




Contents: Sequence of execution ↓ Installation ↓
To complete the work you will need a multimeter.
Sequence of execution
1. Prepare the vehicle for the operation (see "Preparing a car for maintenance and repair").
2. Release the wiring harness connector retainer and disconnect
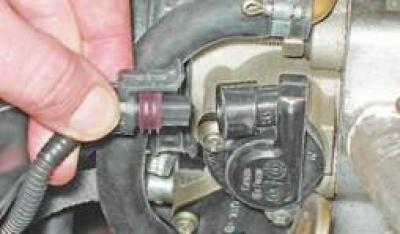
block from the throttle position sensor.
3. To check the sensor's serviceability, connect the ohmmeter probes to the sensor's terminals "B" and "C" (terminal designations are marked on the wiring harness block). By turning the drive sector, we open the throttle valve. In this case, the resistance of a serviceable sensor should increase uniformly from 2.7 to 8.2 kOhm.
4. Connect the negative probe of the voltmeter to the engine ground.
5. To check the sensor circuit, turn on the ignition. Connect the "positive" probe of the voltmeter to the "A" wiring harness pads (the terminal numbers are marked on the socket), we measure the supply voltage.
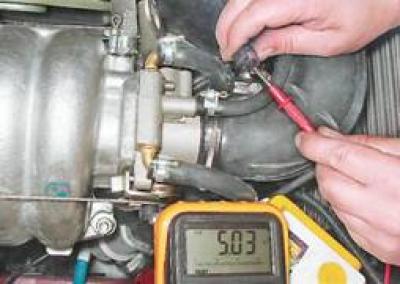
The supply voltage at terminal "A" of the connector should be about 5 V. If the voltage does not reach the connector or it is significantly less than 5 V, the supply circuit is faulty or the ECU is faulty.
6. Turn off the ignition.
7. To remove the sensor, use a Phillips screwdriver to unscrew the two screws that secure it to the throttle body.
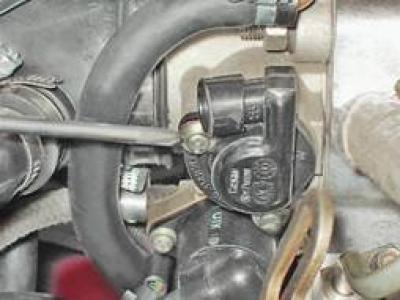
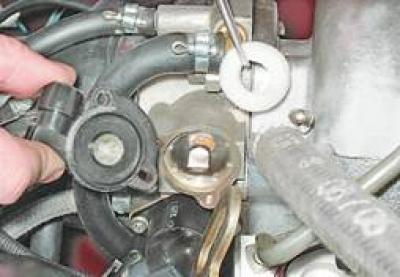
8. Remove the throttle position sensor from the throttle shaft. The connection between the sensor and the throttle body is sealed with a foam ring.
Installation
1. Install the sensor with the throttle valve closed, orienting it so that the segmental protrusion of the valve axis enters the groove of the sensor.
2. Connect the wiring harness connector.