English Русский
Български
Беларускі
Український
Српски
Hrvatski
Română
Polski
Slovenský
Magyar
| Articles | Contacts | Sitemap |   
Repair and maintenance Lada Repair and maintenance Mazda Repair and maintenance Mitsubishi Repair and maintenance Toyota Repair and maintenance Land Rover Repair and maintenance Hyundai Repair and maintenance Nissan
VAZbook.ru


Main     1111   2101   2105   2106   2107   2109   2110   2115   2121  
VAZ-2107 (1982-2012)
  • Main
  • «Zhiguli»
  • VAZ-2107
  • Electrical equipment
  • Equipment and devices
  • Windshield wiper motor-reducer — removal and installation

Windshield wiper motor-reducer — removal and installation (VAZ-2107)

            0

Contents: Removal ↓ Installation ↓

Removal


1. Prepare the vehicle for operations (see "Preparing a car for maintenance and repair").

2. Disconnect the wire from the negative terminal of the battery (see "Battery - Removal and Installation").

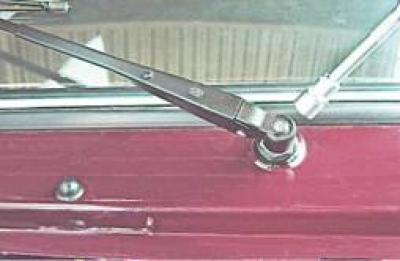
3. Using a 10 mm socket wrench, unscrew the union nuts securing the windshield wiper arms.

3. Using a 10 mm socket wrench, unscrew the union nuts securing the windshield wiper arms.


4. Using an open-end wrench or other suitable tool, remove the levers from the conical splines of the shafts. If removal is difficult, apply penetrating lubricant to the splined surface of the shafts.
4. Using an open-end wrench or other suitable tool, remove the levers from the conical splines of…


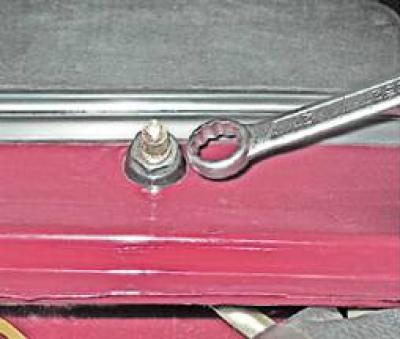
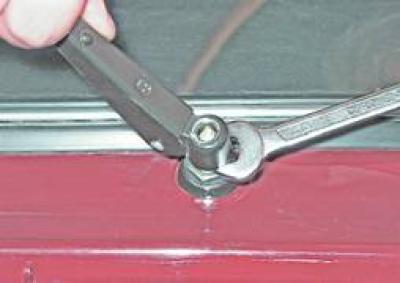
5. With a 21 mm open-end wrench (or a spark plug wrench) we unscrew the nuts securing the brush lever shafts.

5. With a 21 mm open-end wrench (or a spark plug wrench) we unscrew the nuts securing the brush…


6. Remove the plastic bushings and rubber gaskets from the shafts.
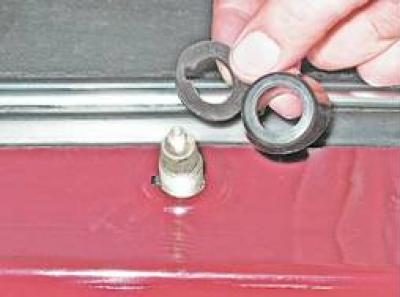


6. Remove the plastic bushings and rubber gaskets from the shafts.


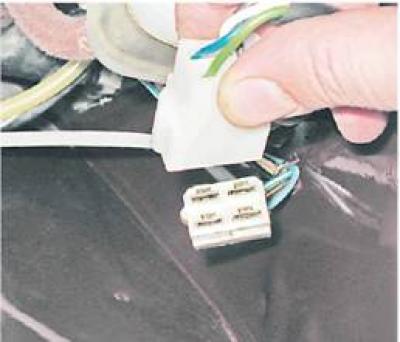
7. Disconnect the windshield wiper wiring harness connector.

7. Disconnect the windshield wiper wiring harness connector.


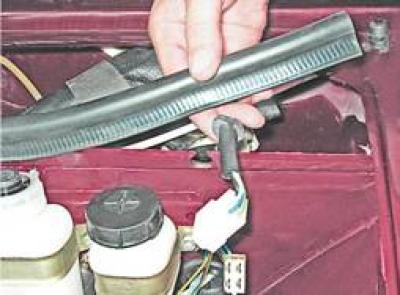
8. Lift the edge of the seal and remove the windshield wiper wiring harness from the slot in the engine compartment bulkhead.

8. Lift the edge of the seal and remove the windshield wiper wiring harness from the slot in the…


9. Using a 10 mm socket wrench, unscrew the two nuts securing the gear motor to the body.
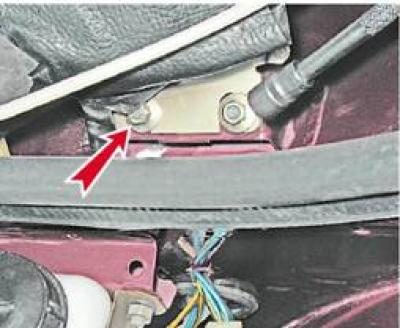
9. Using a 10 mm socket wrench, unscrew the two nuts securing the gear motor to the body.


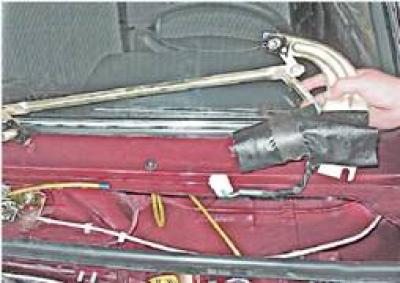
10. Remove the windshield wiper by removing the lever shafts from the holes in the body.


10. Remove the windshield wiper by removing the lever shafts from the holes in the body.


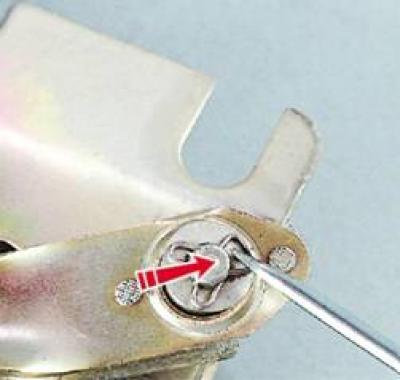
11. Using a slotted screwdriver, remove the spring retainer and washer from the rod axle. Disconnect the rod.

11. Using a slotted screwdriver, remove the spring retainer and washer from the rod axle.…


12. Using a 10 mm socket wrench, unscrew the nut and remove the crank from the splines of the gearmotor shaft.

12. Using a 10 mm socket wrench, unscrew the nut and remove the crank from the splines of the…


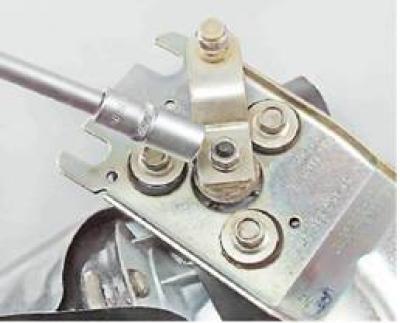
13. Using a 10 mm socket wrench, unscrew the three bolts securing the gear motor to the bracket.

13. Using a 10 mm socket wrench, unscrew the three bolts securing the gear motor to the bracket.


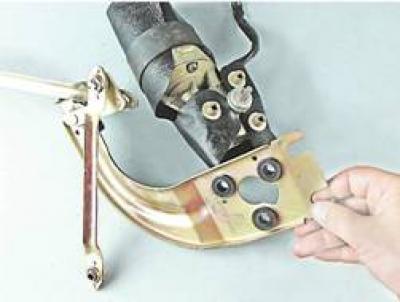
14. Remove the bracket together with the rods.

14. Remove the bracket together with the rods.


15. Having unfastened the tensioning belt, remove the dirt-protective cover of the gear motor.
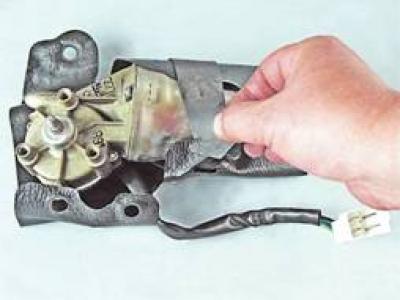
15. Having unfastened the tensioning belt, remove the dirt-protective cover of the gear motor.


Installation


1. Before installation, wash the rods with levers from dirt. Lubricate the hinges of the levers with plastic grease.

2. Connect the connector block of the new gearmotor to the connector block of the wiring harness. Connect the wire to the negative terminal of the battery. Turn on the ignition and briefly turn on the intermittent mode of the windshield wipers. In this case, the shaft of the gearmotor will be set to the position corresponding to the extreme left position of the windshield wipers. Turn off the ignition and disconnect the wire from the negative terminal of the battery.

3. Disconnect the motor-reducer connector.

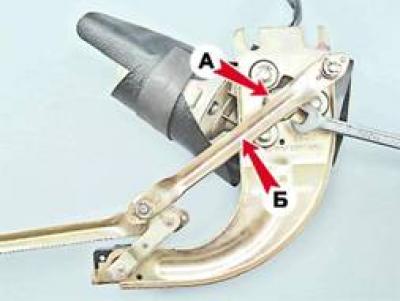
4. Connect the crank A with traction B. We install the lever on the splined shaft of the gear motor, orienting it in a position so that the crank and rod are parallel.

4. Connect the crank A with traction B. We install the lever on the splined shaft of the gear…


5. Further installation of the gear motor is performed in the reverse order. Before installing the brush shafts into the body holes, lubricate the threaded and splined parts of the shafts with plastic grease.


This article is available at russian, bulgarian, belarusian, ukrainian, serbian, croatian, romanian, polish, slovak, hungarian
The text was reviewed by the specialist: Grigory Vologodtsev

Share with friends:

Previous articles
VAZ-2107: Equipment and devices
Next articles

Steering column switches — removal and installation
Horn — adjustment and replacement
Ignition relay, hazard warning light and turn signal relay — replacement
Relays and Fuses — Replacement
Relay and fuse box mounting block
Windshield Washer Electric Pump — Removal and Installation
Instrument cluster — removing and replacing bulbs
Radio Panel Upper Insert — Replacing Bulbs and Instrument Light Dimmer
Key switches — replacement
Glove Box Light — Bulb Replacement

More articles from other manuals on VAZ cars:
➠ Windshield wiper motor-reducer — removal and installation VAZ-2104 (1984-2012)
➠ Windshield wiper motor-reducer — removal and installation VAZ-2106 (1976-2006)
➠ Disassembly, assembly and inspection of the windshield wiper… VAZ-1111 (1988-1996)
➠ Disassembly, assembly and testing of the windshield wiper gear… VAZ-21011 (1974-1983)
➠ Windshield wiper gear motor repair VAZ-2108 (1984-2003)
Link in different formats to this page


Visitor comments

No comments yet


How much will 11 + 46 ?


VAZ-2107 (1982-2012) 
  • General information
  • User manual
  • Maintenance
  • Operation and maintenance
  • Power unit
  • Engine repair
  • Fuel system (carburetor)
  • Fuel system (injector)
  • Control system
  • Cooling system
  • Exhaust system
  • Transmission
  • Clutch
  • Car gearbox
  • Cardan gear
  • Rear axle
  • Chassis
  • Front suspension
  • Rear suspension
  • Wheels and tires
  • Steering
  • Brake system
  • Body
  • Exterior
  • Interior
  • Doors and glass
  • Electrical equipment
  • Equipment and devices
  • Headlights and lighting
  • Engine electrics


VAZbook.ru © 2017 · Mobile version · Contact with administration · Sitemap: EN BG BY UA RS HR RO PL SK HU · Site search · News and articles VAZ-1111 · VAZ-11113 · VAZ-2101 · VAZ-21011 · VAZ-2104 · VAZ-2105 · VAZ-21051 · VAZ-2106 · VAZ-21061 · VAZ-2107 · VAZ-21099 · VAZ-2109 · VAZ-2108 · VAZ-2110 · VAZ-2112 · VAZ-2114 · VAZ-2115 · VAZ-2121 · VAZ-21213 · VAZ-21214 ·
The site stores technical data using cookies to improve the service.