
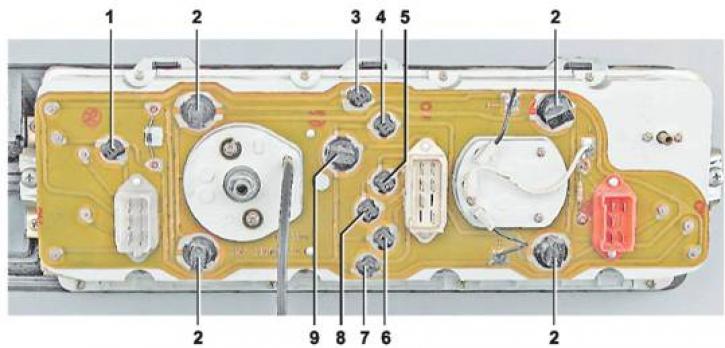
The location of the lamps on the instrument panel: 1 - fuel reserve warning lamp (A 12-1.2 (W1,2W); 2 - instrument illumination lamps (AMN 12-3-1 (T3W); 3 - control lamp for turning on the direction indicators (A 12-1.2 (W1,2); 4 - a control lamp of malfunction of a control system of the engine (A 121.2 (W1,2); 5 - control lamp for switching on external lighting (A 12-1.2 (W1,2); 6 - control lamp of insufficient oil pressure (A 12-1.2 (W1,2); 7 - control lamp for turning on the parking brake (A 12-1.2 (W1,2); 8 - control lamp for switching on high beam headlights (A 12-1.2 (W1,2); 9 - battery charge control lamp (A 12-1.2 (W1,2)
Removing
1. We prepare the car for operations (see "Vehicle preparation for maintenance and repair").
2. Disconnect the wire from the negative battery terminal (see "Battery - removal and installation").
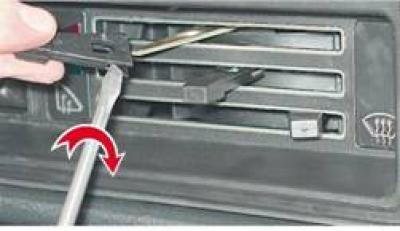
3. We use a slotted screwdriver and remove the handles from the heater control levers.
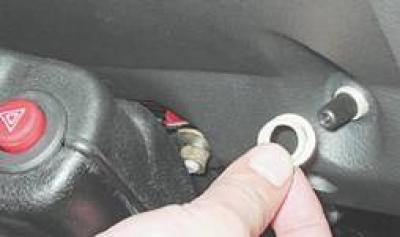
4. We unscrew the nut that secures the handle for resetting the daily mileage counter. Remove the nut and washer and push the handle into the space behind the panel.
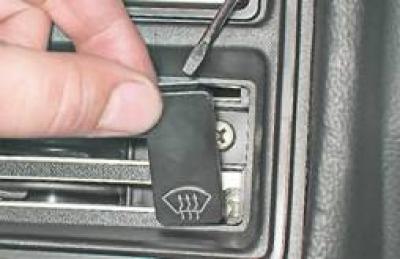
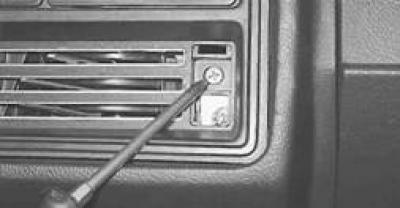
5. Using a thin slotted screwdriver, pry off and remove the plug of the shield mounting screw, located on the right edge of the block of levers for controlling the ventilation and interior heating system.
6. Using a Phillips screwdriver, unscrew the self-tapping screw.
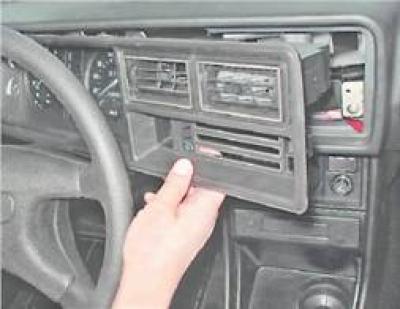
7. We take out the shield from the panel.
8. Unscrew the knurled nut of the speedometer drive cable and disconnect the cable.
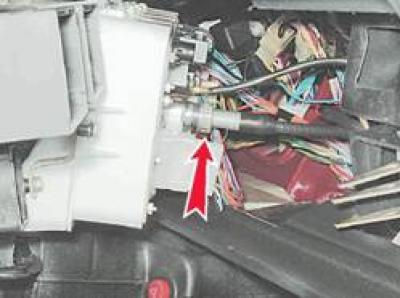
9. Remove the vacuum supply hose from the econometer fitting.
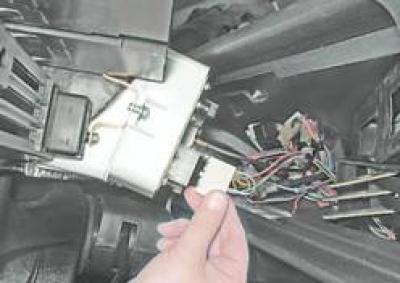
10. Disconnect the three colored pads of the wiring harnesses.
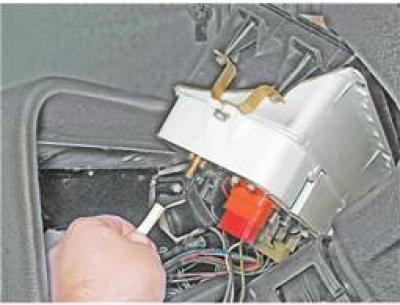
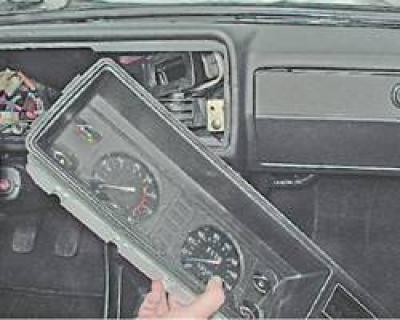
11. Remove the instrument panel.
Replacing the instrument illumination lamp
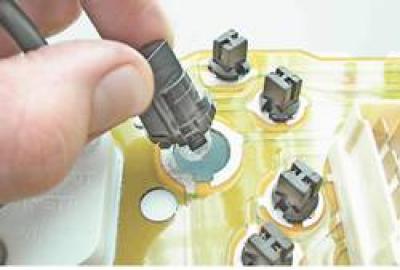
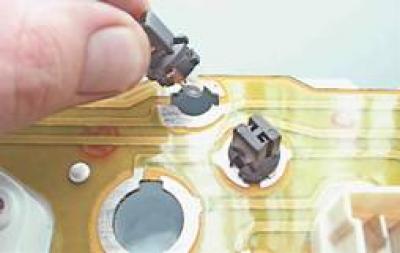
1. Turning the lamp socket by 90°until its protrusion coincides with the slot in the board, remove the socket with the lamp.
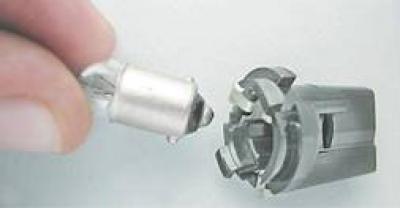
2. Press and turn 90°to remove the bulb.
Replacing indicator lamps
1. Turning the lamp socket by 90°until its protrusion coincides with the slot in the board, remove the socket with the lamp.
2. We replace the lamp together with the cartridge.
Installation
Install all removed parts in reverse order.