
English Русский
Български
Беларускі
Український
Српски
Hrvatski
Română
Polski
Slovenský
Magyar
| Articles | Contacts | Sitemap |   
Repair and maintenance Lada Repair and maintenance Mazda Repair and maintenance Mitsubishi Repair and maintenance Toyota Repair and maintenance Land Rover Repair and maintenance Hyundai Repair and maintenance Nissan
VAZbook.ru


Main     1111   2101   2105   2106   2107   2109   2110   2115   2121  
VAZ-2106 (1976-2006) VAZ-21061 (1976-2006)
  • Main
  • «Zhiguli»
  • VAZ-2106
  • Chassis
  • Front suspension
  • Lower arm — removal and installation

Lower arm — removal and installation (VAZ-2106)

            0

Contents: Removal ↓ Installation ↓
We remove the lower arm in case of mechanical damage or to replace the rubber-metal hinges.
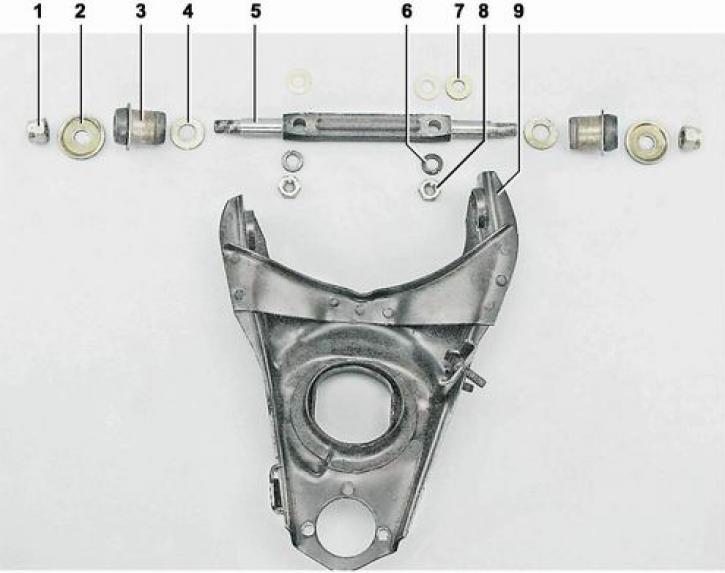
Front suspension lower arm mounting parts: 1 - self-locking nut M14x1.5 (12574811); 2 - thrust…

Front suspension lower arm mounting parts: 1 - self-locking nut M14x1.5 (12574811); 2 - thrust washer (2101-2904045); 3 - rubber-metal hinge (2101-2904040); 4 - thrust washer (2101-2904035); 5 - lower arm axle (2101-2904032); 6 - spring washer (10517070); 7 - adjusting washer (2101-2904225/28); 8 - nut M12x1.25 (16101511); 9 - lower right lever (2101-2904020-01)


To perform the work, you will need a device for pressing out and pressing in rubber-metal hinges.

Removal


1. Prepare the vehicle for operations (see "Preparing a car for maintenance and repair").

2. Remove the wheel (see "Wheel - replacement").

3. Remove the front suspension spring (see "Front suspension spring - replacement").

4. With a socket wrench by 22 mm we unscrew the two self-locking nuts of the lower arm axle and remove the thrust washers.
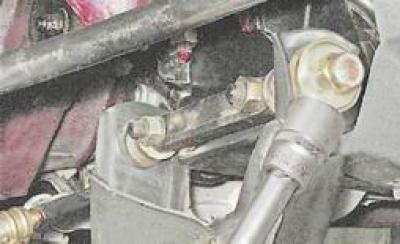
4. With a socket wrench by 22 mm we unscrew the two self-locking nuts of the lower arm axle and…


5. With a socket wrench by 19 mm we unscrew the two nuts securing the lever axle to the crossmember and remove the thrust washers.
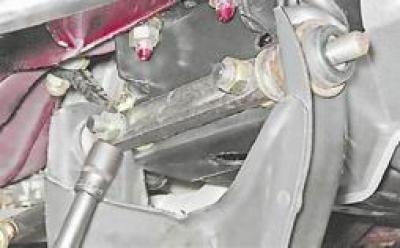


5. With a socket wrench by 19 mm we unscrew the two nuts securing the lever axle to the crossmember…


6. Using a mounting blade, press the lever axis away from the crossmember and remove the lever.
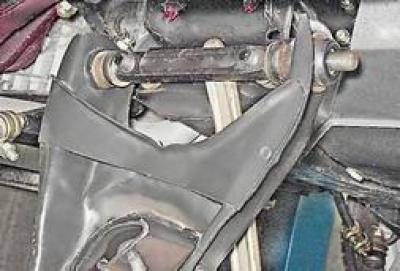
6. Using a mounting blade, press the lever axis away from the crossmember and remove the lever.


Between the axle and the cross member (on axle mounting bolts) the washers required for adjusting the wheel alignment angles are located here. They should not be removed from the bolts unless necessary. If the washers need to be removed, their location should be marked.

7. When replacing the lever, remove the ball joint from it (see "Ball joints - replacement"). When replacing rubber-metal hinges, the support does not need to be removed.

8. Install the lower arm in a vice. To press out the hinge, tighten the puller bolt onto the arm axis. The bearing part of the cup should rest against the arm. Holding the bolt from turning, tighten the puller nut and press the rubber-metal hinge into the cup.
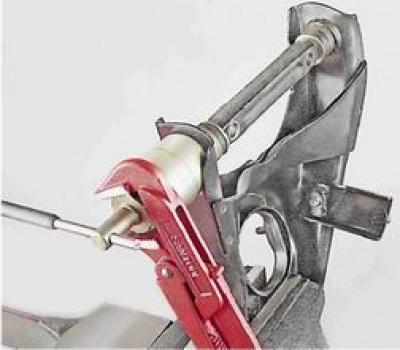

8. Install the lower arm in a vice. To press out the hinge, tighten the puller bolt onto the arm…


9. Similarly, we press out the hinge from the opposite side of the lever and remove the axle.

(The text is taken from the online resource: «VazBook.ru»)
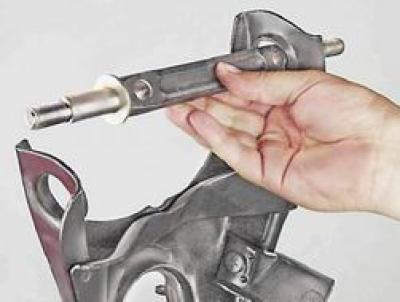
9. Similarly, we press out the hinge from the opposite side of the lever and remove the axle.


Installation


1. Having changed the position of the puller parts, we press the rubber-metal hinge into the lever.
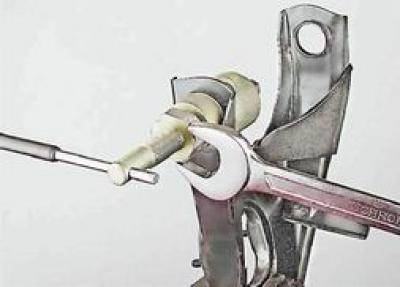
1. Having changed the position of the puller parts, we press the rubber-metal hinge into the lever.


2. Insert the axle with thrust washers through the free hole in the lever.
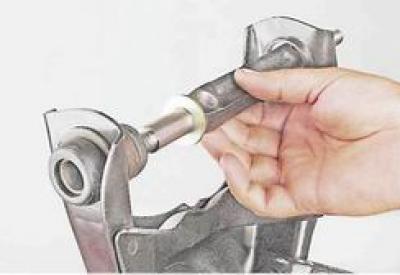
2. Insert the axle with thrust washers through the free hole in the lever.


3. From the side of the pressed rubber-metal hinge, install the outer thrust washer on the axle and screw in a new self-locking nut without tightening it.

4. Having changed the position of the puller parts, we press the second rubber-metal hinge into the lever.
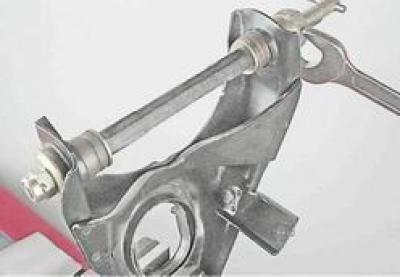
4. Having changed the position of the puller parts, we press the second rubber-metal hinge into the…


5. Having installed the thrust shaped washer on the axle, tighten the self-locking nut.

6. Install the lower arm and other parts in the reverse order of their removal.

7. Without unloading the suspension, finally tighten the lever axle nuts and install the wheel.

8. After replacing the lever or rubber-metal hinges, it is recommended to check and, if necessary, adjust the front wheel alignment angles (see "Wheel alignment angles - adjustment").


This article is available at russian, bulgarian, belarusian, ukrainian, serbian, croatian, romanian, polish, slovak, hungarian
The text was reviewed by the specialist: Grigory Vologodtsev

Share with friends:

Previous articles
VAZ-2106: Front suspension
Next articles

Rubber-metal hinges of lower arms — replacement on the car
Upper arm — removal and replacement of rubber-metal hinges
Front Suspension Spring — Replacement
Front Suspension Shock Absorber — Replacement
Hub — replacement of seal, grease and bearings
Anti-roll bar cushions and rod — replacement
Ball joints — replacement

More articles from other manuals on VAZ cars:
➠ Parallelism of the axes of the lower head of the connecting rod… VAZ-21011 (1974-1983)
➠ Rubber-metal hinges of lower arms — replacement on the car VAZ-2104 (1984-2012)
➠ Rubber-metal hinges of lower arms — replacement on the car VAZ-2107 (1982-2012)
➠ Lower mounting rod for engines 2112 and 21124 (16v) VAZ-2112 (1999-2007)
➠ Checking the parallelism of the axes of the lower connecting rod… VAZ-2121 (1977-1994)
Link in different formats to this page


Visitor comments

No comments yet


How much will 37 + 12 ?


VAZ-2106 (1976-2006) 
  • General information
  • Vehicle device
  • Operation and maintenance
  • Power unit
  • Engine repair
  • Supply system
  • Cooling system
  • Exhaust system
  • Transmission
  • Clutch
  • Car gearbox
  • Cardan gear
  • Rear axle
  • Chassis
  • Front suspension
  • Rear suspension
  • Wheels and tires
  • Steering
  • Brake system
  • Body
  • Exterior
  • Interior
  • Doors and glass
  • Electrical equipment
  • Equipment and devices
  • Headlights and lighting
  • Engine electrics
  • Electrical circuits


VAZ-21061 (1976-2006) 
  • General information
  • Specifications
  • Troubleshooting
  • Power unit
  • Engine repair
  • Cooling and lubrication system
  • Power and exhaust system
  • Transmission
  • Clutch
  • Car gearbox
  • Cardan gear
  • Rear axle
  • Chassis
  • Front suspension
  • Rear suspension
  • Steering
  • Brake system
  • Body
  • Exterior
  • Interior
  • Doors and windows
  • Heating and ventilation
  • Electrical equipment
  • Equipment and devices
  • Engine electrics
  • Ignition system
  • Lighting and signaling


VAZbook.ru © 2017 · Mobile version · Contact with administration · Sitemap: EN BG BY UA RS HR RO PL SK HU · Site search · News and articles VAZ-1111 · VAZ-11113 · VAZ-2101 · VAZ-21011 · VAZ-2104 · VAZ-2105 · VAZ-21051 · VAZ-2106 · VAZ-21061 · VAZ-2107 · VAZ-21099 · VAZ-2109 · VAZ-2108 · VAZ-2110 · VAZ-2112 · VAZ-2114 · VAZ-2115 · VAZ-2121 · VAZ-21213 · VAZ-21214 ·
The site stores technical data using cookies to improve the service.