English Русский
Български
Беларускі
Український
Српски
Hrvatski
Română
Polski
Slovenský
Magyar
| Articles | Contacts | Sitemap |   
Repair and maintenance Lada Repair and maintenance Mazda Repair and maintenance Mitsubishi Repair and maintenance Toyota Repair and maintenance Land Rover Repair and maintenance Hyundai Repair and maintenance Nissan
VAZbook.ru


Main     1111   2101   2105   2106   2107   2109   2110   2115   2121  
VAZ-2106 (1976-2006) VAZ-21061 (1976-2006)
  • Main
  • «Zhiguli»
  • VAZ-2106
  • Power unit
  • Engine repair
  • Crankcase ventilation oil separator — removal and installation

Crankcase ventilation oil separator — removal and installation (VAZ-2106)

            0

Contents: Removal ↓ Installation ↓

Removal


1. Prepare the car for work (see "Preparing a car for maintenance and repair").

2. Remove the oil level indicator from the guide tube (see "Engine Oil - Checking Level and Replacement").

3. Using pliers, loosen the clamps on the crankcase ventilation hoses.
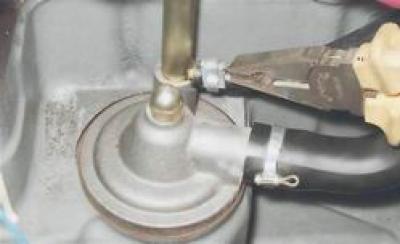
3. Using pliers, loosen the clamps on the crankcase ventilation hoses.


4. Disconnect the hoses from the pipe and breather connections.
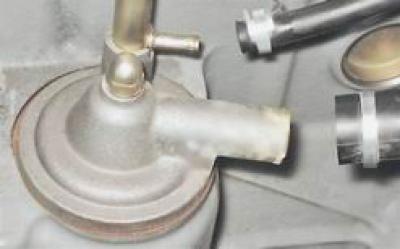
4. Disconnect the hoses from the pipe and breather connections.


5. With a socket wrench by 13 mm we unscrew the breather cover fastening nut and remove the nut. There is a copper sealing washer installed under the nut.
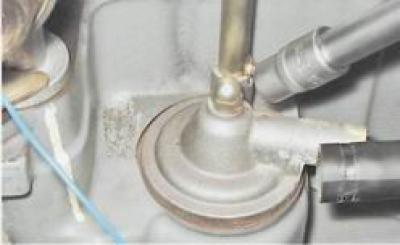
5. With a socket wrench by 13 mm we unscrew the breather cover fastening nut and remove the nut.…


6. Remove the breather cap.


6. Remove the breather cap.


7. Remove the sealing gasket installed between the breather and the cylinder block.
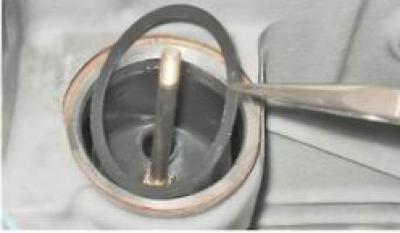
7. Remove the sealing gasket installed between the breather and the cylinder block.


8. Key by 13 mm unscrew the nut securing the oil separator stud. If you can't unscrew the nut, tighten two M8 nuts on the stud together and unscrew the stud together with the nut.

The original can be viewed on the portal VAZBOOK.ru
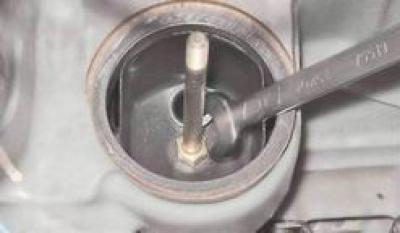
8. Key by 13 mm unscrew the nut securing the oil separator stud. If you can't unscrew the nut,…


9. Remove the oil separator from the cylinder block.
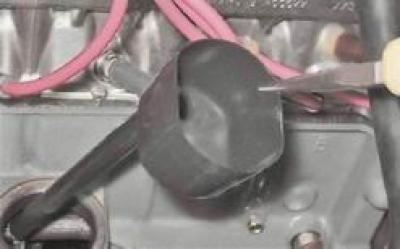

9. Remove the oil separator from the cylinder block.


Installation


1. Wash the oil separator parts with kerosene. Check the condition of the sealing gasket. Replace a cracked or loose gasket.

2. Installation of removed parts is performed in reverse order.


This article is available at russian, bulgarian, belarusian, ukrainian, serbian, croatian, romanian, polish, slovak, hungarian
The text was reviewed by the specialist: Grigory Vologodtsev

Share with friends:

Previous articles
VAZ-2106: Engine repair
Next articles

Oil pump — replacement
Cylinder Head Gasket — Replacement
Intake Manifold and Exhaust Manifold Gaskets — Replacement
Front Crankshaft Oil Seal — Replacement
Auxiliary Drive Shaft — Replacement
Powertrain Mounts — Replacement
Engine — removal and installation
Flywheel — removal and installation
Rear Crankshaft Oil Seal — Replacement
Crankshaft — removal and installation

More articles from other manuals on VAZ cars:
➠ Crankcase ventilation oil separator — removal and installation VAZ-2104 (1984-2012)
➠ Crankcase ventilation oil separator — removal and installation VAZ-2107 (1982-2012)
➠ Removal the crankcase ventilation oil separator VAZ-21214 (1994-2006)
➠ Cleaning and flushing of crankcase ventilation system parts VAZ-1111 (1988-1996)
➠ Engine crankcase ventilation VAZ-21011 (1974-1983)
Link in different formats to this page


Visitor comments

No comments yet


How much will 40 + 31 ?


VAZ-2106 (1976-2006) 
  • General information
  • Vehicle device
  • Operation and maintenance
  • Power unit
  • Engine repair
  • Supply system
  • Cooling system
  • Exhaust system
  • Transmission
  • Clutch
  • Car gearbox
  • Cardan gear
  • Rear axle
  • Chassis
  • Front suspension
  • Rear suspension
  • Wheels and tires
  • Steering
  • Brake system
  • Body
  • Exterior
  • Interior
  • Doors and glass
  • Electrical equipment
  • Equipment and devices
  • Headlights and lighting
  • Engine electrics
  • Electrical circuits


VAZ-21061 (1976-2006) 
  • General information
  • Specifications
  • Troubleshooting
  • Power unit
  • Engine repair
  • Cooling and lubrication system
  • Power and exhaust system
  • Transmission
  • Clutch
  • Car gearbox
  • Cardan gear
  • Rear axle
  • Chassis
  • Front suspension
  • Rear suspension
  • Steering
  • Brake system
  • Body
  • Exterior
  • Interior
  • Doors and windows
  • Heating and ventilation
  • Electrical equipment
  • Equipment and devices
  • Engine electrics
  • Ignition system
  • Lighting and signaling


VAZbook.ru © 2017 · Mobile version · Contact with administration · Sitemap: EN BG BY UA RS HR RO PL SK HU · Site search · News and articles VAZ-1111 · VAZ-11113 · VAZ-2101 · VAZ-21011 · VAZ-2104 · VAZ-2105 · VAZ-21051 · VAZ-2106 · VAZ-21061 · VAZ-2107 · VAZ-21099 · VAZ-2109 · VAZ-2108 · VAZ-2110 · VAZ-2112 · VAZ-2114 · VAZ-2115 · VAZ-2121 · VAZ-21213 · VAZ-21214 ·
The site stores technical data using cookies to improve the service.