
Execution sequence
1. We install the car on a viewing hole or overpass (see "Vehicle preparation for maintenance and repair").
2. We clean the tank from dirt and open the lid.
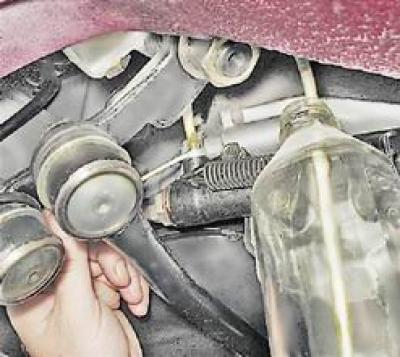
3. We clean the protective cap and the bleeder fitting of the working cylinder from dirt. We remove the cap and put a hose on the fitting, the other end of which is lowered into the prepared container. key by 8 mm Loosen the screw 3/4 turn. Press the clutch pedal repeatedly until all fluid is removed from the system. We turn the fitting.
4. If the pedal "failed", raise it by hand.
5. Pour the working fluid through the tank into the hydraulic drive of the system.
Note: Fluid can be replaced by gradually displacing the previous one. To do this, adding fluid to the reservoir as necessary and unscrewing the bleeder, press and release the clutch pedal. When clean liquid begins to come out of the working cylinder, we wrap the fitting.
Pumping
1. Immerse the free end of the hose into a container with working fluid. key by 8 mm Loosen the bleed screw 3/4 turn.
2. The assistant sharply presses and smoothly releases the clutch pedal. In this case, the liquid with air bubbles will begin to be displaced from the hydraulic drive into the container. In the event that the release of air bubbles has not stopped, and the pedal has reached its lowest position, we wrap the fitting. Check the fluid level in the reservoir and top up if necessary.
3. Repeat steps 1 and 2 again until the bubbles stop coming out.
4. When the release of air bubbles from the system stops, sharply pressing the pedal and holding it, we wrap the fitting.
Attention! If air bubbles persist, check system connections for leaks. Repair the system if leaks are found.