
English Русский
Български
Беларускі
Український
Српски
Hrvatski
Română
Polski
Slovenský
Magyar
| Articles | Contacts | Sitemap |   
Repair and maintenance Lada Repair and maintenance Mazda Repair and maintenance Mitsubishi Repair and maintenance Toyota Repair and maintenance Land Rover Repair and maintenance Hyundai Repair and maintenance Nissan
VAZbook.ru


Main     1111   2101   2105   2106   2107   2109   2110   2115   2121  
VAZ-2106 (1976-2006) VAZ-21061 (1976-2006)
  • Main
  • «Zhiguli»
  • VAZ-2106
  • Transmission
  • Clutch
  • Clutch parts — removal and installation

Clutch parts — removal and installation (VAZ-2106)

            0

Contents: Removal ↓ Installation ↓
A centering mandrel is required for this job.

Removal


1. Place the vehicle on an inspection pit or overpass (see "Preparing a car for maintenance and repair").

2. Remove the gearbox (see "Gearbox - removal and installation").

3. Screw one of the clutch housing mounting bolts into the hole in the cylinder block.

Advice: If you do not plan to replace the basket, then use a center punch to mark its position on the flywheel.


Attention! When performing the following operation, to avoid deformation of the clutch housing, unscrew the bolts sequentially, no more than one turn per pass.


4. Hold the flywheel from turning with a mounting blade inserted between the teeth of the flywheel ring gear and a socket wrench by 13 mm we unscrew the six bolts that secure the basket to the flywheel.
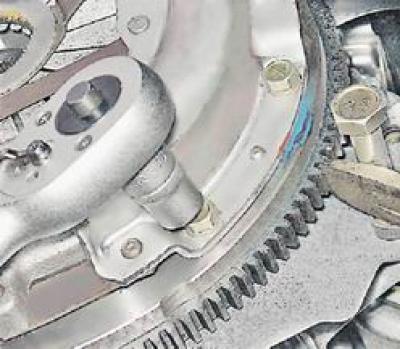
4. Hold the flywheel from turning with a mounting blade inserted between the teeth of the flywheel…


5. Remove the basket and the driven clutch disc.
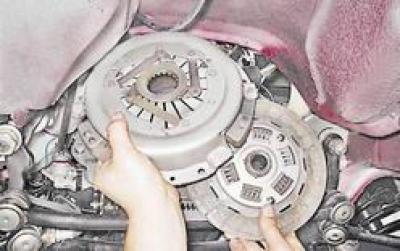
5. Remove the basket and the driven clutch disc.


6. Using a slotted screwdriver, bend back the edge of the clutch release fork boot and remove the boot.
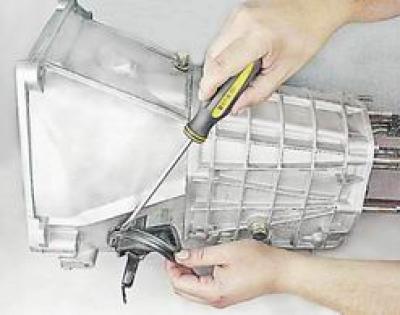


6. Using a slotted screwdriver, bend back the edge of the clutch release fork boot and remove the…


7. Disengage the fork from the clutch spring of the release bearing, remove the fork from the ball joint and remove it from the hole in the clutch housing.
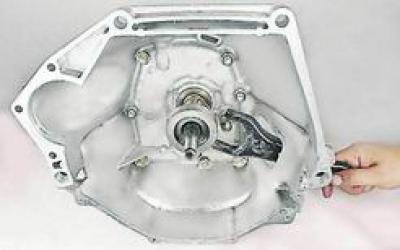
7. Disengage the fork from the clutch spring of the release bearing, remove the fork from the ball…


8. Remove the release bearing sleeve with the spring from the guide sleeve.
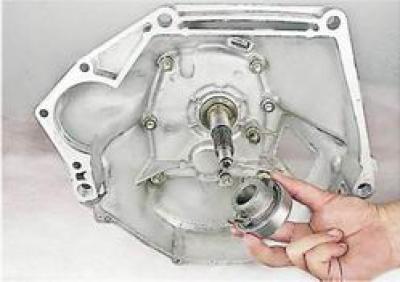
8. Remove the release bearing sleeve with the spring from the guide sleeve.


Installation


Before installing the clutch components, carefully check their condition. Deep grooves, burn marks, and cracks are unacceptable on the working surfaces of the flywheel and pressure plate. The friction linings of the driven disk should not have cracks, chips, warping, or severe wear; there should be no visible signs of wear on the rivet heads. The disk hub should move along the splines of the primary shaft without jamming. The release bearing should rotate easily, without extraneous noise. Cracks are unacceptable on the clutch housing.


Replace faulty and damaged parts. It is advisable to install new bolts for fastening the basket to the flywheel.

1. Wipe the working surfaces of the disks, flywheel and primary shaft with a cloth soaked in white spirit.

2. Apply a thin layer of SHRUS-4 grease or similar to the smooth and splined surfaces of the primary shaft, as well as to the ball joint of the fork.

3. Using a mandrel inserted into the hole in the inner bearing ring at the end of the crankshaft, we center the position of the driven disk. The protruding part of the disk hub should be directed toward the basket. In this case, the driven disk will be held by the mandrel.
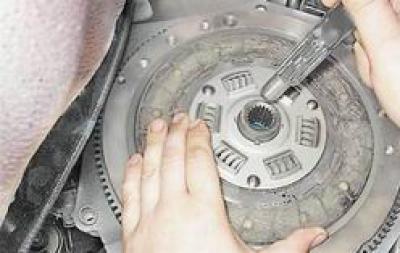
3. Using a mandrel inserted into the hole in the inner bearing ring at the end of the crankshaft,…


4. Install the clutch basket on the flywheel, aligning the centering holes of the casing with the flywheel pins.

5. Evenly tighten the bolts securing the clutch basket to the flywheel by no more than one turn per pass. The tightening torque of the bolts is 19.1-30.9 Nm. After tightening, the mandrel should be freely removed from the driven disk.

6. Further installation is carried out in reverse order.

7. After installation, adjust the free travel of the working cylinder pusher (see "Clutch release hydraulic drive - checking and adjustment").


This article is available at russian, bulgarian, belarusian, ukrainian, serbian, croatian, romanian, polish, slovak, hungarian
The text was reviewed by the specialist: Grigory Vologodtsev

Share with friends:

Previous articles
VAZ-2106: Clutch
Next articles

Clutch release hydraulic hose — removal and installation
Clutch release hydraulic drive slave cylinder — removal and installation
Clutch release hydraulic master cylinder — removal and installation
Clutch release hydraulic reservoir — removal and installation
Clutch release hydraulic drive — fluid replacement and bleeding

More articles from other manuals on VAZ cars:
➠ Determination of the technical condition of clutch parts VAZ-2105 (1979-2010)
➠ Clutch parts — removal and installation VAZ-2107 (1982-2012)
➠ Clutch device VAZ-1111 (1988-1996)
➠ The structure of the car body and its parts VAZ-2101 (1970-1983)
➠ Clutch device VAZ-2109 (1984-1997)
Link in different formats to this page


Visitor comments

No comments yet


How much will 38 + 31 ?


VAZ-2106 (1976-2006) 
  • General information
  • Vehicle device
  • Operation and maintenance
  • Power unit
  • Engine repair
  • Supply system
  • Cooling system
  • Exhaust system
  • Transmission
  • Clutch
  • Car gearbox
  • Cardan gear
  • Rear axle
  • Chassis
  • Front suspension
  • Rear suspension
  • Wheels and tires
  • Steering
  • Brake system
  • Body
  • Exterior
  • Interior
  • Doors and glass
  • Electrical equipment
  • Equipment and devices
  • Headlights and lighting
  • Engine electrics
  • Electrical circuits


VAZ-21061 (1976-2006) 
  • General information
  • Specifications
  • Troubleshooting
  • Power unit
  • Engine repair
  • Cooling and lubrication system
  • Power and exhaust system
  • Transmission
  • Clutch
  • Car gearbox
  • Cardan gear
  • Rear axle
  • Chassis
  • Front suspension
  • Rear suspension
  • Steering
  • Brake system
  • Body
  • Exterior
  • Interior
  • Doors and windows
  • Heating and ventilation
  • Electrical equipment
  • Equipment and devices
  • Engine electrics
  • Ignition system
  • Lighting and signaling


VAZbook.ru © 2017 · Mobile version · Contact with administration · Sitemap: EN BG BY UA RS HR RO PL SK HU · Site search · News and articles VAZ-1111 · VAZ-11113 · VAZ-2101 · VAZ-21011 · VAZ-2104 · VAZ-2105 · VAZ-21051 · VAZ-2106 · VAZ-21061 · VAZ-2107 · VAZ-21099 · VAZ-2109 · VAZ-2108 · VAZ-2110 · VAZ-2112 · VAZ-2114 · VAZ-2115 · VAZ-2121 · VAZ-21213 · VAZ-21214 ·
The site stores technical data using cookies to improve the service.