
English Русский
Български
Беларускі
Український
Српски
Hrvatski
Română
Polski
Slovenský
Magyar
| Articles | Contacts | Sitemap |   
Repair and maintenance Lada Repair and maintenance Mazda Repair and maintenance Mitsubishi Repair and maintenance Toyota Repair and maintenance Land Rover Repair and maintenance Hyundai Repair and maintenance Nissan
VAZbook.ru


Main     1111   2101   2105   2106   2107   2109   2110   2115   2121  
VAZ-2106 (1976-2006) VAZ-21061 (1976-2006)
  • Main
  • «Zhiguli»
  • VAZ-2106
  • Transmission
  • Car gearbox
  • Gearbox — removal and installation

Gearbox — removal and installation (VAZ-2106)

            0

Contents: Removal ↓ Installation ↓

Removal


1. Place the vehicle on an inspection pit or overpass (see "Preparing a car for maintenance and repair").

2. Disconnect the wire from the negative terminal of the battery (see "Battery - Removal and Installation").

3. Remove the decorative cover of the gear shift lever from the ring of the mounting clip to the floor trim and slide the cover up the lever.
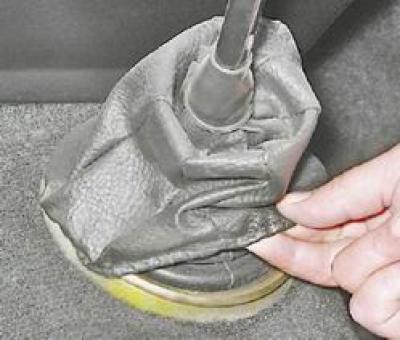
3. Remove the decorative cover of the gear shift lever from the ring of the mounting clip to the…


4. Carefully, using a screwdriver to pry around the perimeter, separate the rings of the clip.
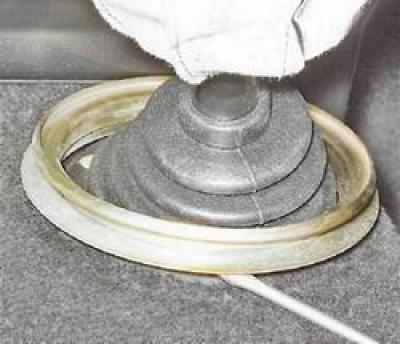
4. Carefully, using a screwdriver to pry around the perimeter, separate the rings of the clip.


5. Remove the three rings that make up the clip from the floor tunnel trim.
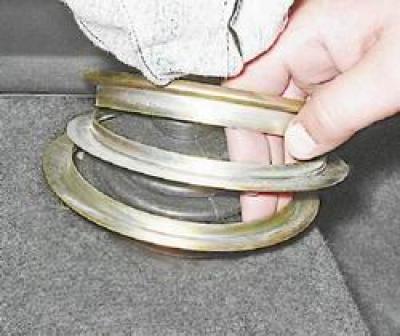
5. Remove the three rings that make up the clip from the floor tunnel trim.


6. Pressing the lever, insert the screwdriver into the hole of the locking sleeve and, moving it down, remove the locking sleeve from the cavity of the rod. Remove the rod from the lever.
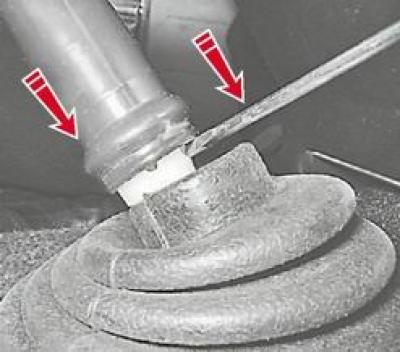


6. Pressing the lever, insert the screwdriver into the hole of the locking sleeve and, moving it…


7. Using tweezers, remove the elastic rubber bushing of the lever damper from the lever rod.
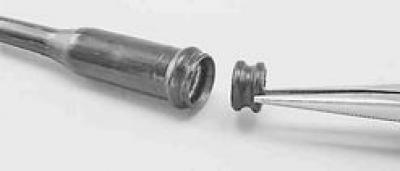
7. Using tweezers, remove the elastic rubber bushing of the lever damper from the lever rod.


8. Using two screwdrivers, loosen the petals of the damper spacer sleeve and remove them from the groove of the lever.
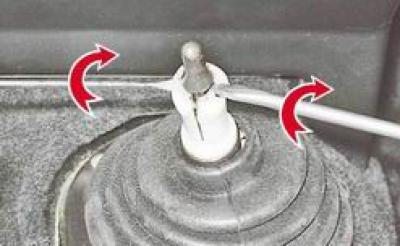
8. Using two screwdrivers, loosen the petals of the damper spacer sleeve and remove them from the…


9. Remove the damper spacer bushing and the lower rubber bushing from the lever A and shut-off B damper bushings.
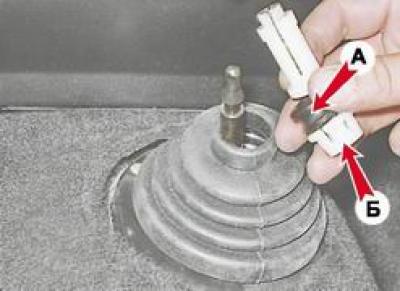

9. Remove the damper spacer bushing and the lower rubber bushing from the lever A and shut-off B…


10. By moving the floor trim, use a Phillips screwdriver to unscrew the four screws securing the cover that covers the opening in the body floor.
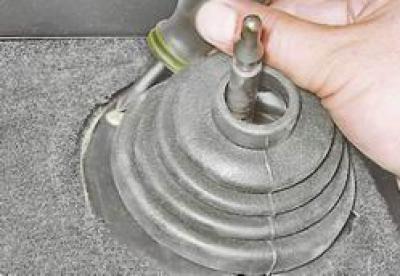
10. By moving the floor trim, use a Phillips screwdriver to unscrew the four screws securing the…


11. Remove the cover from the lever together with the foam seal.
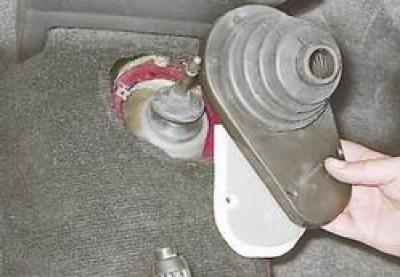
11. Remove the cover from the lever together with the foam seal.


12. Remove the exhaust pipe (see "Intake pipe - removal and installation").

13. Disconnect the starter from the clutch housing and move it forward (see "Starter - removal and installation").

14. Disconnect the wiring harness from the reversing light switch (see "Reverse Light Switch - Checking and Replacing").

15. Remove the cardan transmission (see "Cardan transmission - removal and installation").

16. Disconnect the cross member of the rear support of the power unit from the body (see "Cardan transmission - disassembly and assembly").

17. Disconnect the flexible shaft from the speedometer drive (see "Speedometer Drive - Replacement").

18. Disconnect the clutch release hydraulic drive slave cylinder from the gearbox housing without disconnecting the hose from it (see "Clutch release hydraulic drive slave cylinder - removal and installation").

19. With a socket wrench by 10 mm we turn away two (on early production cars four) clutch housing cover mounting bolt.
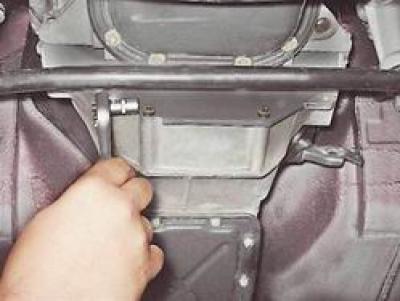
19. With a socket wrench by 10 mm we turn away two (on early production cars four) clutch housing…


20. Install a reliable support under the gearbox. Use a socket wrench by 19 mm using an extension and a cardan joint, unscrew the four bolts securing the clutch housing to the cylinder block.
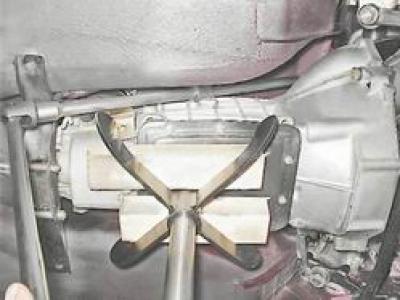
20. Install a reliable support under the gearbox. Use a socket wrench by 19 mm using an extension…


21. Insert a screwdriver into the gap between the clutch housing and the cylinder block, press the clutch housing away from the block and remove the housing from the guide bushings.
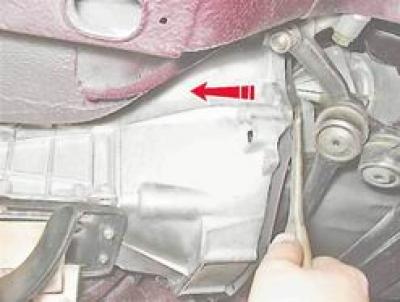
21. Insert a screwdriver into the gap between the clutch housing and the cylinder block, press the…


22. By moving the gearbox back, we remove the primary shaft from the hub of the driven clutch disk and simultaneously from the inner ring of the bearing located at the end of the crankshaft. Having released the shaft, we remove the gearbox.

Caution! Do not rest the gearbox with the end of the input shaft on the thrust flange of the clutch basket.
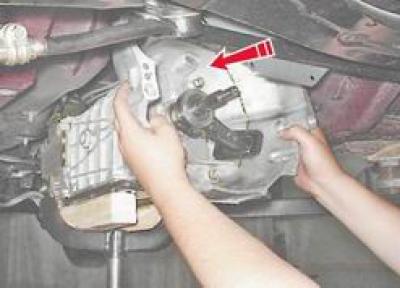

Caution! Do not rest the gearbox with the end of the input shaft on the thrust flange of the clutch…


Installation


1. Before installation, clean the splined end of the primary shaft and apply a thin layer of SHRUS-4 grease to it.

2. Installation of all removed parts is performed in reverse order.


This article is available at russian, bulgarian, belarusian, ukrainian, serbian, croatian, romanian, polish, slovak, hungarian
The text was reviewed by the specialist: Grigory Vologodtsev

Share with friends:

Previous articles
VAZ-2106: Car gearbox
Next articles

Secondary shaft seal — replacement
Reverse Light Switch — Checking and Replacing
Speedometer Drive — Replacement
Gearbox — Checking the level and changing the oil
Description of the design
Gearbox — disassembly and assembly

More articles from other manuals on VAZ cars:
➠ Gearbox device VAZ-1111 (1988-1996)
➠ Gearbox device VAZ-2101 (1970-1983)
➠ The device of a four-speed gearbox VAZ-2105 (1979-2010)
➠ Description of the gearbox design VAZ-2107 (1982-2012)
➠ Gearbox device VAZ-2109 (1984-1997)
Link in different formats to this page


Visitor comments

No comments yet


How much will 44 + 48 ?


VAZ-2106 (1976-2006) 
  • General information
  • Vehicle device
  • Operation and maintenance
  • Power unit
  • Engine repair
  • Supply system
  • Cooling system
  • Exhaust system
  • Transmission
  • Clutch
  • Car gearbox
  • Cardan gear
  • Rear axle
  • Chassis
  • Front suspension
  • Rear suspension
  • Wheels and tires
  • Steering
  • Brake system
  • Body
  • Exterior
  • Interior
  • Doors and glass
  • Electrical equipment
  • Equipment and devices
  • Headlights and lighting
  • Engine electrics
  • Electrical circuits


VAZ-21061 (1976-2006) 
  • General information
  • Specifications
  • Troubleshooting
  • Power unit
  • Engine repair
  • Cooling and lubrication system
  • Power and exhaust system
  • Transmission
  • Clutch
  • Car gearbox
  • Cardan gear
  • Rear axle
  • Chassis
  • Front suspension
  • Rear suspension
  • Steering
  • Brake system
  • Body
  • Exterior
  • Interior
  • Doors and windows
  • Heating and ventilation
  • Electrical equipment
  • Equipment and devices
  • Engine electrics
  • Ignition system
  • Lighting and signaling


VAZbook.ru © 2017 · Mobile version · Contact with administration · Sitemap: EN BG BY UA RS HR RO PL SK HU · Site search · News and articles VAZ-1111 · VAZ-11113 · VAZ-2101 · VAZ-21011 · VAZ-2104 · VAZ-2105 · VAZ-21051 · VAZ-2106 · VAZ-21061 · VAZ-2107 · VAZ-21099 · VAZ-2109 · VAZ-2108 · VAZ-2110 · VAZ-2112 · VAZ-2114 · VAZ-2115 · VAZ-2121 · VAZ-21213 · VAZ-21214 ·
The site stores technical data using cookies to improve the service.