




Contents: Removal ↓ Installation ↓
Attention! Replace the pads as a set on both sides of the car.
Check the condition of the brake shoe linings periodically (see "Brake system - checking technical condition") and replace them without allowing the linings to wear to a thickness of less than 1.5 mm.
The work is shown on the brake mechanism of the right wheel.
Removal
1. Prepare the vehicle for operations (see "Preparing a car for maintenance and repair").
2. Check the brake fluid level in the reservoir. If the level is at the "MAX" mark, use a bulb to remove some of the fluid from the reservoir to avoid it splashing out when the pistons are pressed into the cylinders.
3. Remove the front wheel (see "Wheel - replacement").
4. Using a rag, clean the brake mechanism from dirt and apply penetrating lubricant with a rust converter to the guide pins.
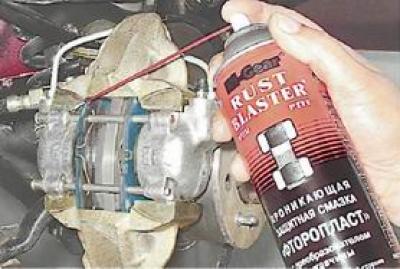
5. Using pliers, remove the two cotter pins from the guide pins.
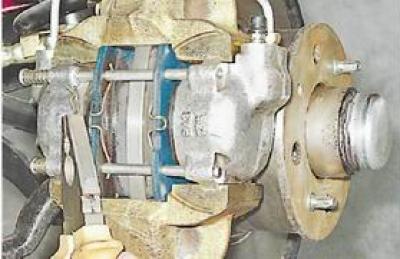
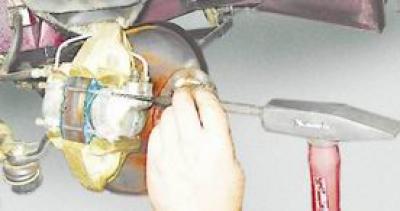
6. Using a punch, knock the pins out of the cylinder lugs.
7. Remove the two brake shoe pressure springs.
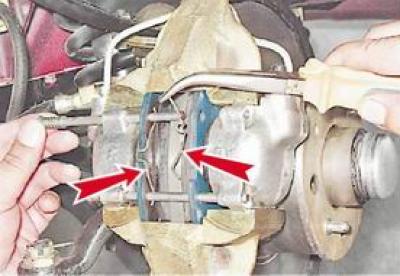
8. Using sliding pliers or another suitable tool, press the pistons into the cylinders one by one through the block.
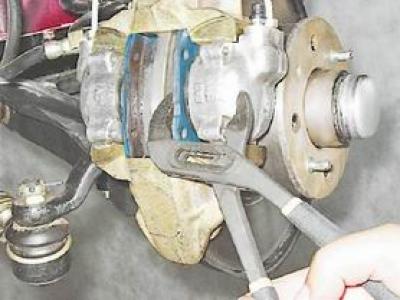
9. Remove the brake pads.
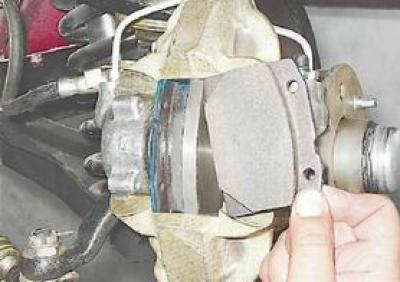
Attention! Do not press the brake pedal with the pads removed, this will cause the pistons to be pushed out of the working cylinders.
Installation
1. Apply consistent grease to the surface of the guide pins.
2. Install new brake pads in reverse order.
3. After replacing the pads, press the brake pedal several times to set the pistons to the working position and check the fluid level in the master cylinder reservoir. If necessary, top up the fluid to the required level (see "Hydraulic brake drive - checking the brake fluid level").
4. Similarly, replace the pads on the opposite side.