
English Русский
Български
Беларускі
Український
Српски
Hrvatski
Română
Polski
Slovenský
Magyar
| Articles | Contacts | Sitemap |   
Repair and maintenance Lada Repair and maintenance Mazda Repair and maintenance Mitsubishi Repair and maintenance Toyota Repair and maintenance Land Rover Repair and maintenance Hyundai Repair and maintenance Nissan
VAZbook.ru


Main     1111   2101   2105   2106   2107   2109   2110   2115   2121  
VAZ-1111 (1988-1996) VAZ-11113 (1996-2003)
  • Main
  • «Oka»
  • VAZ-1111
  • General information
  • Maintenance
  • Replacing the front brake pads

Replacing the front brake pads (VAZ-1111)

            0

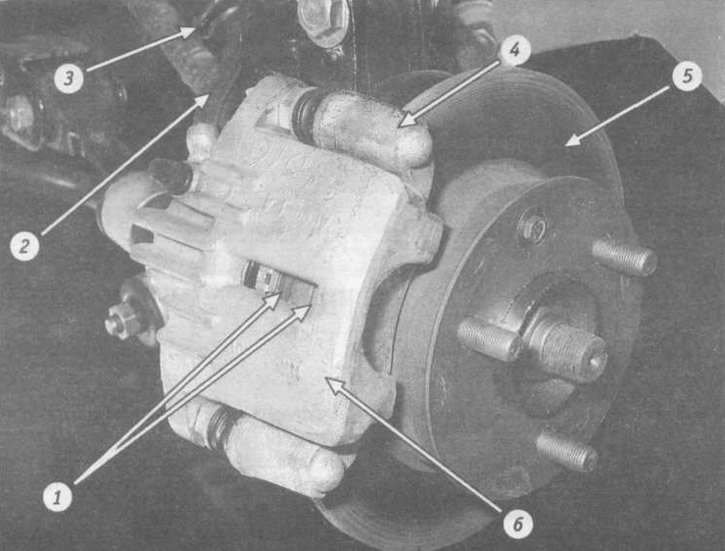
Front wheel brake mechanism: 1 - brake pads; 2 - brake hose; 3 - rubber hose holder; 4 - shoe…

Front wheel brake mechanism: 1 - brake pads; 2 - brake hose; 3 - rubber hose holder; 4 - shoe guide; 5 - brake disc; 6 - support.


You will need: 12 and 17 mm wrenches, a jack, wheel chocks, a screwdriver, and a metal brush.

Before you start working


Apply the parking brake and place wheel chocks under the rear wheels.

Remove the front wheel (see subsection 2.18).

Clean the brake mechanism from dirt.

Pump out some of the fluid from the reservoir if the brake fluid level in the reservoir is at or near the "MAX" mark before replacing the pads.

[Information copied from the portal VazBook]

The minimum permissible thickness of the friction linings 1 of the brake shoes is 1.5 mm. If the pressure springs 2 have lost their elasticity, replace the shoes.
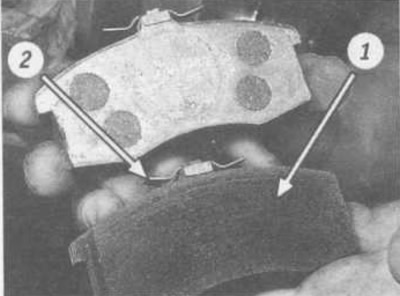
The minimum permissible thickness of the friction linings 1 of the brake shoes is 1.5 mm. If the…


Replace the pads in the following cases:


  • the thickness of the pads is less than 1.5 mm;
  • the surface of the linings is oily;
  • the pads are not firmly connected to the base;
  • the overlays have deep grooves and chips.

Warnings:
  • Loosen and tighten wheel nuts only with the vehicle on the ground.
  • Do not use gasoline, diesel fuel or any other mineral solvents to clean brakes.
  • The brake pads must be replaced on both front wheels at the same time.
  • It is not allowed to replace the inner and outer pads with each other, as well as between the left and right wheels. This can lead to uneven braking.


If you have removed the front wheel for any reason, check the condition of the brake pads through the hole in the brake caliper housing. If the thickness of the friction linings is about 2 mm, replace the pads.
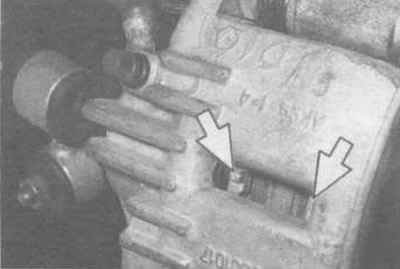
If you have removed the front wheel for any reason, check the condition of the brake pads through…


If the vehicle pulls to one side when braking or you hear strange noise, remove the brake pads and check their condition.


Remove the rubber holder together with the hose from the bracket.
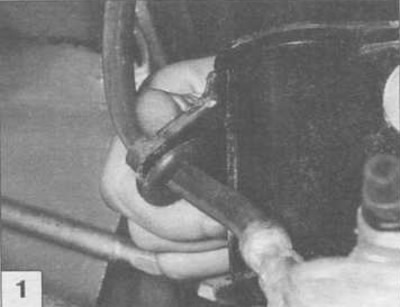
Remove the rubber holder together with the hose from the bracket.


Use a screwdriver to bend back the tabs of the lock washers on the two caliper mounting bolts.

Use a screwdriver to bend back the tabs of the lock washers on the two caliper mounting bolts.


Loosen the lower caliper mounting bolt while holding the guide pin by the Allen key with a wrench.
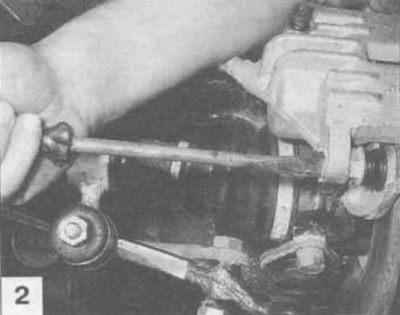
Loosen the lower caliper mounting bolt while holding the guide pin by the Allen key with a wrench.


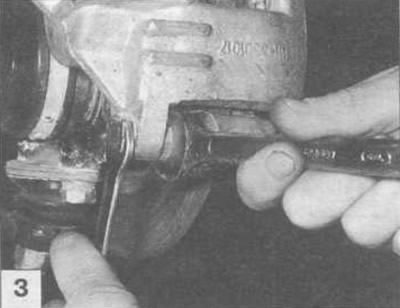
Loosen the upper caliper mounting bolt, holding the guide pin by the hexagon with a wrench.

Loosen the upper caliper mounting bolt, holding the guide pin by the hexagon with a wrench.
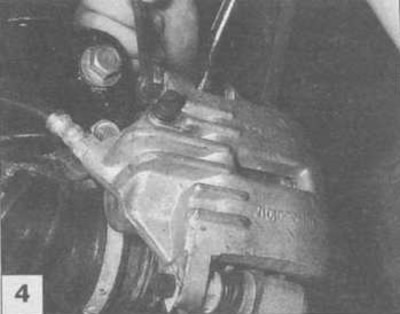

Remove the bolt together with the lock plate.
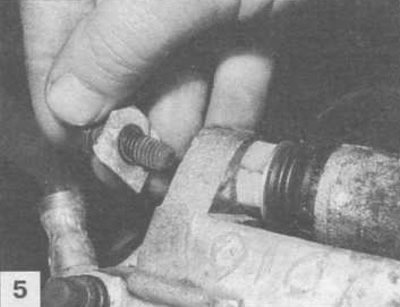
Remove the bolt together with the lock plate.


Rotate the caliper downwards around the axis of the lower guide pin.
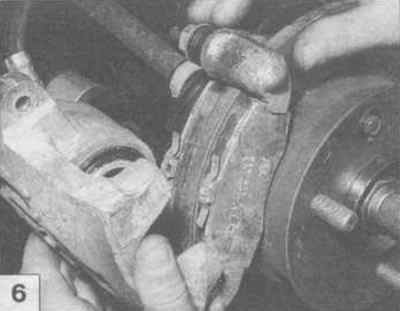
Rotate the caliper downwards around the axis of the lower guide pin.


Remove the brake pads. After that, carefully, so as not to damage the protective cover of the cylinder, clean the brake mechanism parts from dirt and rust, especially the pad seats.
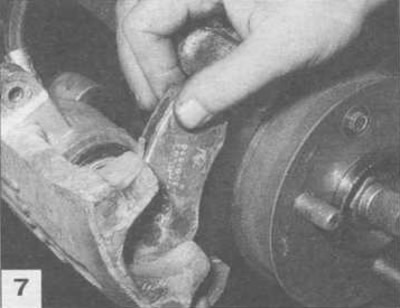
Remove the brake pads. After that, carefully, so as not to damage the protective cover of the…


Before installing new pads, carefully press the piston into the cylinder with a screwdriver or crowbar through the old pads inserted into the caliper (folded together with friction linings facing inward).
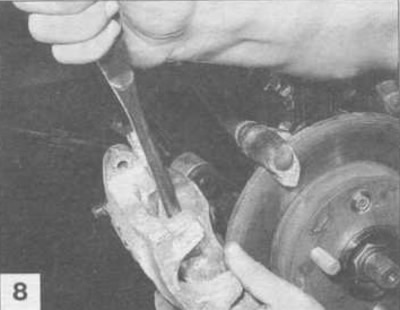
Before installing new pads, carefully press the piston into the cylinder with a screwdriver or…


Install the new pads precisely into the seats in the pad guide. Secure the caliper by securing the mounting bolts with locking plates and install the wheel. After placing the car on the ground, press the brake pedal several times to set the piston to the working position. Check the brake fluid level in the reservoir and top up to the norm if necessary (see subsection 2.11).
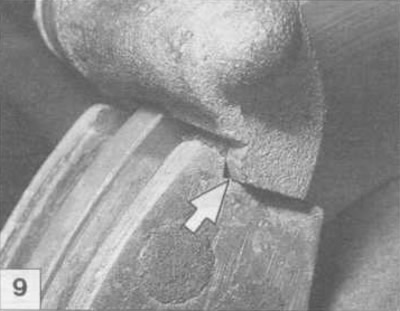
Install the new pads precisely into the seats in the pad guide. Secure the caliper by securing the…


This article is available at russian, bulgarian, belarusian, ukrainian, serbian, croatian, romanian, polish, slovak, hungarian
The text was reviewed by the specialist: Grigory Vologodtsev

Share with friends:

Previous articles
VAZ-1111: Maintenance
Next articles

Checking the pressure regulator
Checking the efficiency of the vacuum booster
Adjusting the brake pedal free travel
Replacing brake fluid
Bleeding the brake system
Replacing rear brake pads
Adjusting the clearances between the brake shoes and the brake drum
Adjusting clearances in rear wheel hub bearings
Replacing grease in rear wheel hub bearings
Checking and adjusting the parking brake

More articles from other manuals on VAZ cars:
➠ Replacing the front brake pads VAZ-21011 (1974-1983)
➠ Replacing the front brake pads VAZ-21051 (1979-2010)
➠ Replacing the front brake pads VAZ-21061 (1976-2006)
➠ Checking the condition and replacing the front wheel brake pads VAZ-2109 (1984-1997)
➠ Replacing the front brake pads VAZ-2115 (1997-2012)
Link in different formats to this page


Visitor comments

No comments yet


How much will 17 + 49 ?


VAZ-1111 (1988-1996) 
  • General information
  • Vehicle description
  • Vehicle device
  • Vehicle operation
  • Maintenance
  • Applications
  • Power unit
  • Engine repair
  • Cooling system
  • Lubrication system
  • Supply system
  • Transmission
  • Clutch
  • Transmission
  • Chassis
  • Front suspension and wheels
  • Rear suspension
  • Steering
  • Brake system
  • Body
  • Exterior
  • Interior
  • Electrical equipment
  • Engine electrics
  • Equipment and devices


VAZ-11113 (1996-2003) 
  • General information
  • Introduction to the guide
  • User manual
  • Maintenance
  • Power unit
  • Engine repair
  • Cooling and lubrication system
  • Fuel system
  • Exhaust system
  • Transmission
  • Car gearbox
  • Clutch and drive shafts
  • Chassis
  • Front suspension
  • Rear suspension
  • Steering
  • Brake system
  • Body
  • Exterior
  • Interior
  • Doors and locks
  • Electrical equipment
  • Equipment and devices
  • Lighting and signaling
  • Engine electrics
  • Ignition system


VAZbook.ru © 2017 · Mobile version · Contact with administration · Sitemap: EN BG BY UA RS HR RO PL SK HU · Site search · News and articles VAZ-1111 · VAZ-11113 · VAZ-2101 · VAZ-21011 · VAZ-2104 · VAZ-2105 · VAZ-21051 · VAZ-2106 · VAZ-21061 · VAZ-2107 · VAZ-21099 · VAZ-2109 · VAZ-2108 · VAZ-2110 · VAZ-2112 · VAZ-2114 · VAZ-2115 · VAZ-2121 · VAZ-21213 · VAZ-21214 ·
The site stores technical data using cookies to improve the service.