




Contents: Removal ↓ Installation ↓
To complete the work you will need a torque wrench.
Removal
1. Prepare the car for work (see "Preparing a car for maintenance and repair").
2. Remove the cylinder head cover (see "Cylinder Head Cover Gasket - Replacement").
3. Set the camshaft to the position corresponding to the end of the compression stroke in the 4th cylinder (see "Clearance between valve levers and camshaft cams - adjustment").
4. Using a chisel, bend back the tab of the lock washer on the camshaft sprocket mounting bolt.
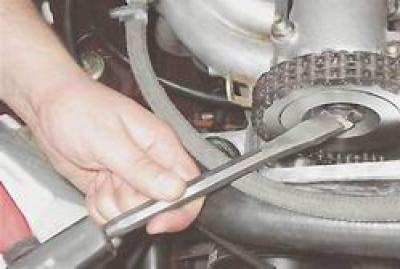
5. Engage first gear. Using a socket wrench by 17 mm we unscrew the bolt and remove it together with the washers.
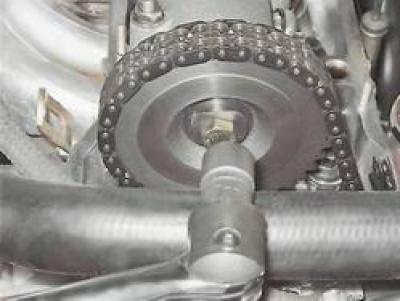
6. Remove the chain tensioner (see above, "Timing chain tensioner - replacement").
7. Remove the sprocket with the chain. To prevent the chain from jumping, tie it with wire to the sprocket and place it in the cylinder head.
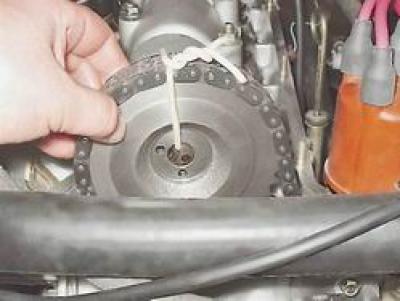
8. With a socket wrench by 13 mm evenly unscrew the nine nuts securing the camshaft bearing housing.
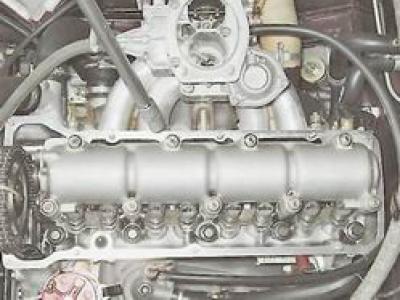
9. Remove the housing assembly with the camshaft from the cylinder head studs.
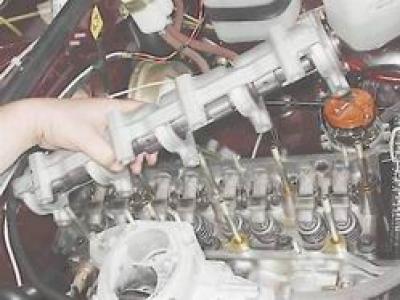
The original source is located on the website (VazBook.ru)
10. With a socket or open-end wrench by 10 mm we unscrew the two bolts securing the thrust flange to the bearing housing and remove the flange from the groove in the front support journal of the shaft.
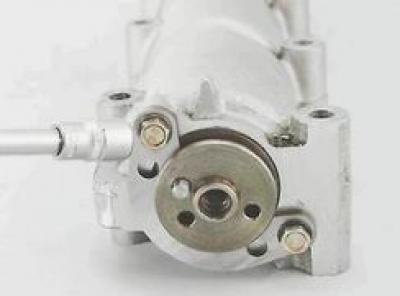
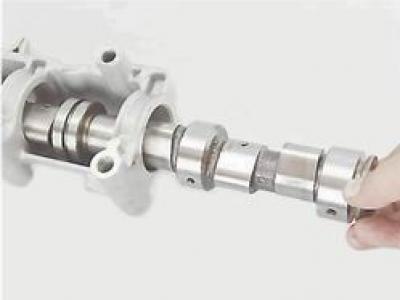
11. Remove the camshaft from the bearing housing.
12. After lifting the valve lever and releasing it from the spring, remove the lever from the adjusting bolt.
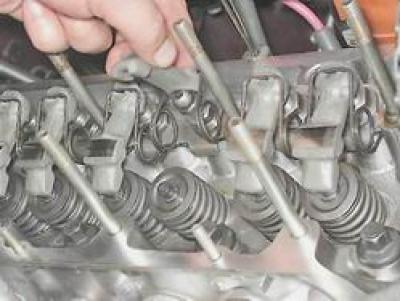
13. Remove the lever spring.
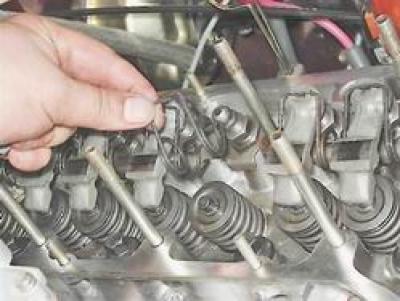
We remove the remaining levers and springs in the same way.
14. Inspect the working surfaces of the cams and journals of the camshaft, the bearing housing, and the levers. If the cams are worn by more than 0.5 mm, or if there are nicks or gouges, the camshaft must be replaced. Cracks on the housing surface are not allowed. No nicks or scratches are allowed on the working surfaces of the journal bearings. The working surfaces of the levers must also be free of nicks and signs of severe wear.
Installation
1. Before installing the camshaft into the bearing housing, lubricate the working surfaces of the cams and journals with engine oil.
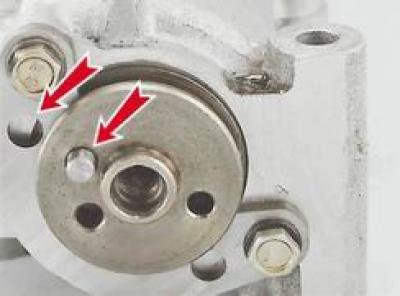
2. Install the camshaft into the housing and secure the shaft with a thrust flange. Orient the camshaft so that its pin is opposite the upper hole in the thrust flange.
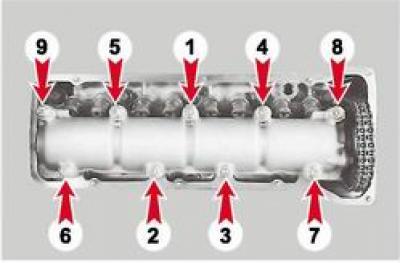
3. Tighten the bearing housing mounting nuts in the order shown in the photo, to a torque of 18.3-22.6 N·m.
4. Untie the wire, install the sprocket with the chain on the camshaft, tighten the mounting bolt and lock it by bending the petals of the lock washer.
5. Install the chain tensioner (see "Timing Chain Tensioner - Replacement").
6. Adjust the clearance between the valve levers and the camshaft cams (see "Clearance between valve levers and camshaft cams - adjustment").
7. Installation of all removed parts is carried out in reverse order.