
English Русский
Български
Беларускі
Український
Српски
Hrvatski
Română
Polski
Slovenský
Magyar
| Articles | Contacts | Sitemap |   
Repair and maintenance Lada Repair and maintenance Mazda Repair and maintenance Mitsubishi Repair and maintenance Toyota Repair and maintenance Land Rover Repair and maintenance Hyundai Repair and maintenance Nissan
VAZbook.ru


Main     1111   2101   2105   2106   2107   2109   2110   2115   2121  
VAZ-2114 (2004-2013) VAZ-2115 (1997-2012)
  • Main
  • «Samara-2»
  • VAZ-2115
  • Body
  • Doors, covers and windows
  • Door lock repair

Door lock repair (VAZ-2115)

            0

The door locks are non-separable and cannot be repaired. If the locks break, replace them as a whole. The designs of the front door locks of all LADA SAMARA-2 family cars and the rear door locks of VAZ-2114 and VAZ-2115 cars are fundamentally the same. The main difference is that the outer handles of the front doors have lock switch cylinders installed, so repair of the locks is shown using the front doors as an example.

You will need a screwdriver.

1. Remove the front left door trim (see "Removal and installation the front door trim").

2. Remove the two screws securing the lock motor reducer to the inner door panel.
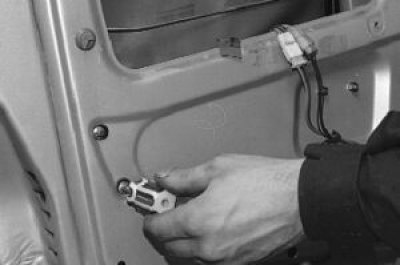
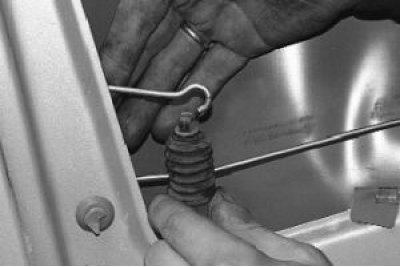
3. Remove the gear motor from the inner door panel window and remove the rod from the gear motor…


3. Remove the gear motor from the inner door panel window and remove the rod from the gear motor drive.
4. Disconnect the two wiring harness connectors and remove the door lock motor reducer.
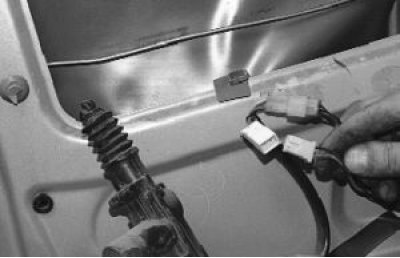

4. Disconnect the two wiring harness connectors and remove the door lock motor reducer.


Note: The rear door lock gear motor is removed in the same way.


Note: The rear door lock gear motor is removed in the same way.


5. To remove the inner handle and the lock drive rod, unscrew the nuts securing the window lift mechanism to the door panel and move it to the side (see "Replacing the front door window regulator").

6. Remove the inner lock handle (see "Replacing the front door window regulator").
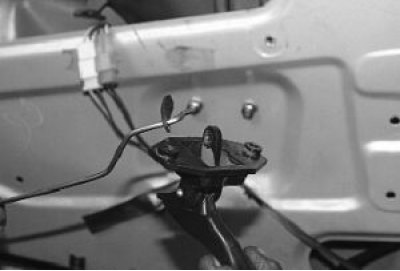
7. Disconnect the outer handle rods and the lock switch from the inner lock.
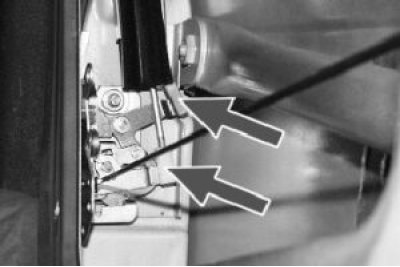

7. Disconnect the outer handle rods and the lock switch from the inner lock.

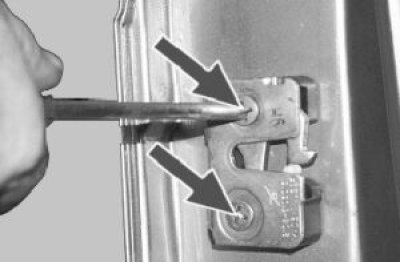
8. Remove the two screws securing the door lock. When removing them, we recommend using an impact…


8. Remove the two screws securing the door lock. When removing them, we recommend using an impact screwdriver, as the screw threads are coated with sealant.

9. Remove the outer lock…
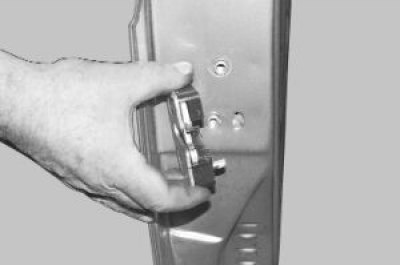

9. Remove the outer lock…

10. …and remove the inner lock from the door.
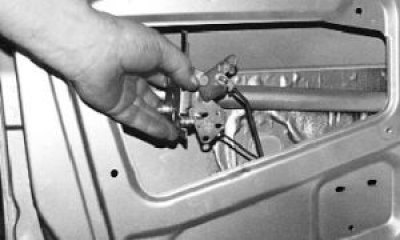

10. …and remove the inner lock from the door.

11. Remove the locking clip from the lever pin and disconnect the inner handle rod from the inner…


11. Remove the locking clip from the lever pin and disconnect the inner handle rod from the inner lock lever.
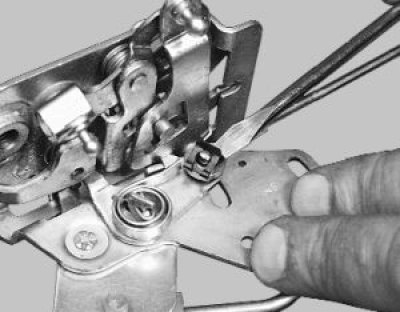
12. Turn the plastic holder and remove the end of the lock lock rod from the lever.
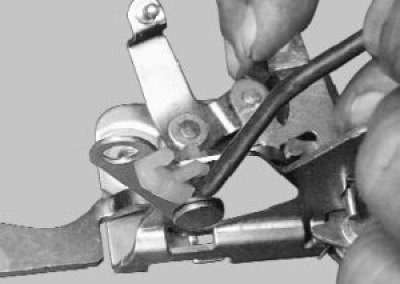

12. Turn the plastic holder and remove the end of the lock lock rod from the lever.

13. Unscrew the two nuts securing the outer handle of the lock.
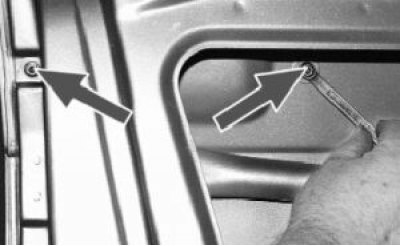

13. Unscrew the two nuts securing the outer handle of the lock.

14. Remove the outer lock handle with rods.
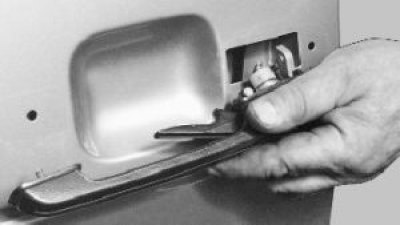

14. Remove the outer lock handle with rods.

15. Remove the pin and remove the plastic rod end from the lock cylinder.
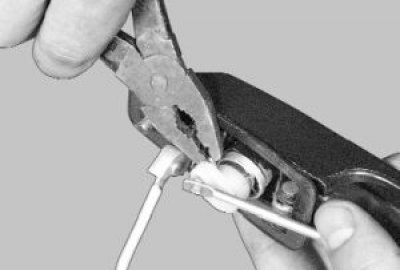

15. Remove the pin and remove the plastic rod end from the lock cylinder.

16. Remove the locking spring by pulling its ends out of the slots on the cylinder and lock handle.
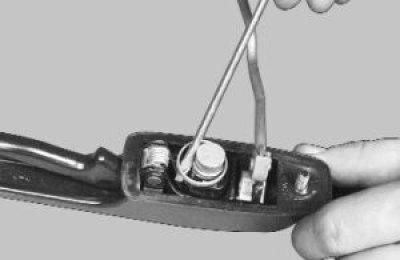

16. Remove the locking spring by pulling its ends out of the slots on the cylinder and lock handle.

17. Insert the key into the lock cylinder and remove the cylinder from the handle.
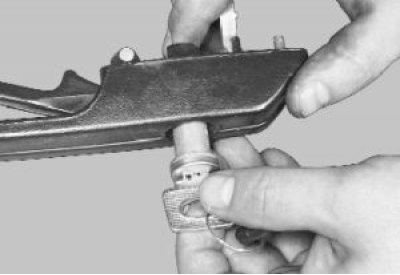

17. Insert the key into the lock cylinder and remove the cylinder from the handle.

18. Install the new lock in the reverse order of removal, having previously lubricated all rubbing…


18. Install the new lock in the reverse order of removal, having previously lubricated all rubbing parts with consistent grease. Check the ease of opening and the reliability of closing the door lock. Adjust the lock if necessary.

19. To adjust the lock, loosen the fastening screws and move the lock:
  • a) outward if the door closes tightly;
  • b) inside if the door does not close tightly;
  • c) downwards, if the door rises when closing.

After adjustment, tighten the screws. Use an impact screwdriver to loosen and tighten the screws.
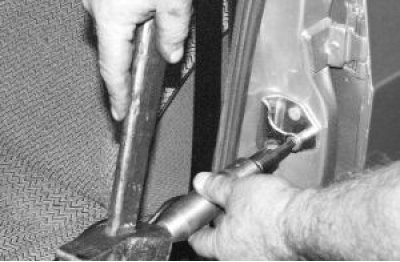
Helpful Hint: If you need to remove the retainer, trace its outline on the body pillar first. This…


Helpful Hint: If you need to remove the retainer, trace its outline on the body pillar first. This will help maintain the lock adjustment when installing.


This article is available at russian, bulgarian, belarusian, ukrainian, serbian, croatian, romanian, polish, slovak, hungarian
The text was reviewed by the specialist: Grigory Vologodtsev

Share with friends:

Previous articles
VAZ-2115: Doors, covers and windows
Next articles

Replacing the front door drop glass
Replacing the front door window regulator
Removal and installation the front door trim
Replacement and adjustment of the trunk lid lock (sedan)
Removal and installation the trunk lid (sedan)
Removal and installation side doors
Removal and installation the door opening limiter
Removal and installation the rear door trim
Replacing the rear door window regulator
Replacing the rear door drop glass

More articles from other manuals on VAZ cars:
➠ Adjusting the side door lock VAZ-11113 (1996-2003)
➠ Lock, cylinder and outer handle of the front door — removal and… VAZ-2104 (1984-2012)
➠ Replacing the rear door lock drive VAZ-21061 (1976-2006)
➠ Lock, cylinder and outer handle of the front door — removal and… VAZ-2107 (1982-2012)
➠ Adjusting the front door lock VAZ-2108 (1984-2003)
Link in different formats to this page


Visitor comments

No comments yet


How much will 44 + 34 ?


VAZ-2114 (2004-2013) 
  • General information
  • Operation and maintenance
  • Power unit
  • Engine repair
  • Cooling system
  • Supply system
  • Control system
  • Exhaust system
  • Transmission
  • Clutch
  • Car gearbox
  • Front wheel drives
  • Chassis
  • Wheels and tires
  • Front suspension
  • Rear suspension
  • Steering
  • Brake system
  • Body
  • Exterior
  • Interior
  • Doors and glass
  • Tailgate
  • Ventilation and heating
  • Electrical equipment
  • Equipment and devices
  • Headlights and lighting
  • Engine electrics
  • Electrical circuits


VAZ-2115 (1997-2012) 
  • General information
  • Vehicle device
  • Operation manual
  • Vehicle malfunctions
  • Car care
  • Power unit
  • Engine repair
  • Cooling system
  • Supply system
  • Control system
  • Exhaust system
  • Transmission
  • Clutch
  • Car gearbox
  • Front wheel drives
  • Chassis
  • Front suspension
  • Rear suspension
  • Steering
  • Brake system
  • Body
  • Exterior
  • Interior
  • Doors, covers and windows
  • Electrical equipment
  • Equipment and devices
  • Headlights and lighting
  • Engine electrics
  • Anti-theft system


VAZbook.ru © 2017 · Mobile version · Contact with administration · Sitemap: EN BG BY UA RS HR RO PL SK HU · Site search · News and articles VAZ-1111 · VAZ-11113 · VAZ-2101 · VAZ-21011 · VAZ-2104 · VAZ-2105 · VAZ-21051 · VAZ-2106 · VAZ-21061 · VAZ-2107 · VAZ-21099 · VAZ-2109 · VAZ-2108 · VAZ-2110 · VAZ-2112 · VAZ-2114 · VAZ-2115 · VAZ-2121 · VAZ-21213 · VAZ-21214 ·
The site stores technical data using cookies to improve the service.