




Removal
1. Prepare the car for work (see "Preparing the car for maintenance and repair").
2. Remove the trim of the luggage compartment door (see "Trunk door trim - removal and installation").
3. With a socket wrench by 10 mm we unscrew the two nuts securing the lock to the trunk door and remove the lock.
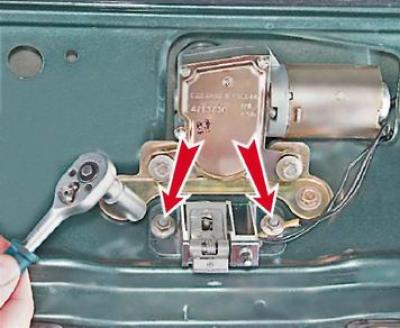
Note: One of the nuts secures the tips of the "ground" wires. When assembling, do not forget to install them in place.
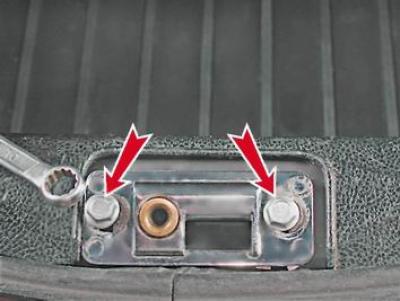
4. With a spanner by 10 mm we unscrew the two bolts securing the lock retainer.
The text is taken from the online resource [vazbook]
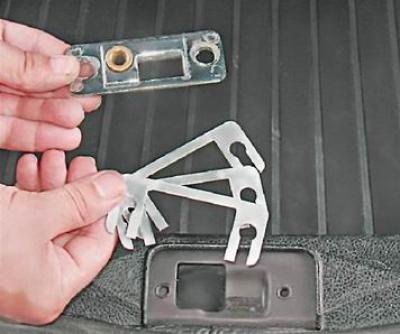
5. Remove the retainer and adjusting linings.
Installation
We install the removed parts in the reverse order and adjust the position of the retainer lock (see below).
Note: If the tailgate does not close with the lock or you have to slam the door hard to close it, the position of the lock catch should be adjusted.
Adjustment
1. Loosen the retainer mounting bolts so that it does not dangle, but can still be moved with a little hand force.
2. Close the door and, looking through the door glass, make sure that the lock pin is located opposite the spring-loaded socket of the latch. If necessary, move the latch, achieving its optimal position.
3. Move the lock retainer all the way back and slam the door. The lock retainer itself will take the optimal position.
4. Press the lock button to open the trunk door. Trying not to move the lock to the side, tighten the bolts that secure it.
5. If the luggage compartment door does not close tightly, loosen the two bolts securing the lock retainer and remove one or more adjusting plates.
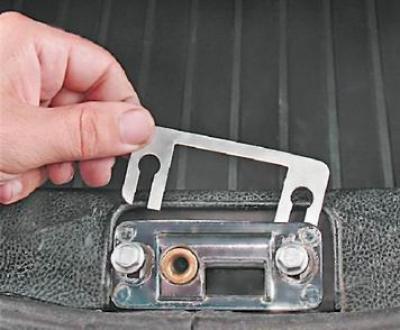
6. If you have to apply too much force to close the door, remove the latch, install an additional adjustment plate and put the latch back in place.
Tip: You can make additional adjustment plates yourself by cutting them out of sheet metal.
7. Having selected the optimal number of adjustment plates, we adjust the position of the retainer (see above, p. 2-4).