
Removing
1. We prepare the car for operations (see "Vehicle preparation for maintenance and repair").
2. Relieve pressure in the power system (see "Pressure relief in the power system").
3. Disconnect the wire from the negative terminal of the battery (see "Battery - removal and installation").
4. Special hose (see "Tools, fixtures and operating materials") we pump out gasoline from the tank.
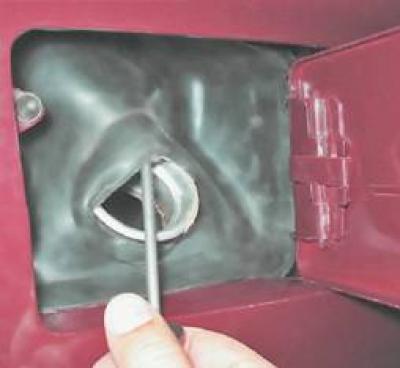
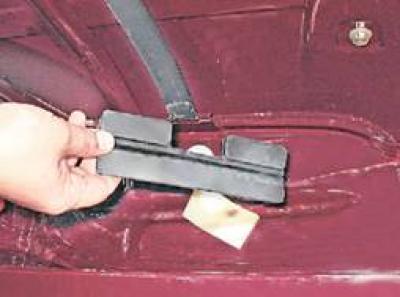
5. Pry off with a screwdriver, remove the rubber apron from the tank neck and disconnect the safety valve hose from it.
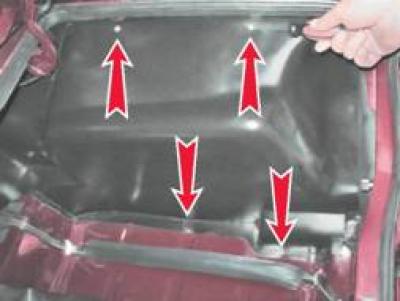
6. We take out the caps and bend the right edge of the trunk mat (see "Rear bumper - removal and installation").
7. Using a Phillips screwdriver, unscrew the four screws securing the fuel tank lining and remove it.
8. Using a 10 mm socket wrench, unscrew the bolt of the fuel tank fastening clamp.

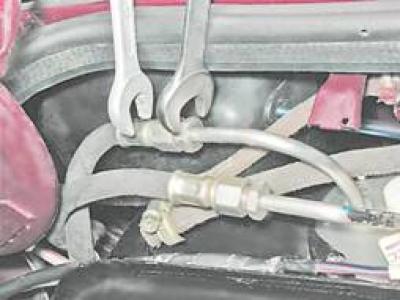
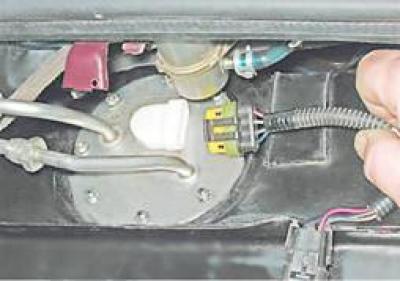
9. Using a 17 mm wrench, unscrew the fittings of the drain and supply pipes, holding the hose tips with a wrench of the same size.
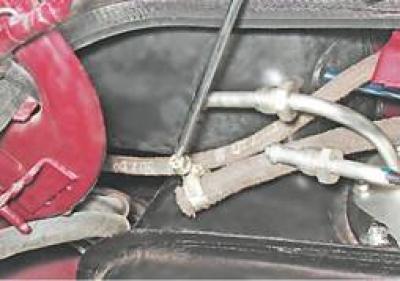
10. Loosen the clamp with a Phillips screwdriver and disconnect the bypass valve hose from the rear pipe of the tank.

11. Similarly, disconnect the hose from the front pipe of the tank.
12. Disconnect the block of wires from the electric fuel pump.
13. We take out the fuel tank from the trunk niche.
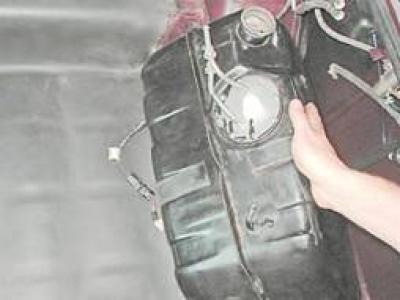
14. We take out the bottom rubber gasket.
Installation
1. If the tank was not removed for replacement, we wash it from the inside with gasoline or solvent.
2. Installation of the fuel tank is carried out in reverse order.
3. Filling the tank with fuel, turn on the ignition to create pressure in the power system and check the tightness of the connections.