
English Русский
Български
Беларускі
Український
Српски
Hrvatski
Română
Polski
Slovenský
Magyar
| Articles | Contacts | Sitemap |   
Repair and maintenance Lada Repair and maintenance Mazda Repair and maintenance Mitsubishi Repair and maintenance Toyota Repair and maintenance Land Rover Repair and maintenance Hyundai Repair and maintenance Nissan
VAZbook.ru


Main     1111   2101   2105   2106   2107   2109   2110   2115   2121  
VAZ-2110 (1995-2007) VAZ-2112 (1999-2007)
  • Main
  • «Lada»
  • VAZ-2110
  • Body
  • Tailgate
  • Removal and installation the trunk lid (VAZ-2112)

Removal and installation the trunk lid (VAZ-2112) (VAZ-2110)

            0

Contents: Removal ↓ Installation ↓
Note: Removing the trunk lid is a labor-intensive job - you must first remove the wiring harness that runs inside the lid. You may need an assistant to remove and move the lid.


Removal


1. Prepare the car for repair work.

2. Remove the three ceiling trim holders in the same way as shown when removing the trunk lid trim.
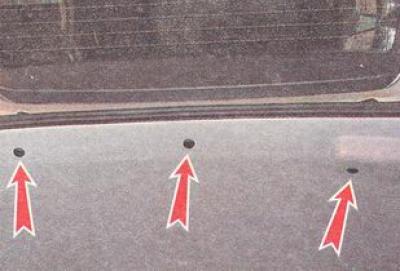
2. Remove the three ceiling trim holders in the same way as shown when removing the trunk lid trim.


3. After unscrewing four screws, bend back the right trunk trim and disconnect the connectors of the right branch of the trunk lid wires.
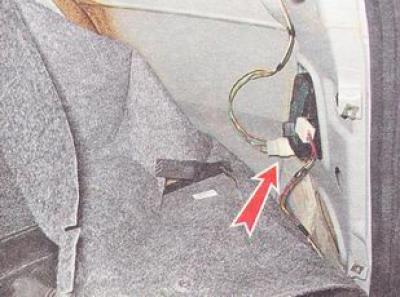
3. After unscrewing four screws, bend back the right trunk trim and disconnect the connectors of…


4. Mark the colors of the wires and remove the wire tips from the connector, similar to how it is shown when removing the trunk lid on a VAZ 2112 hatchback.

5. After unscrewing the screw, detach the decorative trim from the rear pillar (the overlay is held by two holders).
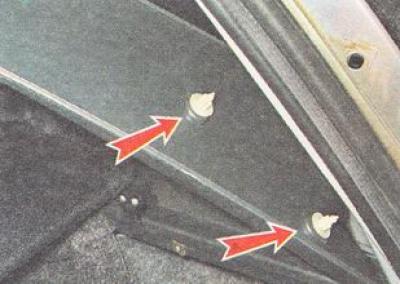


5. After unscrewing the screw, detach the decorative trim from the rear pillar (the overlay is held…


Note: There is no need to remove the trim, just move it away from the rack so that you can pull out the wires.


6. The wires on the stand are secured with insulating tape, remove it.
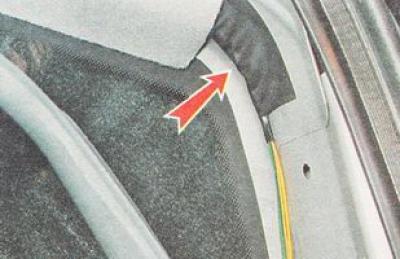
6. The wires on the stand are secured with insulating tape, remove it.


7. Similarly, we release the wires laid along the rear left pillar.

8. Remove the spoiler from the trunk lid.

9. Remove the trunk lid trim.

10. Disconnect the wire connector (1) from the left rear light section and the wire tip (2) from the rear window heating element.
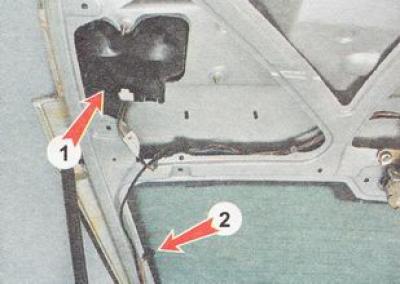
10. Disconnect the wire connector (1) from the left rear light section and the wire tip (2) from…


11. Disconnect the wire connector from the right rear light section (2), the wire tip (3) from the heater and disconnect the motor-reducer wire connector (1).
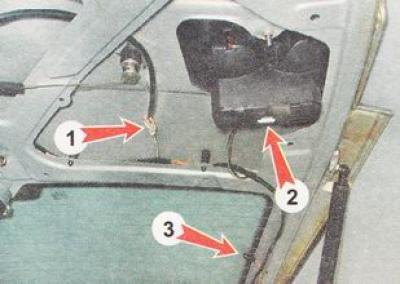

11. Disconnect the wire connector from the right rear light section (2), the wire tip (3) from the…


12. Disconnect the wire connector (2) from the rear window wiper and disconnect the wire connector (1) from the license plate lights.
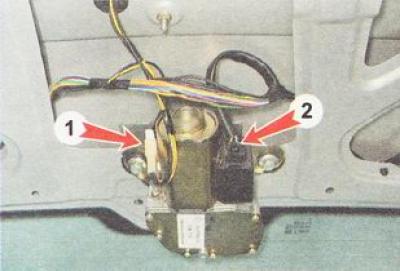
12. Disconnect the wire connector (2) from the rear window wiper and disconnect the wire connector…


13. Remove the wire harness holders from the holes.
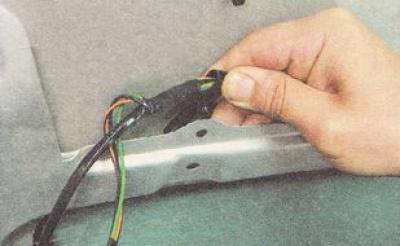
13. Remove the wire harness holders from the holes.


14. Using a screwdriver, press the seal into the hole in the trunk lid, and pull the wiring harness together with the connector into the lid through the hole.
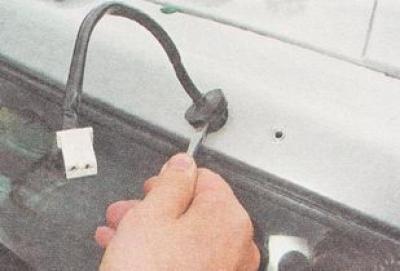
14. Using a screwdriver, press the seal into the hole in the trunk lid, and pull the wiring harness…


15. Using a screwdriver, remove the washer tube seal from the cover hole.
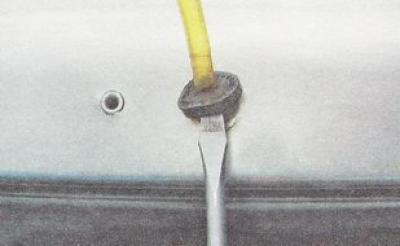
15. Using a screwdriver, remove the washer tube seal from the cover hole.


16. Remove the seal from the washer tube.
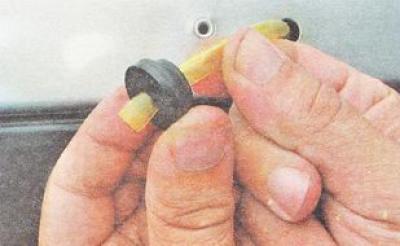
16. Remove the seal from the washer tube.


17. Pull the washer tube inside the trunk lid.

18. Remove the seal from the hole on the inside of the lid...
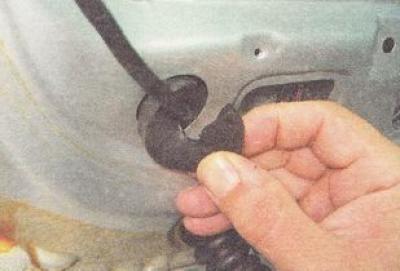
18. Remove the seal from the hole on the inside of the lid...


...and pull the left branch of the wiring harness out of the inner cavity of the trunk lid.
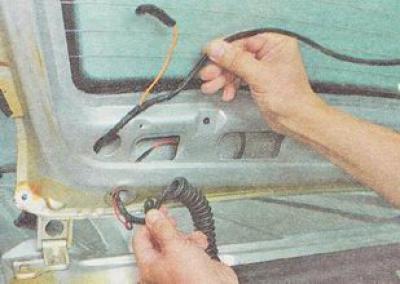
...and pull the left branch of the wiring harness out of the inner cavity of the trunk lid.


19. Similarly, remove the right branch of the wiring harness.

20. Using a 10 mm socket wrench, unscrew the two bolts securing the right and left hinges.

Note: It is advisable to have an assistant when removing and moving the trunk lid.
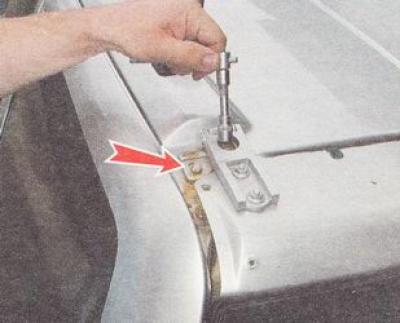

Note: It is advisable to have an assistant when removing and moving the trunk lid.


21. Remove the trunk lid together with the hinges.

Installation


We install the trunk lid and all previously removed parts on the car in the reverse order. We insert the covers into the holes using a slotted screwdriver with a thin blade.
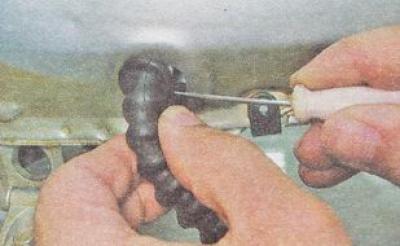
We install the trunk lid and all previously removed parts on the car in the reverse order. We…


This article is available at russian, bulgarian, belarusian, ukrainian, serbian, croatian, romanian, polish, slovak, hungarian
The text was reviewed by the specialist: Grigory Vologodtsev

Share with friends:

Previous articles
VAZ-2110: Tailgate
Next articles

Replacing the rear window washer nozzle (VAZ-2112)
Removal and installation the rear wiper (VAZ-2112)
Removal, installation and adjustment of the trunk lock (VAZ-2112)
Removal and installation the decorative trunk trim (VAZ-2112)
Removal and installation the trunk lid trim (VAZ-2112)

More articles from other manuals on VAZ cars:
➠ Replacement of the trunk floor, fuel tank floor and trunk side… VAZ-2101 (1970-1983)
➠ Opening the trunk lid VAZ-2105 (1979-2010)
➠ Trunk lid lock and lock cylinder — removal and installation VAZ-2106 (1976-2006)
➠ Fuel tank cap and trunk VAZ-2107 (1982-2012)
➠ Trunk lid VAZ-21099 (1990-2004)
Link in different formats to this page


Visitor comments

No comments yet


How much will 22 + 43 ?


VAZ-2110 (1995-2007) 
  • General information
  • Vehicle description
  • Specifications
  • User manual
  • Maintenance
  • Operation and maintenance
  • Tips for car owner
  • Power unit
  • Engine repair
  • Supply system
  • Control system
  • Cooling system
  • Exhaust system
  • Transmission
  • Clutch
  • Car gearbox
  • Front wheel drives
  • Chassis
  • Suspension and wheels
  • Steering
  • Brake system
  • Body
  • Exterior
  • Interior
  • Doors and glass
  • Tailgate
  • Ventilation and heating
  • Electrical equipment
  • Equipment and devices
  • Headlights and lighting
  • Engine electrics
  • Electrical circuits


VAZ-2112 (1999-2007) 
  • General information
  • Operation and maintenance
  • Power unit
  • Engine repair
  • Supply system
  • Control system
  • Cooling system
  • Exhaust system
  • Transmission
  • Clutch
  • Car gearbox
  • Front wheel drives
  • Chassis
  • Wheels and tires
  • Car suspension
  • Steering
  • Brake system
  • Body
  • Exterior
  • Interior
  • Doors and glass
  • Tailgate
  • Ventilation and heating
  • Electrical equipment
  • Equipment and devices
  • Headlights and lighting
  • Engine electrics
  • Electrical circuits


VAZbook.ru © 2017 · Mobile version · Contact with administration · Sitemap: EN BG BY UA RS HR RO PL SK HU · Site search · News and articles VAZ-1111 · VAZ-11113 · VAZ-2101 · VAZ-21011 · VAZ-2104 · VAZ-2105 · VAZ-21051 · VAZ-2106 · VAZ-21061 · VAZ-2107 · VAZ-21099 · VAZ-2109 · VAZ-2108 · VAZ-2110 · VAZ-2112 · VAZ-2114 · VAZ-2115 · VAZ-2121 · VAZ-21213 · VAZ-21214 ·
The site stores technical data using cookies to improve the service.