
Removing the trunk lid trim
1. Using a Phillips screwdriver, unscrew the screws securing the skin to the cover (one self-tapping screw is located at the top of the skin on the left pillar, the rest are at the bottom of the skin).

2. With a puller or a slotted screwdriver, we remove the buttons of the four holders of the upper casing fastening, and then the holders themselves.
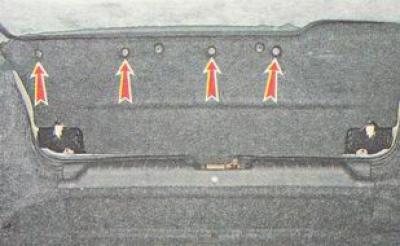
3. Slotted screwdriver (laying a cloth underneath) pry off the lower part of the cover trim and remove the trim.
Removing the trunk lid lock
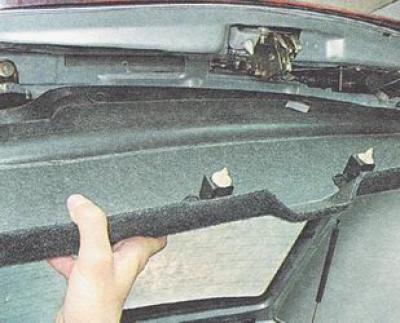
1. Remove the inner lining of the trunk lid.
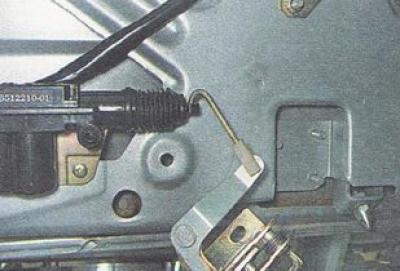
2. Using a slotted screwdriver, unscrew the screw that fixes the lock drive rod.
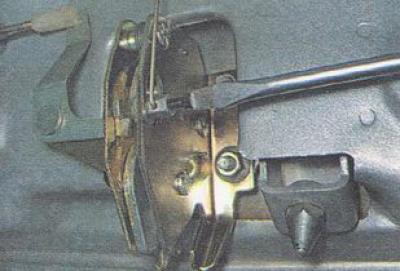
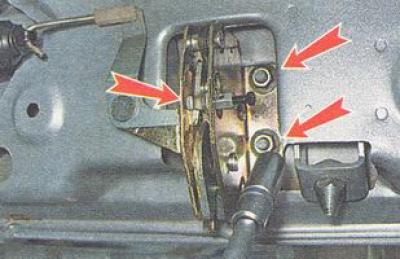
3. Using a 10 mm socket wrench with a deep head, unscrew the three nuts securing the lock.
4. Disconnect the rod from the electric drive and remove the lock.
Installing the trunk lid lock
We install the trunk lid lock and all previously removed parts on the car in the reverse order of removal.
Note. Before installing the lower trim of the trunk lid, check the operation of the lock, the reliability of locking the trunk lid and, if necessary, adjust the lock.
Trunk lid lock adjustment
If the trunk lid does not lock properly in the closed position (opens spontaneously when driving on a rough road or you have to slam the trunk lid hard to close), the lid lock needs to be adjusted. Also, adjustment may be required after replacing the lock and its elements, changing the position of the cover in the opening and performing other repairs.
It is convenient to check the operation of the lock from the passenger compartment by folding the rear seat.
Retainer bar (3) should go into the groove of the lock (4), without touching the edges of the groove, but the guide pin (1) should compress the spring-loaded socket (2).
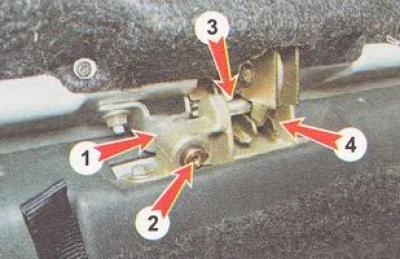
If the crossbar of the latch touches the edges of the groove, remove the lower trim of the trunk lid. Using a 10 mm socket wrench, we loosen the tightening of the three nuts securing the locking mechanism of the lock. Having put the lock in the optimal position, tighten the nuts.
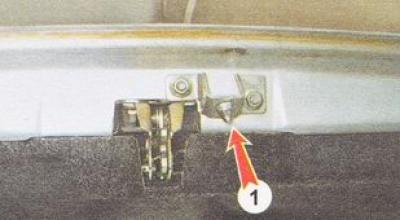
Helpful advice. If there are not enough oval holes in the lock to adjust the size, you can remove the lock and bore the holes with a round file. You can also put washers or a set of homemade shims under the lock lock (1), by cutting them out of sheet metal.
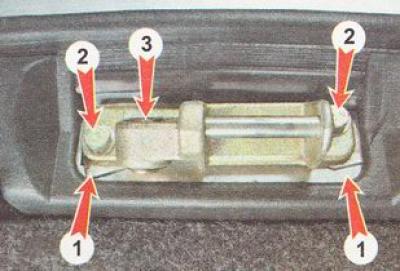
If the guide spike enters the socket with a warp, use a 10 mm socket wrench to loosen the two bolts (2) fastener fastening. By shifting the latch to the side, we achieve that the spring-loaded socket (3) located on the same axis with the spike. By moving the latch back and forth, we adjust the tightness of the trunk lid. Having found the optimal position of the latch, we tighten the bolts of its fastening.
Helpful advice. If the specified adjustment fails to achieve the desired result, you can remove the spike together with the bracket (1), file the mounting holes with a file and grind the spike.
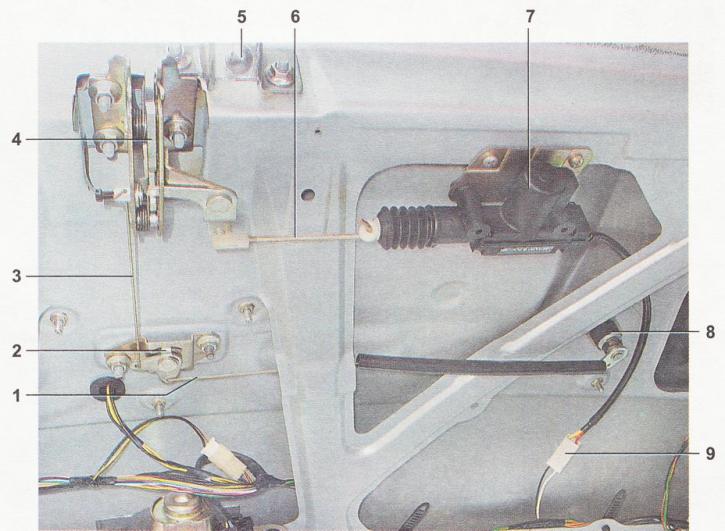
Trunk lid lock drive on a VAZ 2112 car: 1 - transverse thrust; 2 - lock drive lever; 3 - longitudinal thrust; 4 - locking mechanism of the lock; 5 - guide spike; 6 - thrust motor-reducer; 7 - motor-reducer; 8 - lock switch (larva); 9 - block of wires of the motor-reducer