




Attention! Before starting work, read the safety rules for working with brake fluid.
The brake fluid level is checked periodically: during vehicle operation, during each maintenance, after bleeding the brake system hydraulic drive and replacing the brake fluid, when the control lamp on the instrument panel lights up, signaling an insufficient level of brake fluid in the master cylinder reservoir.
Sequence of execution
1. Prepare the car for work (see "Preparing the car for maintenance and repair").
2. Use a rag to remove dirt from the master brake cylinder reservoir.
3. Visually check the brake fluid level in the reservoir. It should be between the "MIN" and "MAX" marks on the reservoir body.
4. Check the degree of wear of the brake pads of the front and rear brake mechanisms (see "Brake pads - checking for wear").
5. If the wear of the brake pads is within the normal range and the fluid level in the reservoir is below the "MIN" mark, then disconnect the wire harness tip from the brake fluid level emergency drop sensor, unscrew and remove the reservoir cap (see "Low Brake Fluid Sensor - Checking and Replacing").
Warning! Use only new fluid to fill the brake system hydraulic drive.
6. Add new brake fluid to the reservoir up to the "MAX" mark (when installing the tank cap, the sensor float will be immersed in the liquid and its level will increase).
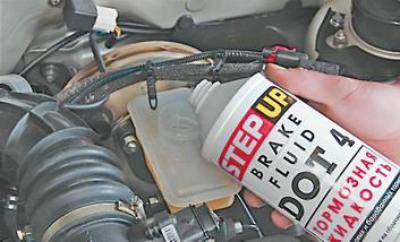
Warning! If brake fluid has to be added to the reservoir frequently, it is necessary to check the tightness of the brake system (visually checked for signs of brake fluid leakage from the cylinders and joints of system elements).
7. Close the tank lid tightly.
8. Connect the wiring harness connector to the sensor connector.
9. Check the operation of the brake fluid emergency level sensor: with the ignition on, press the rubber pad on the tank cover from above. If the sensor is working properly, the control lamp on the instrument panel will light up.