




Contents: Removal ↓ Installation ↓
We remove the anti-roll bar when the rod is deformed or when replacing all the rubber cushions of its mounting brackets. We replace the rubber cushions of the clamps of the stabilizer rod to the levers without removing the rod itself.
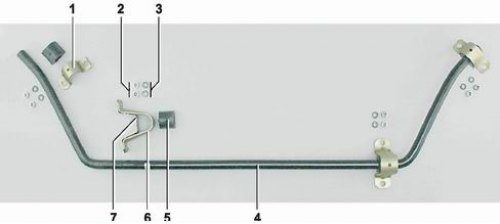
Anti-roll bar parts: 1 - cushion holder (2101-2906048/49); 2 - nut M8 (16100811); 3 - spring washer (10516670); 4 - stabilizer (2101-2906010); 5 - stabilizer bar cushion (2101-2906040); 6 - outer bracket (2101-2906042); 7 - internal bracket (2101-2906043)
Removal
1. Place the car on an inspection pit or overpass and lift the front part of the car (see "Preparing a car for maintenance and repair").
2. Mark the position of the stabilizer cushion clips relative to the levers for correct installation during assembly.
Attention! The right and left stabilizer pad mounting clips are not interchangeable.
If we are replacing only the cushions, we mark their position relative to the stabilizer bar.
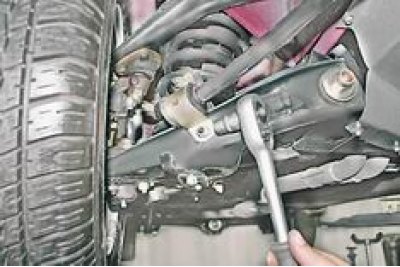
3. With a socket wrench on 13 mm we unscrew the two nuts securing the stabilizer cushion clip to the lower arm.
4. Using a mounting blade, remove the cushion housing from the lever studs.
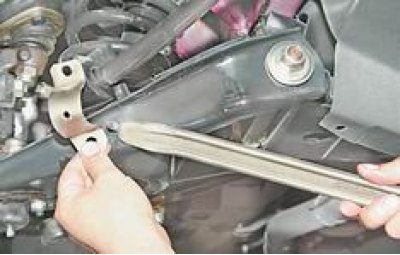
5. Remove the cushion from the stabilizer. Similarly, remove the cushion from the opposite side of the stabilizer.
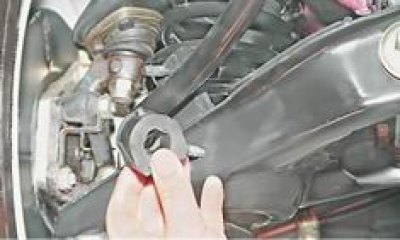
To replace the stabilizer or its mounting bracket cushions, remove the mudguard (see "Mudguard - Removal and Installation").
Attention! When removing the stabilizer bar, it is necessary that the load on the right and left springs of the front suspension be the same. Otherwise, when removing, the twisted bar may straighten out and cause injury.
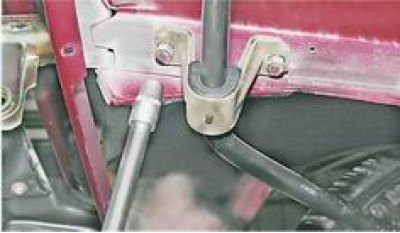
6. With a socket wrench on 13 mm using an extension, unscrew the two nuts securing the stabilizer bracket to the body side member.
7. Similarly, unscrew the nuts securing the second bracket and remove the stabilizer. Clean the stabilizer bar from dirt.
8. To replace the stabilizer bracket cushion, clamp the bracket in a vice. If the stabilizer bar does not require replacement, mark the position of the bracket cushions relative to the stabilizer bar to facilitate subsequent assembly. Lubricate the stabilizer bar with a soap solution to facilitate removal of the bracket with the cushion.
9. Turning the stabilizer bar in different directions, pull it out of the bracket cushion.
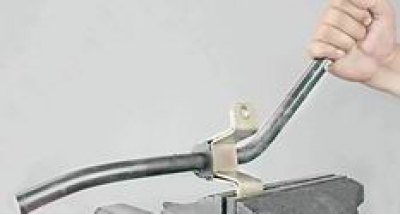
10. Using a slotted screwdriver, remove the rubber cushion from the bracket.
11. Remove the cushion of the second bracket in the same way.
Installation
1. Installation of the anti-roll bar is performed in the reverse order.
2. If the stabilizer bar has not been replaced, then orient the stabilizer pads according to the previously applied marks.
3. Tighten the nuts securing the stabilizer brackets.
4. First, install the collar on the lower stud of the lever and tighten the nut 2-3 turns. Use sliding pliers to press the collar and screw on the second nut.
[The original can be viewed on the portal: VAZBOOK]
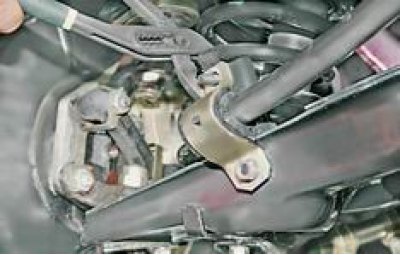
5. Having made sure that the cushion protrusion is in the opening of the clip, we finally tighten the nuts. Similarly, we install the stabilizer clip on the other side.