




Contents: Removal ↓ Installation ↓
The need to replace the seal arises when oil leakage is detected. The presence of oil drops on the crankcase is not allowed, but oil sweating is acceptable, which is not a sign of damage to the seal.
To complete the job you will need a three-jaw puller and fixing glue.
Removal
1. Place the vehicle on an inspection pit or overpass (see "Preparing a car for maintenance and repair").
2. On a vehicle with an injection system, remove the heat shield (see "Cardan transmission - removal and installation").
3. Disconnect the propeller shaft from the rear axle gearbox and unscrew the two bolts securing the intermediate support of the propeller shaft to the crossmember (see "Cardan transmission - removal and installation").
4. Disconnect the flexible coupling of the cardan transmission from the flange on the secondary shaft of the gearbox (see "Cardan transmission - disassembly and assembly") and move the cardan shaft back.
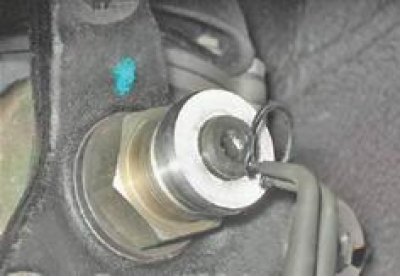
5. Use pliers to remove the thrust ring.
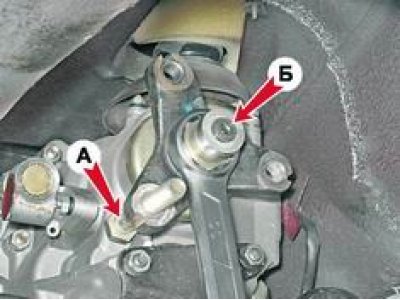
6. We fix the elastic coupling flange from turning by inserting bolt A into its hole. Using a key at 30 mm unscrew the flange fastening nut and move the centering ring B of the elastic coupling along the shaft.
The text is published on the portal: www.vazbook.ru
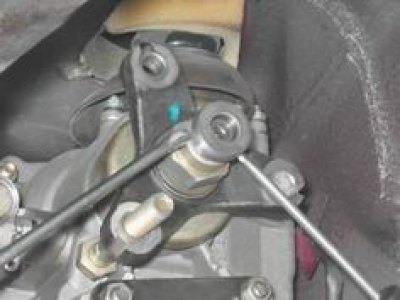
7. After tightening the nut a few turns, use two slotted screwdrivers to pry up the centering ring and remove it from the secondary shaft of the gearbox.
8. Unscrew the nut.
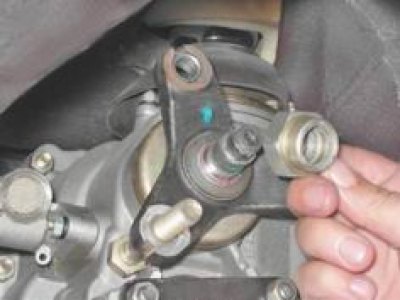
9. Remove the bolt from the flange hole.
10. Using the screw of the three-jaw puller against the end of the secondary shaft, press the flange off the shaft.
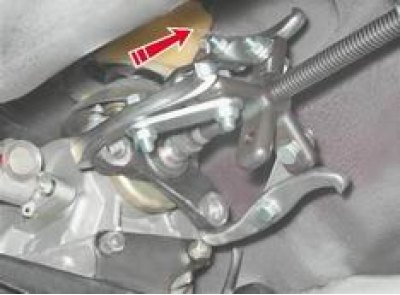
11. Remove the flange together with the washer.
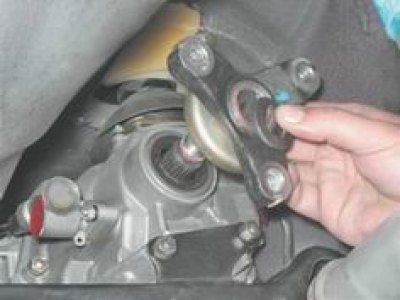
12. Using sliding pliers, remove the damaged seal.
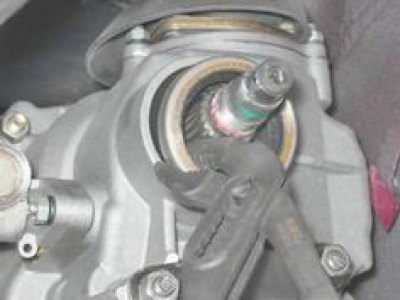
Installation
Attention! Before installing the seal, check the condition of the inner cylindrical surface of the flange that contacts the seal. It may have traces of corrosion and wear that should be removed by polishing.
Before installation, lubricate the surfaces of the new seal with a thin layer of plastic grease.
1. Press the seal in using a mandrel of suitable diameter.
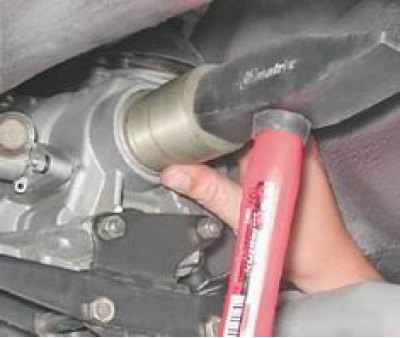
For clarity, we show the following operation on a removed gearbox.
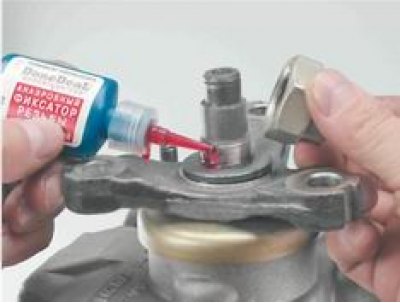
2. Using a hammer, press the flange onto the shaft. After installing the washer, apply fixing glue to the threaded surface of the shaft (according to the instructions for use) and tighten the nut.
3. Installation of the remaining removed parts is carried out in the reverse order.