




Trunk lid
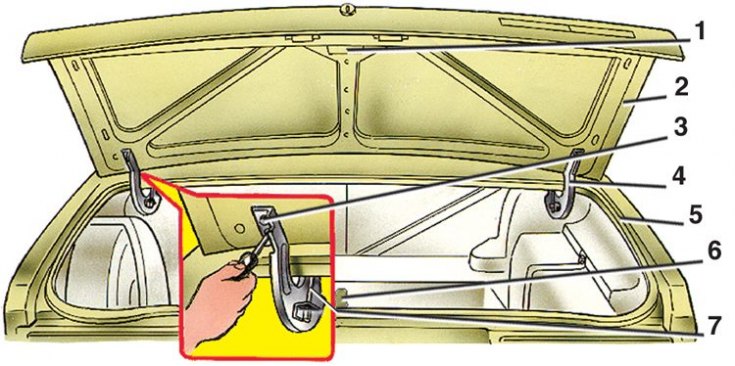
1 – lock; 2 – trunk lid; 3 – nut; 4 – loop; 5 – seal; 6 – retainer; 7 – torsion bar
Trunk lock
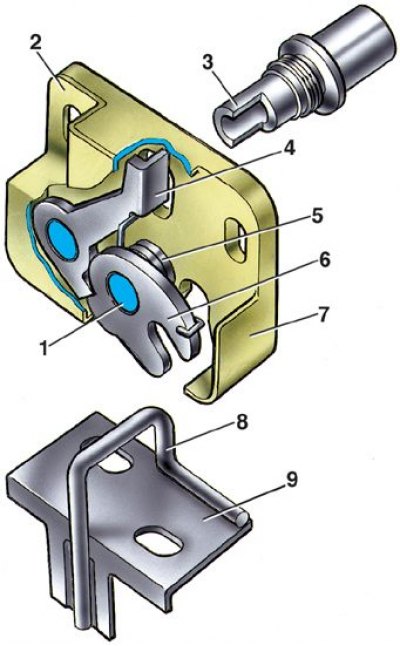
1 – rotor axis; 2 – lock body cover; 3 – lock drive extension; 4 – lever; 5 – spring; 6 – rotor; 7 – lock body; 8 – retainer; 9 – retainer plate
1. Removing and installing the cover is similar to removing and installing the hood, except for disconnecting the stop.
2. Lid position 2 (see fig. Trunk lid) the trunk is adjusted in the same way as the position of the hood.
3. If the castle (see fig. Trunk lock) the lid opens with difficulty or does not lock, adjust the position of the lock by outlining the contours of the lock body 7.
4. Loosen the lock mounting nuts.
5. Move the lock to a new position.
6. Lightly tighten the nuts, check the operation and finally secure the lock.
7The force for opening the lid is adjusted by rearranging the ends of the torsion bars 7 (see fig. Trunk lid) on one of the fixing teeth of loops 4.