




Longitudinal section of the coolant pump
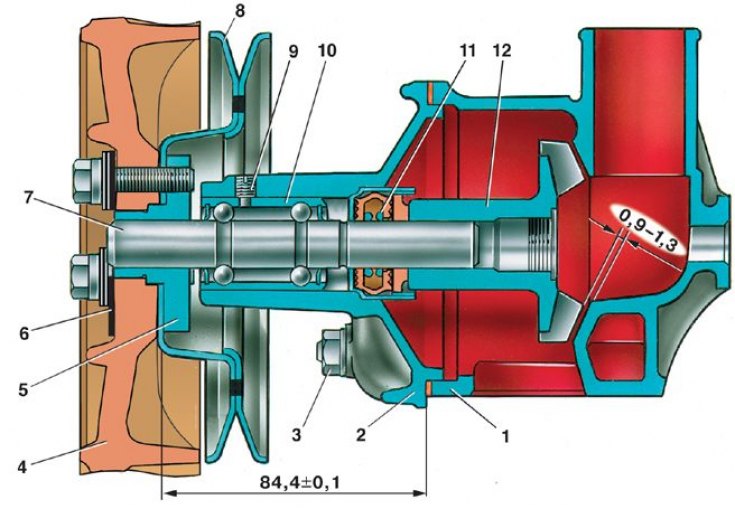
1 – body; 2 – lid; 3 – pump cover fastening nut; 4 – fan; 5 – pulley hub; 6 – overlay; 7 – roller; 8 – pulley; 9 – bearing lock screw; 10 – bearing; 11 – oil seal; 12 – impeller
Pressing the impeller onto the pump shaft using the A.60430 device
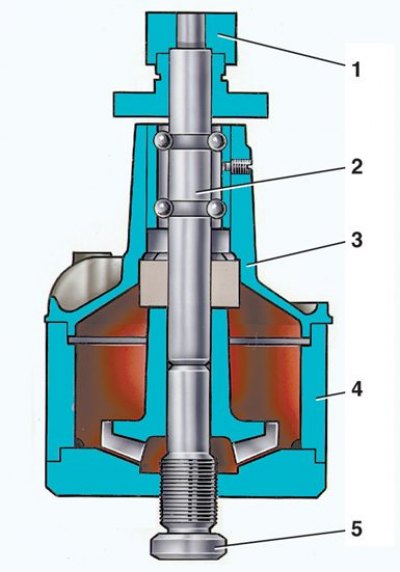
1 – support; 2 – pump shaft; 3 – pump housing cover; 4 – glass; 5 – Set screw
Disassembly
1. Disconnect pump body 1 from cover 2.
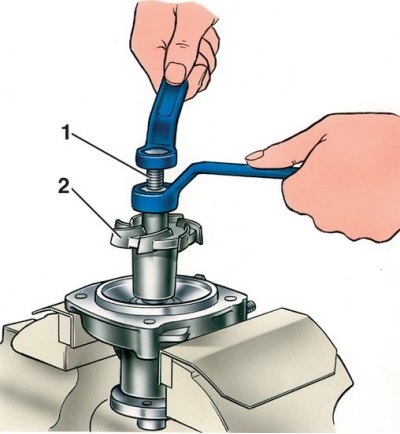
2. Secure the cover in a vice using spacers and remove the impeller from the shaft using puller A.40026.
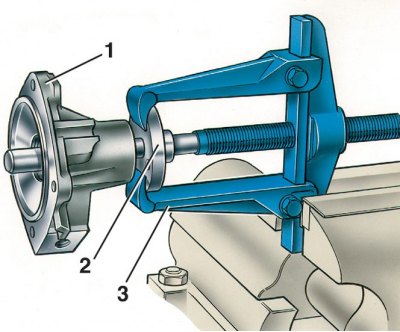
3. Remove hub 2 of the fan pulley from the shaft using puller A.40005/1/5 (1 – pump housing cover, 3 – puller).
4. Unscrew the lock screw 9 and remove the bearing with the pump shaft.
5. Remove seal 11 from housing cover 2.
Control
1. Check the axial clearance in the bearing. It should not exceed 0.13 mm under a load of 49 N (5 kgf), especially if significant pump noise was noted. Replace the bearing if necessary.
2. It is recommended to replace the pump seal and the gasket between the pump and the cylinder block during repairs.
3. Inspect the pump body and cover, no deformations or cracks are allowed.
(The original can be found on the website: vazbook.ru)
Assembly
1. Install the seal into the housing cover using a mandrel, without allowing it to slant.
2. Press the bearing with the shaft into the cover so that the socket of the locking screw coincides with the hole in the cover of the pump housing.
3. Tighten the bearing lock screw and caulk the contours of the socket to prevent the screw from loosening.
4. Press the pulley hub onto the shaft using the A.60430 device, maintaining a size of 84.4±0.1 mm. If the hub is made of metal ceramics, then after removal, press only a new one.
5. Press the impeller onto the shaft using the A.60430 device, which ensures a technological gap between the impeller blades and the pump body of 0.9–1.3 mm.
6. Assemble the pump body with the cover, placing a gasket between them.