
Disconnect wires from battery and alternator (see Removing the generator).
Checking the rectifier unit for a short circuit
We remove the wire from the output of the voltage regulator (see Replacing the voltage regulator).
We check the rectifier block with an ohmmeter (or with a test lamp and battery). If the resistance is high (instrument pointer on «infinity», and the control lamp is off) - the valves are correct.
General check
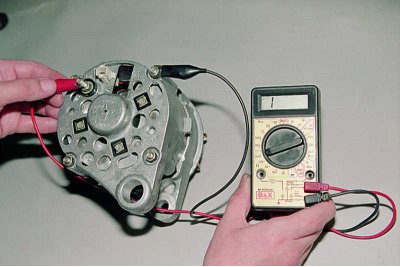
Checking for «breakdown» positive and negative valves. «Plus» connect an ohmmeter to the terminal «30» generator, and «minus» - on his body. If the ohmmeter shows a short circuit (gauge pointer at zero), then one of the gates «broken».
Refined Check
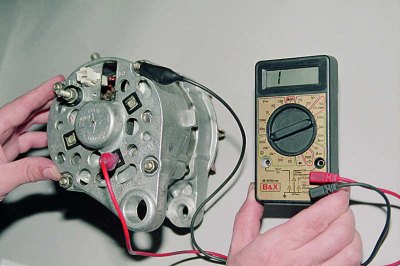
Negative valves are checked by connecting «plus» device with one of the bolts for fixing the rectifier unit, and «minus» with generator housing.
If the resistance is low, one or more valves «pierced» or there is a short circuit in the stator winding to the generator case.
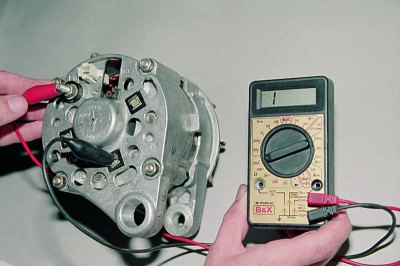
To test the positive valves «plus» connect the device to the output «30» generator, and «minus» - with one of the bolts for fixing the rectifier unit. Low resistance means «broken» one of the valves.
In case of failure of the elements of the rectifier unit, we recommend replacing it as an assembly. It is allowed to replace individual diodes, however, they will need to be repressed into a holder - an operation that requires accuracy and skill.
Checking the excitation winding of the rotor
Remove the brush holder (see Generator brush replacement).
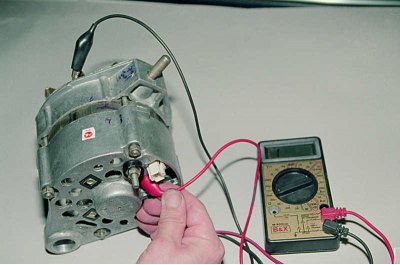
Through the window in the generator cover, we check the rotor for a short circuit to the housing by connecting one ohmmeter lead to the generator fan impeller, and the other to the contact ring of the excitation winding.
We also check the absence of a break in the excitation winding by connecting the device leads to slip rings.