
English Русский
Български
Беларускі
Український
Српски
Hrvatski
Română
Polski
Slovenský
Magyar
| Articles | Contacts | Sitemap |   
Repair and maintenance Lada Repair and maintenance Mazda Repair and maintenance Mitsubishi Repair and maintenance Toyota Repair and maintenance Land Rover Repair and maintenance Hyundai Repair and maintenance Nissan
VAZbook.ru


Main     1111   2101   2105   2106   2107   2109   2110   2115   2121  
VAZ-2108 (1984-2003) VAZ-2109 (1984-1997) VAZ-21099 (1990-2004)
  • Main
  • «Sputnik»
  • VAZ-21099
  • Electrical equipment
  • Ignition system
  • Disassembling the ignition distributor

Disassembling the ignition distributor (VAZ-21099)

            0

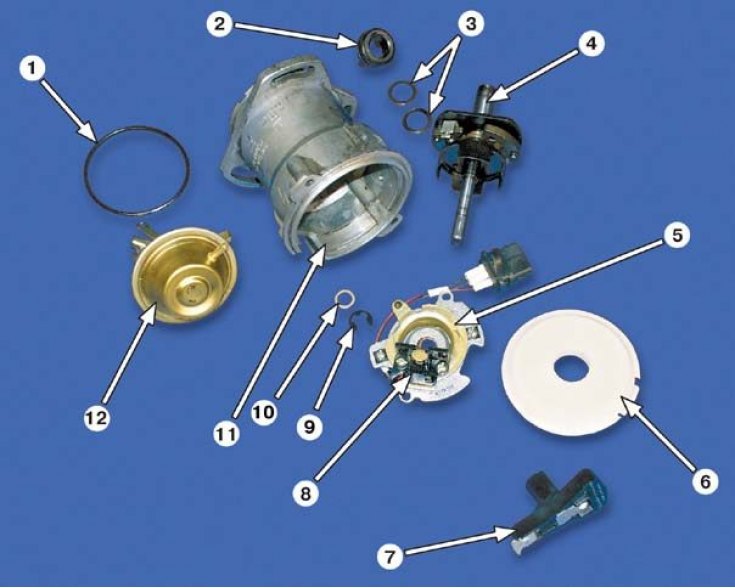
Distributor: 1 - sealing ring; 2 - coupling; 3 - adjusting washers; 4 - roller with centrifugal…

Distributor: 1 - sealing ring; 2 - coupling; 3 - adjusting washers; 4 - roller with centrifugal regulator; 5 - support plate; 6 - dust shield; 7 - runner; 8 - Hall sensor; 9 - lock washer; 10 - thrust washer; 11 - body; 12 - vacuum corrector

Distributor: 1 - sealing ring; 2 - coupling; 3 - adjusting washers; 4 - roller with centrifugal…


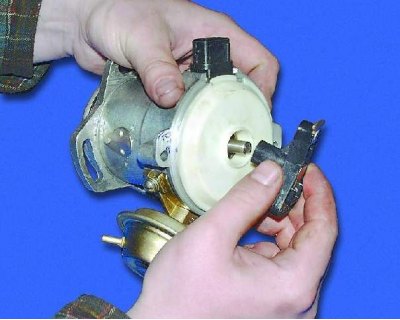
1. Remove the runner by pulling it up.
1. Remove the runner by pulling it up.


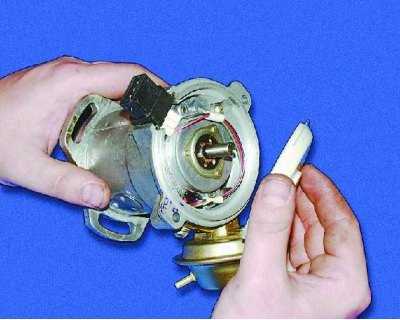
2. Remove the dust shield.


2. Remove the dust shield.


The original can be found on the website VAZbook

3. Loosen the screw securing the low voltage wire terminal.
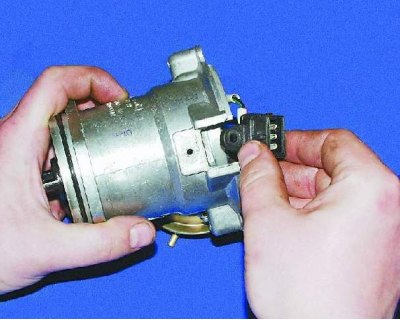
3. Loosen the screw securing the low voltage wire terminal.


4. Remove the terminal from the distributor housing.
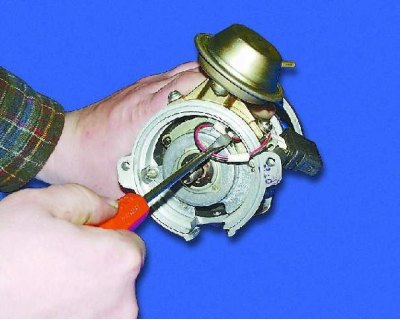
4. Remove the terminal from the distributor housing.


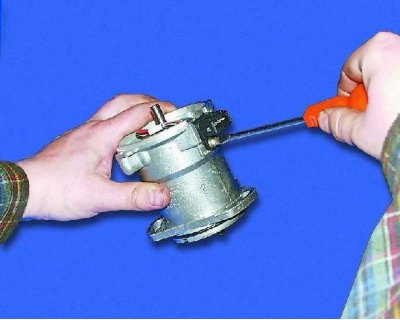
5. Use a screwdriver to release the holder tabs and remove the wire from the holder.
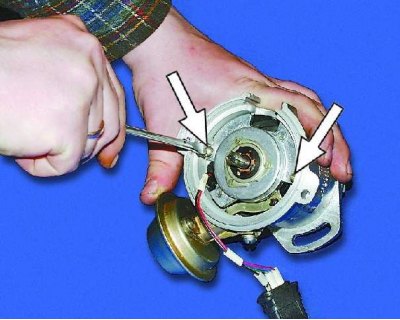
5. Use a screwdriver to release the holder tabs and remove the wire from the holder.


6. Remove the two screws securing the Hall sensor support plate.
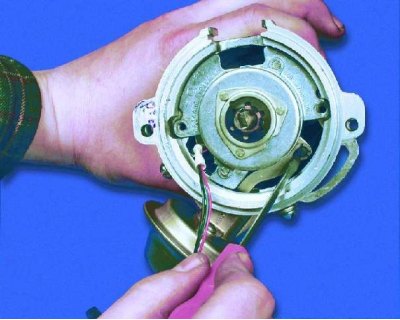

6. Remove the two screws securing the Hall sensor support plate.


7. Remove the retaining ring from the support plate pin.
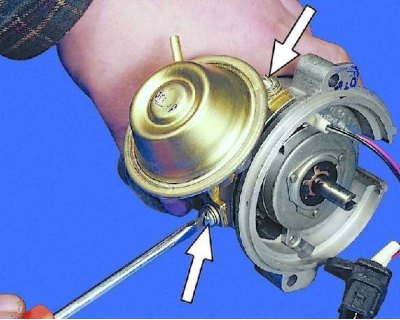
7. Remove the retaining ring from the support plate pin.


8. Unscrew the two screws securing the vacuum corrector.
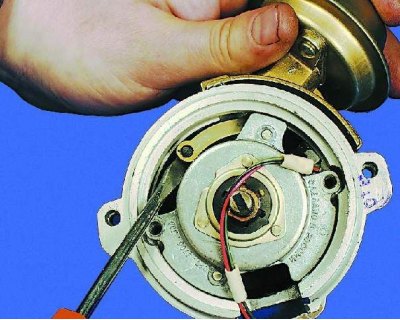
8. Unscrew the two screws securing the vacuum corrector.


9. Using a screwdriver, remove the vacuum corrector rod from the support plate pin.
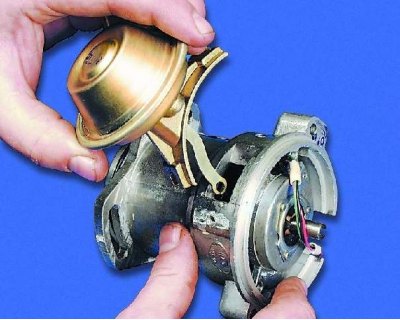
9. Using a screwdriver, remove the vacuum corrector rod from the support plate pin.


10. Remove the vacuum corrector.
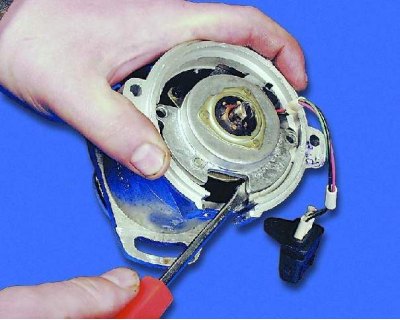
10. Remove the vacuum corrector.


11. Use a screwdriver to lift the support plate...
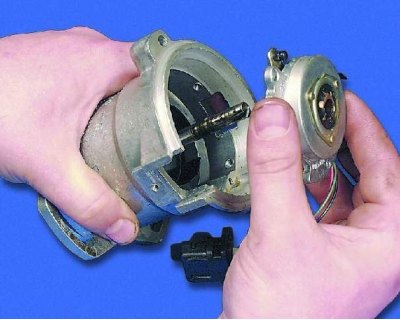
11. Use a screwdriver to lift the support plate...


12....and take it off.
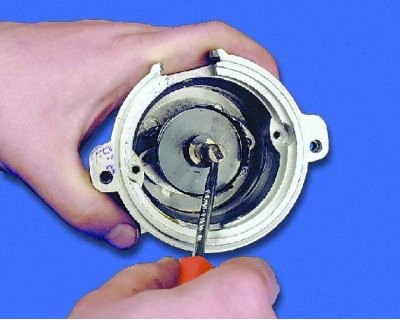
12....and take it off.


13. Remove the retaining ring from the distributor shaft.
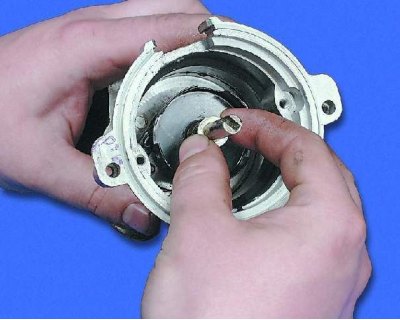
13. Remove the retaining ring from the distributor shaft.


14. Remove the thrust washer from the distributor shaft.
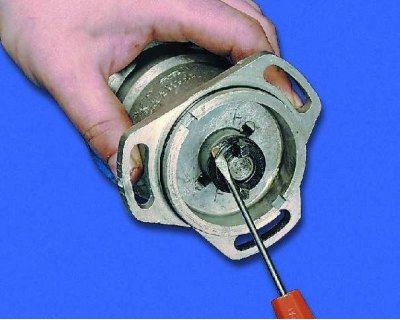
14. Remove the thrust washer from the distributor shaft.


15. Remove the snap ring that holds the clutch mounting pin.
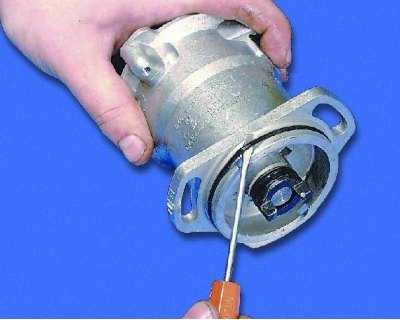
15. Remove the snap ring that holds the clutch mounting pin.


16. Use a screwdriver to pry up the sealing ring and remove it.
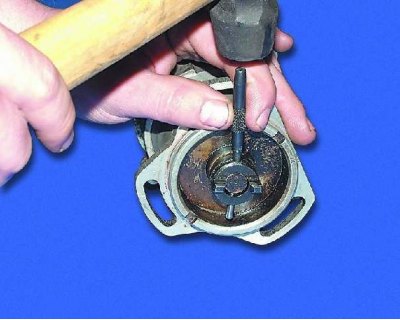
16. Use a screwdriver to pry up the sealing ring and remove it.


17. Knock out the coupling mounting pin using a suitable punch.
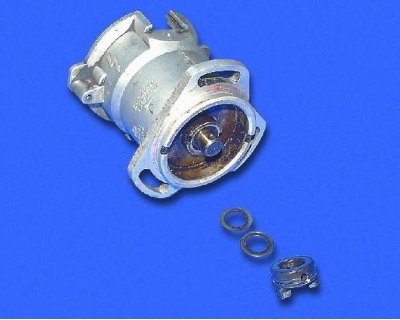
17. Knock out the coupling mounting pin using a suitable punch.


18. Remove the distributor drive coupling and adjusting washers.
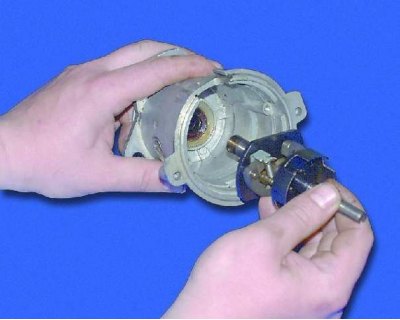
18. Remove the distributor drive coupling and adjusting washers.


19. Remove the roller with the centrifugal regulator.
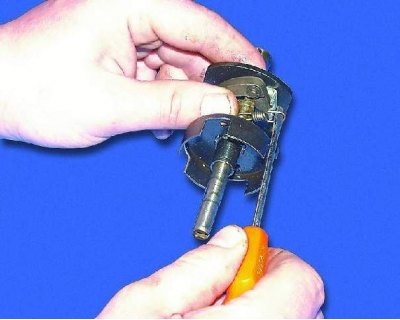
19. Remove the roller with the centrifugal regulator.


20. Using a screwdriver, remove the two weight springs from the struts.
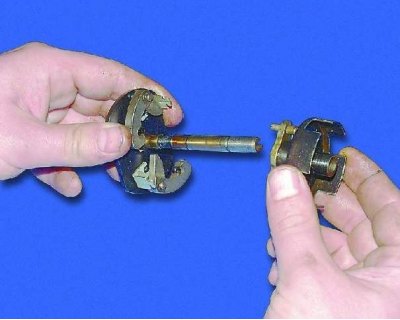
20. Using a screwdriver, remove the two weight springs from the struts.


21. Remove the centrifugal governor driven plate from the screen.
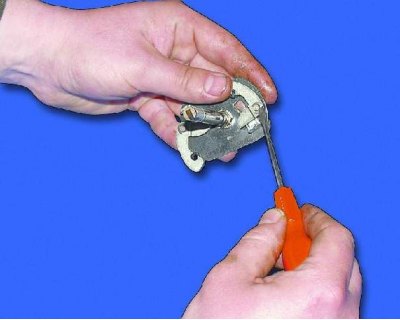
21. Remove the centrifugal governor driven plate from the screen.


22. Remove the retaining rings from the weights.
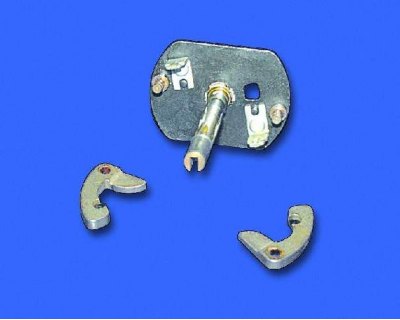
22. Remove the retaining rings from the weights.


23. Remove both weights from the axles.
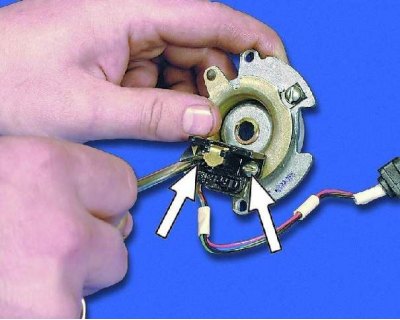
23. Remove both weights from the axles.


24. Loosen the two mounting screws and remove the Hall sensor from the support plate.

On some ignition distributors, the Hall sensor is attached to the support plate using rivets. In this case, the Hall sensor is replaced as a complete assembly with the support plate.
On some ignition distributors, the Hall sensor is attached to the support plate using rivets. In…


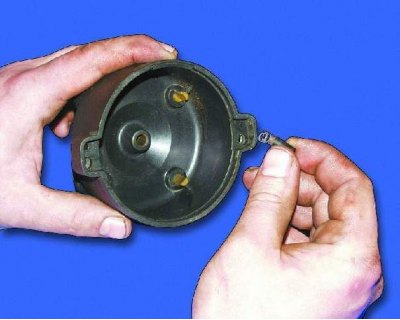
25. Remove the coal with the spring from the lid if it needs to be replaced.


This article is available at russian, bulgarian, belarusian, ukrainian, serbian, croatian, romanian, polish, slovak, hungarian
The text was reviewed by the specialist: Grigory Vologodtsev

Share with friends:

Previous articles
VAZ-21099: Ignition system
Next articles

Ignition distributor
Elements of the ignition system
Defect detection of ignition distributor
Assembly of the ignition distributor
Ignition coil
Checking the ignition coil
Checking and replacing the switch

More articles from other manuals on VAZ cars:
➠ Disassembling the ignition distributor sensor VAZ-21214 (1994-2006)
➠ Gap between contacts of the breaker in the ignition distributor VAZ-21011 (1974-1983)
➠ Ignition distributor — testing on the bench VAZ-21051 (1979-2010)
➠ Ignition distributor VAZ-2106 (1976-2006)
➠ Ignition distributor — lubrication VAZ-2107 (1982-2012)
Link in different formats to this page


Visitor comments

No comments yet


How much will 36 + 31 ?


VAZ-21099 (1990-2004) 
  • General information
  • Specifications
  • User manual
  • Maintenance
  • Car care
  • Troubleshooting
  • Power unit
  • Engine repair
  • Cooling and lubrication system
  • Power and exhaust system
  • Transmission
  • Car gearbox
  • Clutch and drive shafts
  • Chassis
  • Car suspension
  • Steering
  • Brake system
  • Body
  • Exterior
  • Interior
  • Doors and locks
  • Electrical equipment
  • Equipment and devices
  • Lighting and signaling
  • Engine electrics
  • Ignition system


VAZ-2109 (1984-1997) 
  • General information
  • Vehicle operation
  • Vehicle device
  • Power unit
  • Engine repair
  • Cooling and lubrication system
  • Supply system
  • Transmission
  • Clutch
  • Gearbox and drive
  • Chassis
  • Car suspension
  • Steering
  • Brake system
  • Body
  • Body elements
  • Electrical equipment
  • Engine electrics
  • Equipment and devices


VAZ-2108 (1984-2003) 
  • General information
  • Introduction to guide
  • Power unit
  • Engine repair
  • Cooling and lubrication system
  • Power and exhaust system
  • Transmission
  • Clutch and drive shafts
  • Car gearbox
  • Chassis
  • Front suspension
  • Rear suspension
  • Steering
  • Brake system
  • Body
  • Exterior
  • Interior
  • Doors and glass
  • Electrical equipment
  • Equipment and devices
  • Engine electrics
  • Ignition system


VAZbook.ru © 2017 · Mobile version · Contact with administration · Sitemap: EN BG BY UA RS HR RO PL SK HU · Site search · News and articles VAZ-1111 · VAZ-11113 · VAZ-2101 · VAZ-21011 · VAZ-2104 · VAZ-2105 · VAZ-21051 · VAZ-2106 · VAZ-21061 · VAZ-2107 · VAZ-21099 · VAZ-2109 · VAZ-2108 · VAZ-2110 · VAZ-2112 · VAZ-2114 · VAZ-2115 · VAZ-2121 · VAZ-21213 · VAZ-21214 ·
The site stores technical data using cookies to improve the service.