
Attention! The switch generates a large amount of heat during operation. Besides, "weight" The switch is connected through its heatsink. Therefore, periodically clean the heatsink of the switch from dust and dirt to improve heat dissipation.

1. Disconnect from terminal "TO" ignition coil brown wire with red stripe (the wire goes to the contact "1" switch).
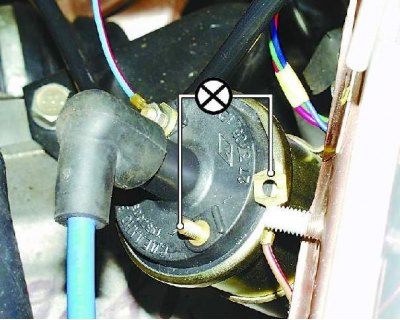
2. Connect this wire to a 12V 3W test light. Connect the other contact of the lamp to the terminal "TO" ignition coils. Turn the engine over with the starter, and the lamp should flash. If the lamp does not light up, replace the switch.
This test method allows you to check if the switch supplies control pulses to the ignition coil. More accurate check (the duration and shape of the pulses) the switch must be produced on a special stand.
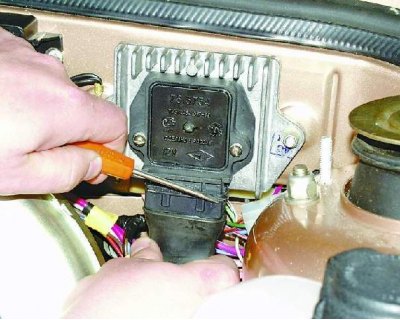
3. To replace the switch, disconnect the block with wires from the ignition switch by pressing the spring clip on the block with a screwdriver.
Before removing the switch, disconnect the wire from the terminal "–" battery.
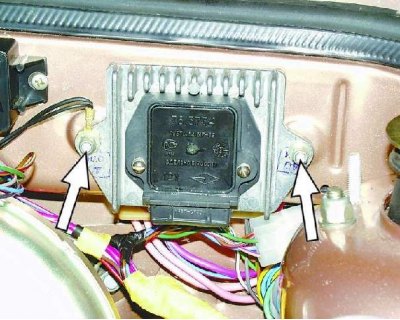
4. Remove the two heatsink mounting nuts and remove the switch with the heatsink.
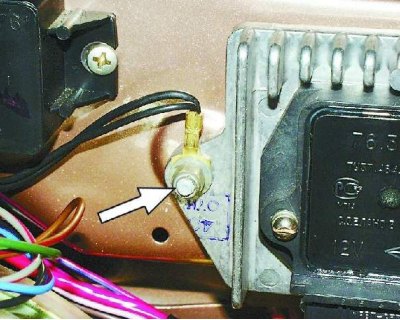
5. Install the new switch with heatsink in the reverse order of removal. Please note: a wire must be fixed under the left nut "masses".