English Русский
Български
Беларускі
Український
Српски
Hrvatski
Română
Polski
Slovenský
Magyar
| Articles | Contacts | Sitemap |   
Repair and maintenance Lada Repair and maintenance Mazda Repair and maintenance Mitsubishi Repair and maintenance Toyota Repair and maintenance Land Rover Repair and maintenance Hyundai Repair and maintenance Nissan
VAZbook.ru


Main     1111   2101   2105   2106   2107   2109   2110   2115   2121  
VAZ-2108 (1984-2003) VAZ-2109 (1984-1997) VAZ-21099 (1990-2004)
  • Main
  • «Sputnik»
  • VAZ-21099
  • Electrical equipment
  • Equipment and devices
  • Disassembling the windshield wiper

Disassembling the windshield wiper (VAZ-21099)

            0

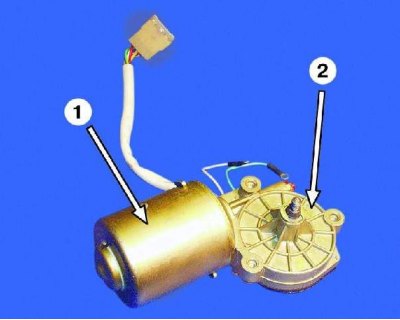
1 – electric motor; 2 – gearbox
1 – electric motor; 2 – gearbox


1 – electric motor; 2 – gearbox


1. Loosen the windshield wiper mechanism crank mounting nut.
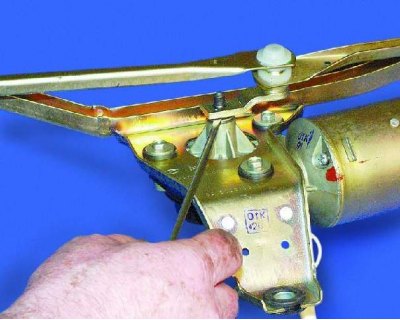
1. Loosen the windshield wiper mechanism crank mounting nut.


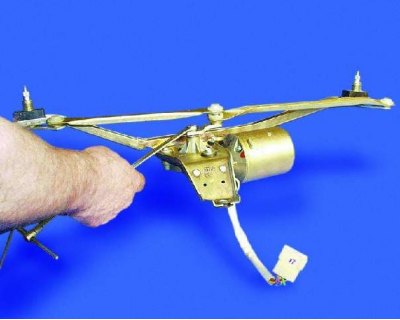
2. Remove the crank from the gearbox shaft by prying it off with a screwdriver.
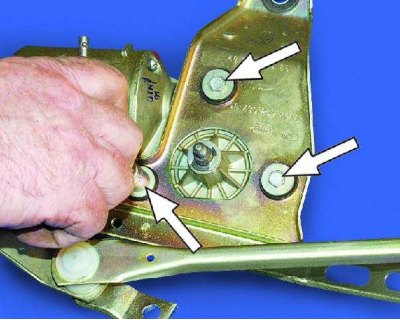
2. Remove the crank from the gearbox shaft by prying it off with a screwdriver.


3. Unscrew the three bolts securing the gearbox to the electric motor.
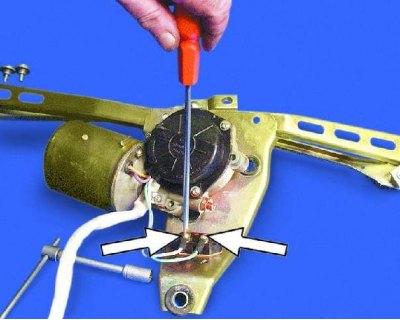


3. Unscrew the three bolts securing the gearbox to the electric motor.


4. Loosen the two screws securing the electric motor wires and disconnect the wires from the thermal bimetallic fuse. Remove the motor from the bracket.
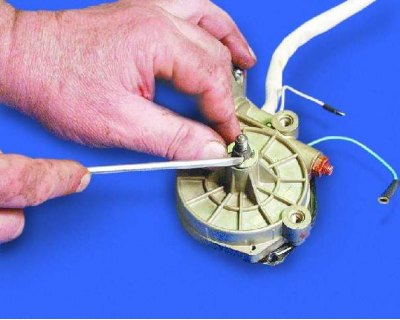
4. Loosen the two screws securing the electric motor wires and disconnect the wires from the…


5. Remove the retaining ring from the gearbox shaft.
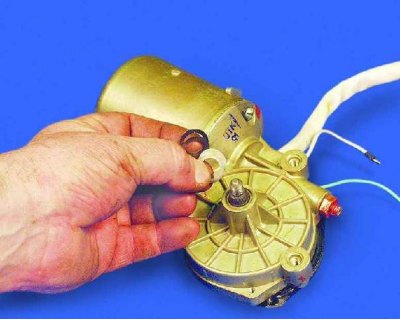
5. Remove the retaining ring from the gearbox shaft.


6. Remove the adjusting washers from the gearbox shaft.

The text is taken from the online resource: VazBook.ru


Mark the adjusting washers so that during assembly they are installed in the same places and in the same quantity.
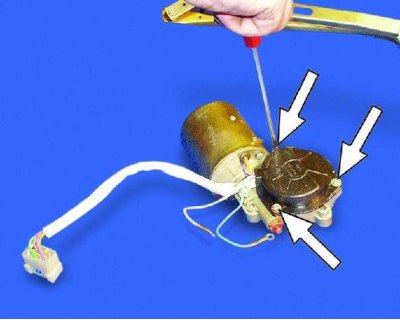
Mark the adjusting washers so that during assembly they are installed in the same places and in the…


7. Unscrew the three mounting screws...
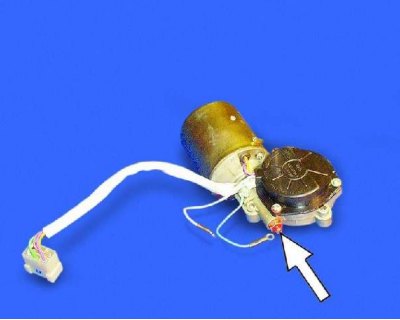
7. Unscrew the three mounting screws...


Warning: When disassembling, do not loosen the adjusting screw, otherwise the axial clearance of the armature shaft will be disturbed.
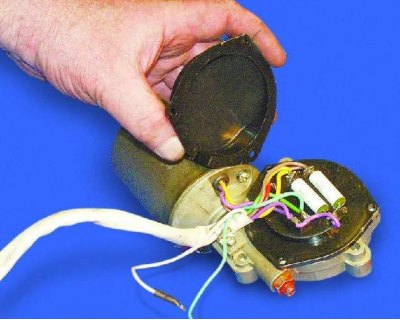

Warning: When disassembling, do not loosen the adjusting screw, otherwise the axial clearance of…


8....remove the gearbox cover.

8....remove the gearbox cover.


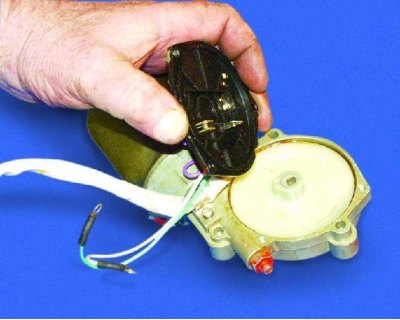
9. Remove the panel from the gearbox.
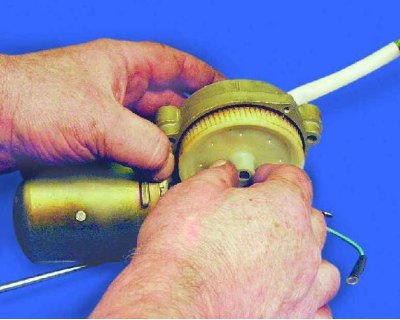
9. Remove the panel from the gearbox.


10. Remove the gear reducer.
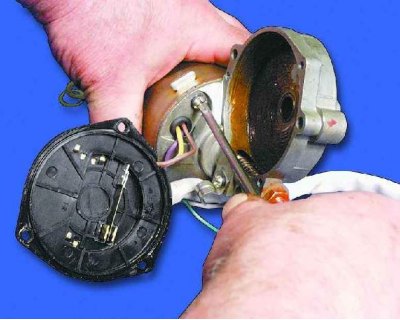
10. Remove the gear reducer.


11. Unscrew the two screws (the second one is located behind the gearbox housing)...
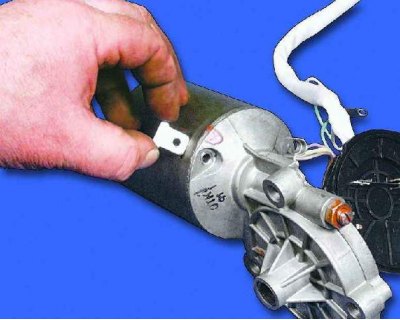
11. Unscrew the two screws (the second one is located behind the gearbox housing)...


12....and remove the two lug nuts.
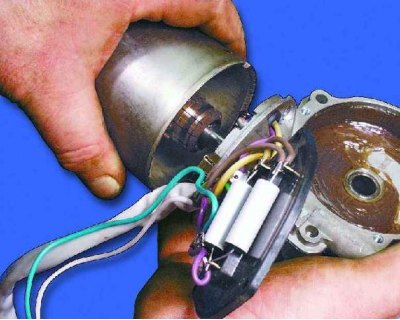
12....and remove the two lug nuts.


13. Remove the gearbox housing with the brush holder from the electric motor housing.
13. Remove the gearbox housing with the brush holder from the electric motor housing.


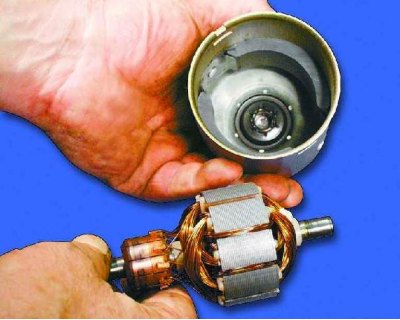
14. Remove the anchor from the motor housing. After disassembling, blow the motor housing with compressed air to remove carbon dust.
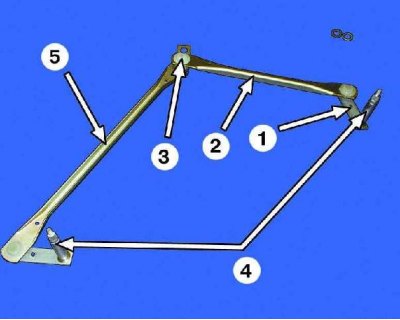
Windscreen wiper rods of non-separable design: 1 – crank; 2 - short pull; 3 – rod joint; 4 –…

Windscreen wiper rods of non-separable design: 1 – crank; 2 - short pull; 3 – rod joint; 4 – windshield wiper mechanism roller; 5 - long pull
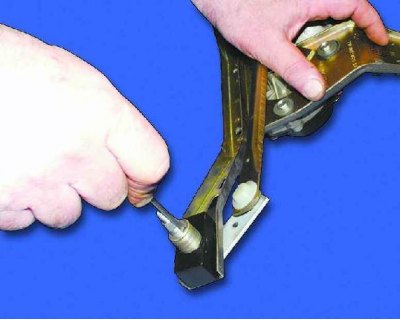

Windscreen wiper rods of non-separable design: 1 – crank; 2 - short pull; 3 – rod joint; 4 –…


15. Remove the retaining rings from both wiper shafts.
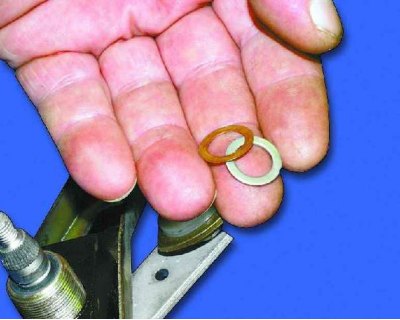
15. Remove the retaining rings from both wiper shafts.


16. Remove the adjusting washers from both wiper shafts.
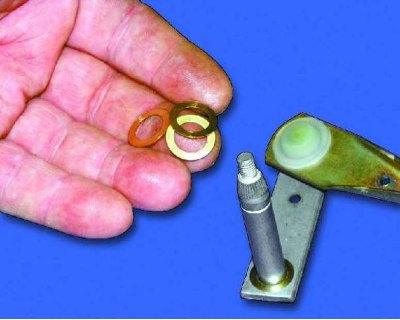
16. Remove the adjusting washers from both wiper shafts.


17. Remove the rods from the wiper bracket and remove the adjusting washers from both shafts.

17. Remove the rods from the wiper bracket and remove the adjusting washers from both shafts.
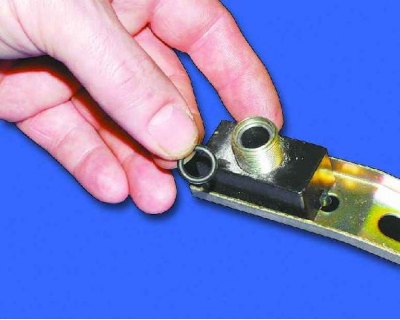

18. Remove the O-rings from the grooves on both sides of the bracket.


This article is available at russian, bulgarian, belarusian, ukrainian, serbian, croatian, romanian, polish, slovak, hungarian
The text was reviewed by the specialist: Grigory Vologodtsev

Share with friends:

Previous articles
VAZ-21099: Equipment and devices
Next articles

Windscreen Wiper — Removal
Heater resistor
Heater rods
Heater radiator
Disassembly and assembly of the heater fan
Windscreen wiper defect detection
Windscreen wiper assembly and installation
Instrument panel (high)
Instrument panel (low)
Electrical diagram of the VAZ-21099 car

More articles from other manuals on VAZ cars:
➠ Checking the windshield wiper relay VAZ-1111 (1988-1996)
➠ Possible malfunctions of the windshield wiper VAZ-2101 (1970-1983)
➠ Possible malfunctions of the windshield wiper VAZ-2105 (1979-2010)
➠ Windshield Wiper Blades — Replacement VAZ-2106 (1976-2006)
➠ Windshield Wiper Blades — Replacement VAZ-2107 (1982-2012)
Link in different formats to this page


Visitor comments

No comments yet


How much will 24 + 28 ?


VAZ-21099 (1990-2004) 
  • General information
  • Specifications
  • User manual
  • Maintenance
  • Car care
  • Troubleshooting
  • Power unit
  • Engine repair
  • Cooling and lubrication system
  • Power and exhaust system
  • Transmission
  • Car gearbox
  • Clutch and drive shafts
  • Chassis
  • Car suspension
  • Steering
  • Brake system
  • Body
  • Exterior
  • Interior
  • Doors and locks
  • Electrical equipment
  • Equipment and devices
  • Lighting and signaling
  • Engine electrics
  • Ignition system


VAZ-2109 (1984-1997) 
  • General information
  • Vehicle operation
  • Vehicle device
  • Power unit
  • Engine repair
  • Cooling and lubrication system
  • Supply system
  • Transmission
  • Clutch
  • Gearbox and drive
  • Chassis
  • Car suspension
  • Steering
  • Brake system
  • Body
  • Body elements
  • Electrical equipment
  • Engine electrics
  • Equipment and devices


VAZ-2108 (1984-2003) 
  • General information
  • Introduction to guide
  • Power unit
  • Engine repair
  • Cooling and lubrication system
  • Power and exhaust system
  • Transmission
  • Clutch and drive shafts
  • Car gearbox
  • Chassis
  • Front suspension
  • Rear suspension
  • Steering
  • Brake system
  • Body
  • Exterior
  • Interior
  • Doors and glass
  • Electrical equipment
  • Equipment and devices
  • Engine electrics
  • Ignition system


VAZbook.ru © 2017 · Mobile version · Contact with administration · Sitemap: EN BG BY UA RS HR RO PL SK HU · Site search · News and articles VAZ-1111 · VAZ-11113 · VAZ-2101 · VAZ-21011 · VAZ-2104 · VAZ-2105 · VAZ-21051 · VAZ-2106 · VAZ-21061 · VAZ-2107 · VAZ-21099 · VAZ-2109 · VAZ-2108 · VAZ-2110 · VAZ-2112 · VAZ-2114 · VAZ-2115 · VAZ-2121 · VAZ-21213 · VAZ-21214 ·
The site stores technical data using cookies to improve the service.