
English Русский
Български
Беларускі
Український
Српски
Hrvatski
Română
Polski
Slovenský
Magyar
| Articles | Contacts | Sitemap |   
Repair and maintenance Lada Repair and maintenance Mazda Repair and maintenance Mitsubishi Repair and maintenance Toyota Repair and maintenance Land Rover Repair and maintenance Hyundai Repair and maintenance Nissan
VAZbook.ru


Main     1111   2101   2105   2106   2107   2109   2110   2115   2121  
VAZ-2110 (1995-2007) VAZ-2112 (1999-2007)
  • Main
  • «Lada»
  • VAZ-2110
  • Body
  • Ventilation and heating
  • Removal and installation the interior heater

Removal and installation the interior heater (VAZ-2110)

            0

Contents: Removal ↓ Installation ↓

Removal


1. Prepare the car for repair work.

2. Disconnect the terminal from the negative terminal of the battery.

3. Remove the decorative engine cover.

4. Drain the coolant from the engine cooling system.

5. Remove the throttle valve.

6. Remove the windshield wiper and remove the steam outlet hose from the heater radiator pipe.

Note: You don't have to remove the windshield wiper, but then, in order to remove the heater, you need to: on the VAZ 21124 engine (1.6i), move the intake module forward; on the VAZ 2112 engine (1.5i) remove the receiver.


7. Using a 10 mm socket wrench, unscrew the nut (1) of the upper fastening of the protective screen and the nut (2) of the lower fastening of the right part of the engine compartment trim.
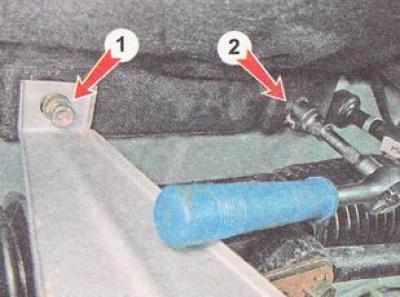
7. Using a 10 mm socket wrench, unscrew the nut (1) of the upper fastening of the protective screen…


8. Using a slotted screwdriver, release the brake booster hose holder.
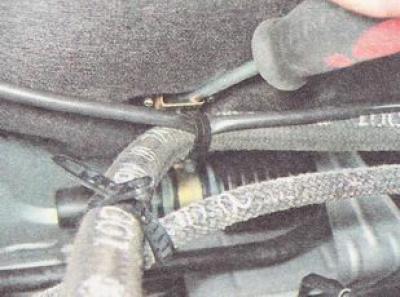
8. Using a slotted screwdriver, release the brake booster hose holder.


Note: The following three operations are performed only on VAZ 2112 hatchback and VAZ 2111 station wagon vehicles.


9. Disconnect the connectors from the terminals of the rear window washer electric pump.
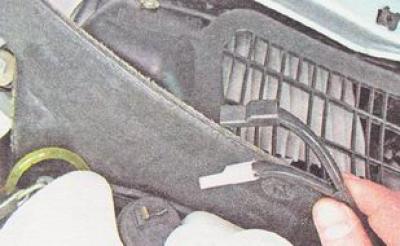
9. Disconnect the connectors from the terminals of the rear window washer electric pump.


10. Disconnect the windshield washer reservoir fastening belt.
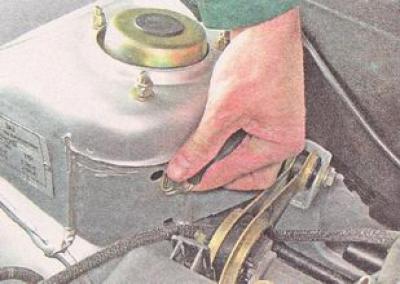
10. Disconnect the windshield washer reservoir fastening belt.


11. Remove the windshield washer reservoir and, having disconnected the tubes from its electric pump, remove it. If there is a lot of washer fluid in the reservoir, without disconnecting the tubes, set it aside on the front wing.
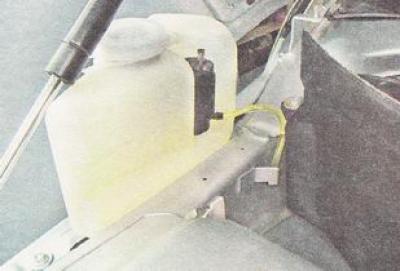
11. Remove the windshield washer reservoir and, having disconnected the tubes from its electric…


12. Remove the right part of the engine compartment trim.
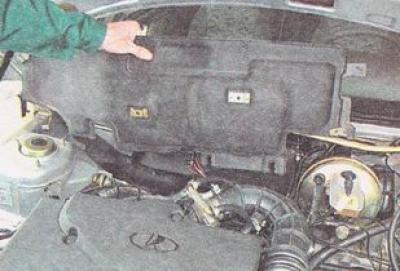

12. Remove the right part of the engine compartment trim.


13. Using nippers, cut the clamp securing the heater wiring harness.
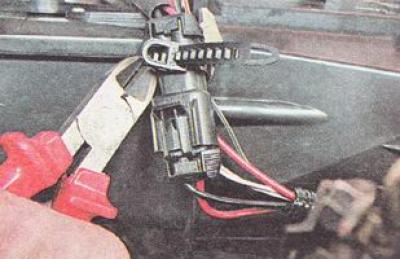
13. Using nippers, cut the clamp securing the heater wiring harness.


14. After pressing the lock, disconnect the heater electric fan connectors.
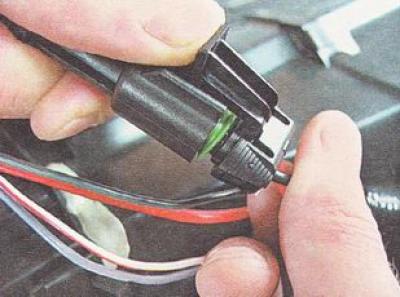
14. After pressing the lock, disconnect the heater electric fan connectors.


15. Disconnect the wire connector from the additional heater resistor.
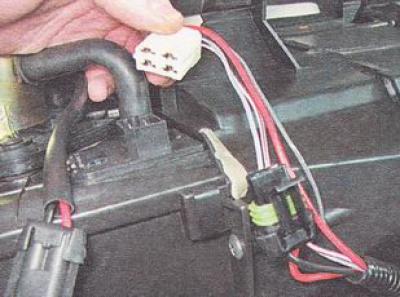
15. Disconnect the wire connector from the additional heater resistor.


16. Disconnect the two connectors of the air mixing heater flap electric drive and the flap position sensor.
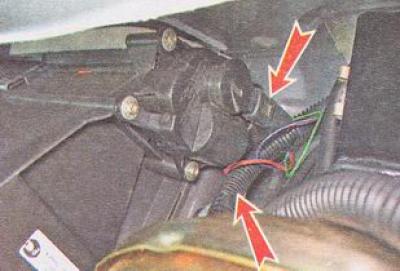
16. Disconnect the two connectors of the air mixing heater flap electric drive and the flap…


Warning. If the heater radiator hoses are "stuck" to the fragile plastic radiator pipes, then, in order not to damage the radiator, it is better to cut off the old hoses and install new ones during assembly. The cost of the hoses is significantly lower than the cost of the heater radiator.


17. Using a Phillips screwdriver, loosen the clamp on the upper heater radiator hose and remove the hose from the radiator pipe.
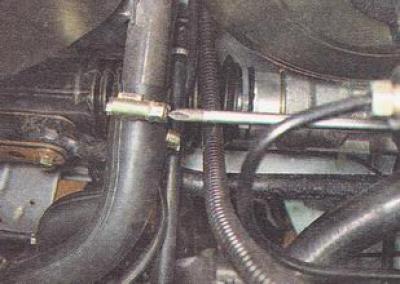
17. Using a Phillips screwdriver, loosen the clamp on the upper heater radiator hose and remove the…


18. In the same way, disconnect the lower hose of the heater radiator.
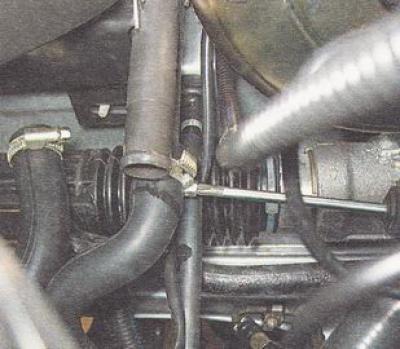
18. In the same way, disconnect the lower hose of the heater radiator.


[The text is copied from the online portal: vazbook.ru]

19. Using a 10 mm deep-head socket wrench, unscrew the nut of the lower right heater mount.
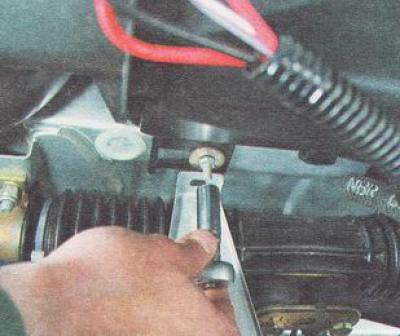
19. Using a 10 mm deep-head socket wrench, unscrew the nut of the lower right heater mount.


20. Using the same key, unscrew the nut of the left lower heater mount.
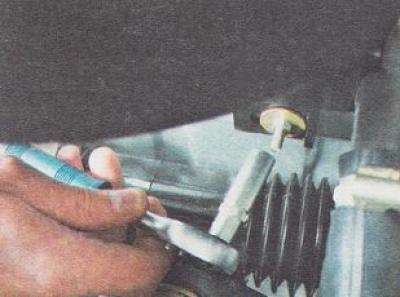
20. Using the same key, unscrew the nut of the left lower heater mount.


21. Using an 8 mm socket wrench, unscrew the screw of the upper heater mount.
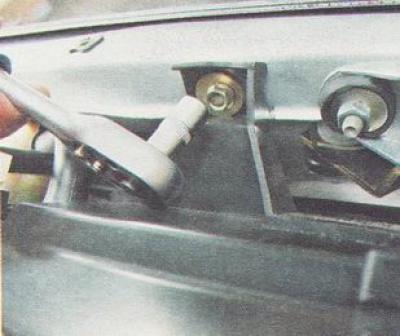
21. Using an 8 mm socket wrench, unscrew the screw of the upper heater mount.


22. Using a 10 mm socket wrench, unscrew the nut of the right heater mount.
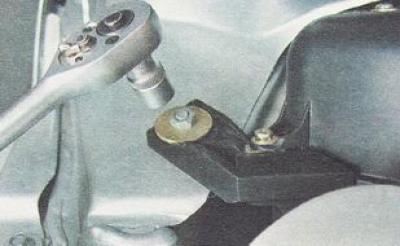
22. Using a 10 mm socket wrench, unscrew the nut of the right heater mount.


Warning: When performing the following operation, be careful because there is always a small amount of coolant in the heater core. Avoid contact with skin.


23. Move the heater housing forward and upward and remove it from the car.
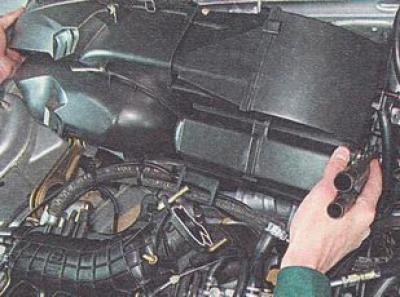
23. Move the heater housing forward and upward and remove it from the car.


Note: Do not separate the heater body parts unless necessary.


Installation


We install the interior heater and all previously removed parts in the reverse order. After installing the heater, fill the engine cooling system with liquid.


This article is available at russian, bulgarian, belarusian, ukrainian, serbian, croatian, romanian, polish, slovak, hungarian
The text was reviewed by the specialist: Grigory Vologodtsev

Share with friends:

Previous articles
VAZ-2110: Ventilation and heating
Next articles

Removal and installation the cabin air temperature sensor
Removal and installation the heating and ventilation control unit
Replacing the cabin ventilation filter
Description of the interior ventilation and heating system
Removal and installation the heater radiator
Removal and installation the heater fan
Removal and installation an additional heater resistor
Removal and installation the motor with the heater flap position sensor

More articles from other manuals on VAZ cars:
➠ Removal and installation the interior heater VAZ-1111 (1988-1996)
➠ Heater motor malfunctions VAZ-2101 (1970-1983)
➠ Interior lighting VAZ-2105 (1979-2010)
➠ Interior rear view mirror — removal and installation VAZ-2106 (1976-2006)
➠ Interior rear view mirror — removal and installation VAZ-2107 (1982-2012)
Link in different formats to this page


Visitor comments

No comments yet


How much will 43 + 13 ?


VAZ-2110 (1995-2007) 
  • General information
  • Vehicle description
  • Specifications
  • User manual
  • Maintenance
  • Operation and maintenance
  • Tips for car owner
  • Power unit
  • Engine repair
  • Supply system
  • Control system
  • Cooling system
  • Exhaust system
  • Transmission
  • Clutch
  • Car gearbox
  • Front wheel drives
  • Chassis
  • Suspension and wheels
  • Steering
  • Brake system
  • Body
  • Exterior
  • Interior
  • Doors and glass
  • Tailgate
  • Ventilation and heating
  • Electrical equipment
  • Equipment and devices
  • Headlights and lighting
  • Engine electrics
  • Electrical circuits


VAZ-2112 (1999-2007) 
  • General information
  • Operation and maintenance
  • Power unit
  • Engine repair
  • Supply system
  • Control system
  • Cooling system
  • Exhaust system
  • Transmission
  • Clutch
  • Car gearbox
  • Front wheel drives
  • Chassis
  • Wheels and tires
  • Car suspension
  • Steering
  • Brake system
  • Body
  • Exterior
  • Interior
  • Doors and glass
  • Tailgate
  • Ventilation and heating
  • Electrical equipment
  • Equipment and devices
  • Headlights and lighting
  • Engine electrics
  • Electrical circuits


VAZbook.ru © 2017 · Mobile version · Contact with administration · Sitemap: EN BG BY UA RS HR RO PL SK HU · Site search · News and articles VAZ-1111 · VAZ-11113 · VAZ-2101 · VAZ-21011 · VAZ-2104 · VAZ-2105 · VAZ-21051 · VAZ-2106 · VAZ-21061 · VAZ-2107 · VAZ-21099 · VAZ-2109 · VAZ-2108 · VAZ-2110 · VAZ-2112 · VAZ-2114 · VAZ-2115 · VAZ-2121 · VAZ-21213 · VAZ-21214 ·
The site stores technical data using cookies to improve the service.