




Pressing out the lower arm joints
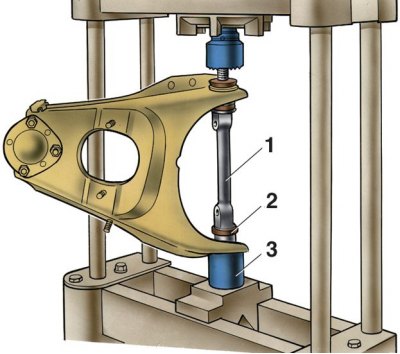
1 – lever axis; 2 – lever hinge; 3 – mandrel
Signs that require replacement of rubber-metal hinges are described in subsection 6.1.2.
Replacement
Lower arm
1. Install it on the mandrel 3 (see fig. Pressing out the lower arm hinges) and press the press punch on the axis 1 of the lever until the hinge 2 is pressed out of the hole. To press out the second hinge, turn the lever over and repeat the operation.
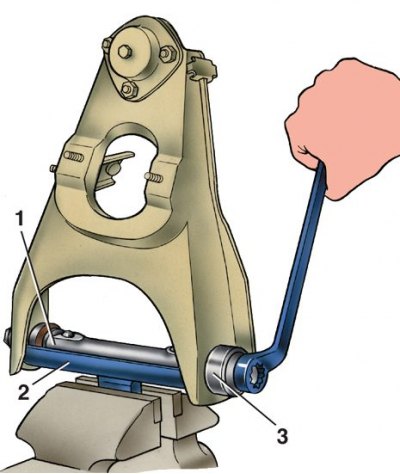
2. Press in the lower arm joints using spacer sleeve A.74177/2 clamped in a vice and fixture A.74177/1. Mount the arm with axle 1 on fixture 2, place the joint on the axle and press it into the arm socket using fixture 3 (A.74177/1). Then repeat the above operations to press in the second joint on the other side of the arm.
Upper arm
The original can be viewed on the portal: vazbook.ru
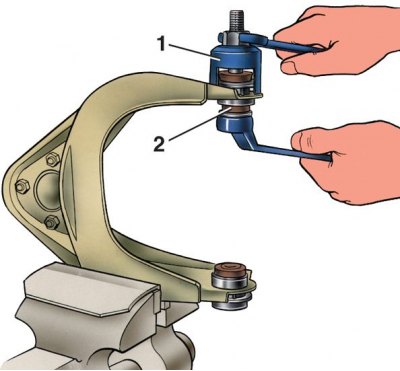
3. To press out the joints, install the device 1 A.47046 on the lever so that the head of the device screw is directed inward. Press out the joint 2 by tightening the device screw.
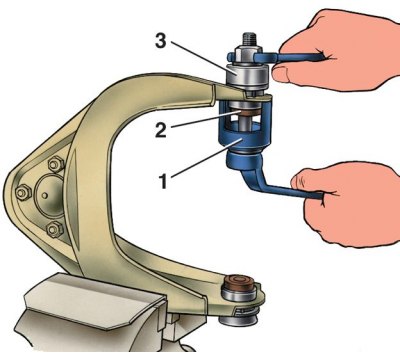
4. To press in, insert joint 2 into the lever socket and install tool 1 A.47046 complete with cap 3. By tightening the tool screw, press the joint into the lever socket.