

2. Check for wear on the running surfaces of the ball joints by manually turning the ball pin. Free movement of the finger or its sticking is unacceptable.
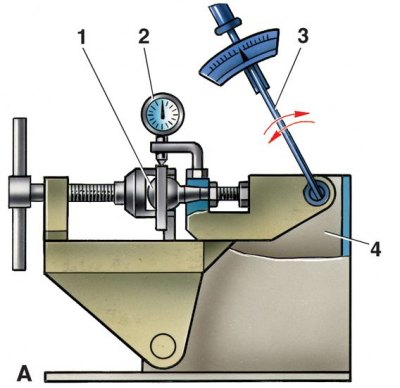
3. A more accurate check of the condition of the upper ball joint 1 by the value of the radial and axial clearance is carried out on the fixture 02.8701.9502. To do this, install the ball joint 1 in the socket of the tool and tighten it with a screw. Install indicator 2 in the fixture bracket so that its leg rests against the side surface of the hinge body, and the indicator needle is at zero.
4. Install the torque wrench 3 in the upper socket of the tool and apply a torque of 196 Nm to it (20 kgf·m) in both directions, determine the total radial clearance in the ball joint using the indicator. If it exceeds 0.7 mm, replace the hinge with a new one.
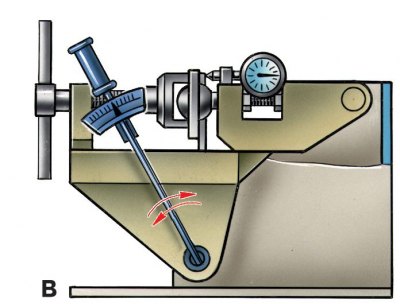
5. Similarly, the axial clearance in the ball joint is checked, after changing its fastening in the fixture. Axial clearance in the hinge is allowed no more than 0.7 mm.