
English Русский
Български
Беларускі
Український
Српски
Hrvatski
Română
Polski
Slovenský
Magyar
| Articles | Contacts | Sitemap |   
Repair and maintenance Lada Repair and maintenance Mazda Repair and maintenance Mitsubishi Repair and maintenance Toyota Repair and maintenance Land Rover Repair and maintenance Hyundai Repair and maintenance Nissan
VAZbook.ru


Main     1111   2101   2105   2106   2107   2109   2110   2115   2121  
VAZ-2106 (1976-2006) VAZ-21061 (1976-2006)
  • Main
  • «Zhiguli»
  • VAZ-2106
  • Power unit
  • Supply system
  • Carburetor body — disassembly

Carburetor body — disassembly (VAZ-2106)

            0

Contents: Disassembly ↓ Assembly ↓
We disassemble the carburetor body to wash its parts, clean the channels, replace defective parts, gaskets and diaphragms.

To complete the job you will need carburetor cleaner or acetone.

Disassembly


1. Remove the carburetor (see "Carburetor - removal and installation").

2. Disconnect the carburetor cover from the body (see "Carburetor cover - removal and disassembly").

3. Using a slotted screwdriver, unscrew the main fuel jet A secondary chamber with marking "150" ("162" for carburetor 2105-1107010-20) and main fuel jet B primary chamber with markings "112" ("107" for carburetor 2105-1107010-20).
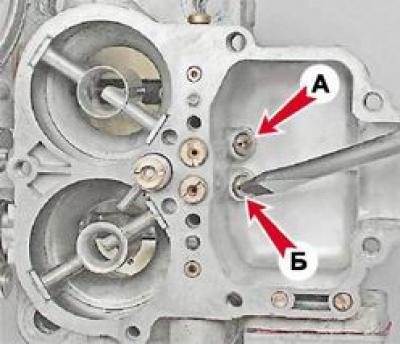
3. Using a slotted screwdriver, unscrew the main fuel jet A secondary chamber with marking «150»…


4. Using the same tool, unscrew the main air jet IN secondary chamber with marking "150" ("176" for carburetor 2105-1107010-20) and main air jet G primary chamber with the same marking.
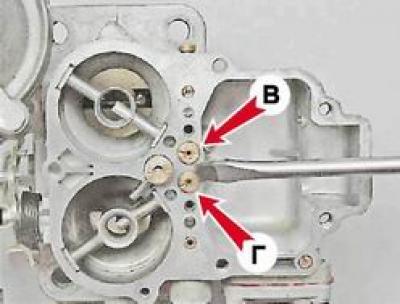
4. Using the same tool, unscrew the main air jet IN secondary chamber with marking «150» («176» for…


5. Emulsion tubes are installed under the air jets in the wells. Using a suitable tool, we remove them from the wells. For this operation, you can use a file with a tapering working surface.
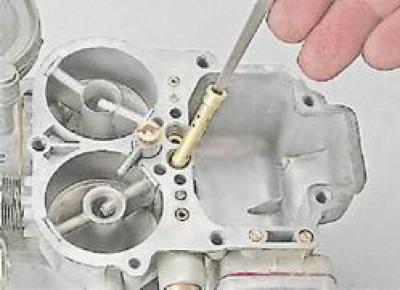


5. Emulsion tubes are installed under the air jets in the wells. Using a suitable tool, we remove…


6. Using a slotted screwdriver, unscrew the accelerator pump valve screw.
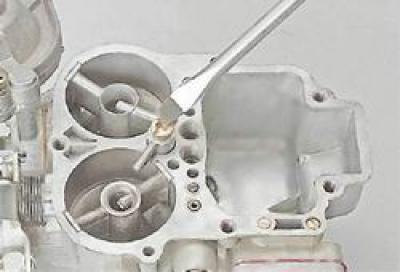
6. Using a slotted screwdriver, unscrew the accelerator pump valve screw.


7. Remove the valve with the accelerator pump sprayer and sealing ring. Using a thin screwdriver, remove the lower sealing ring from the hole.
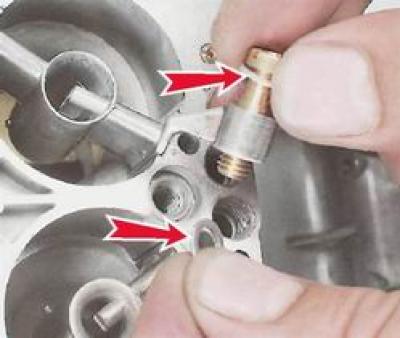
7. Remove the valve with the accelerator pump sprayer and sealing ring. Using a thin screwdriver,…


8. Using pliers, remove the small primary diffusers B and secondary A chambers. The primary chamber diffuser marking is "22" ("21" for carburetor 2105-1107010-20), the secondary one is "25".


If the diffusers cannot be removed after removing the throttle body (see below), knock them out from the opposite side using a soft metal punch.
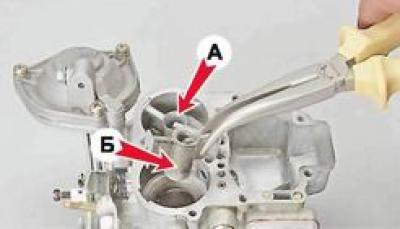
If the diffusers cannot be removed after removing the throttle body (see below), knock them out…


9. Using a slotted screwdriver with a blade width of no more than 3 mm, unscrew the accelerator pump screw and remove it from the channel.
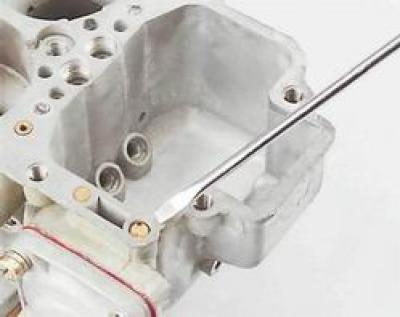
9. Using a slotted screwdriver with a blade width of no more than 3 mm, unscrew the accelerator…


10. Using a slotted screwdriver, unscrew the housing of the fuel jet of the secondary chamber transition system.
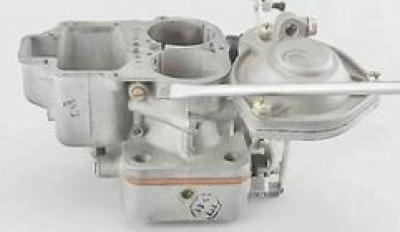
10. Using a slotted screwdriver, unscrew the housing of the fuel jet of the secondary chamber…


11. Remove the housing with the jet from the channel.

(The information is published on the website www.vazbook.ru)
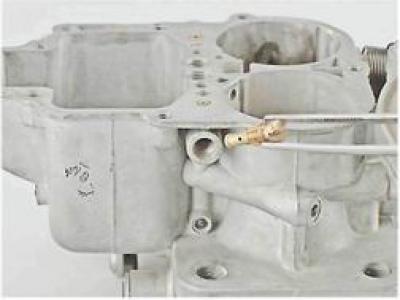
11. Remove the housing with the jet from the channel.


12. Remove the jet B from the body A.
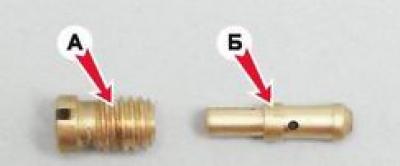
12. Remove the jet B from the body A.


13. Remove the electromagnetic valve (see "Solenoid valve - check and replacement").

14. Using a Phillips screwdriver, unscrew the four screws securing the accelerator pump diaphragm cover.
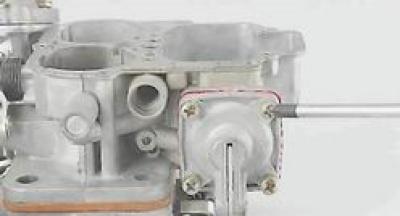
14. Using a Phillips screwdriver, unscrew the four screws securing the accelerator pump diaphragm…


15. Remove the cover, take out the spring and disconnect the diaphragm.
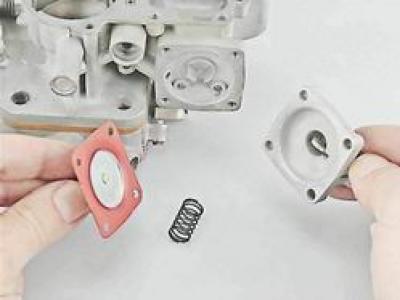
15. Remove the cover, take out the spring and disconnect the diaphragm.


16. Using pliers, disconnect and remove the return spring.
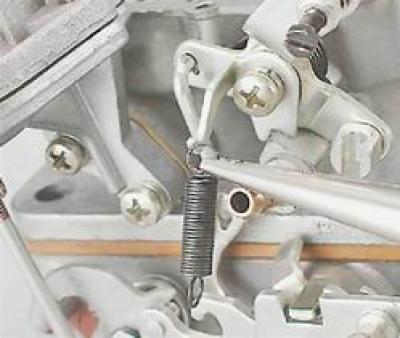
16. Using pliers, disconnect and remove the return spring.


17. Disconnect the throttle valve pneumatic drive (see "Pneumatic throttle actuator - removal and installation").

18. Using a Phillips screwdriver, unscrew the two screws securing the throttle body to the carburetor body.
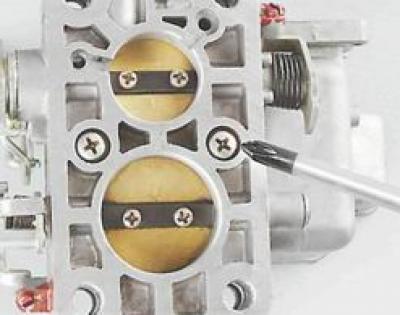
18. Using a Phillips screwdriver, unscrew the two screws securing the throttle body to the…


19. We separate the housings, disengaging the rod from the lever A.
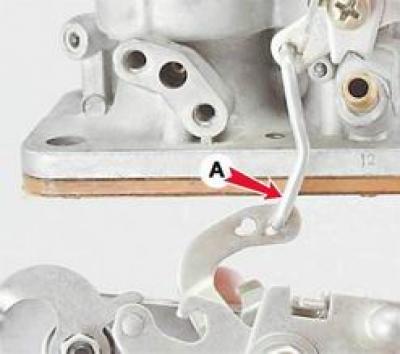
19. We separate the housings, disengaging the rod from the lever A.


20. Carefully remove the heat-insulating spacer with two cardboard gaskets.
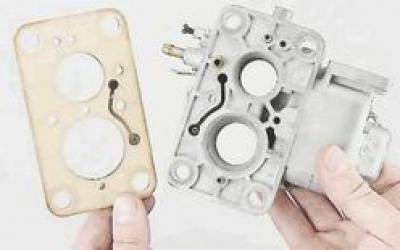
20. Carefully remove the heat-insulating spacer with two cardboard gaskets.


21. Using a Phillips screwdriver, unscrew the two screws securing the cover. Remove the cover together with the mixture quantity adjustment screw and gasket.
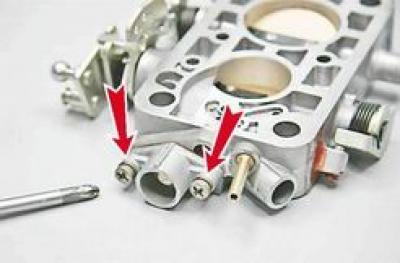
21. Using a Phillips screwdriver, unscrew the two screws securing the cover. Remove the cover…


22. Unscrew and remove the screw with the rubber sealing ring.
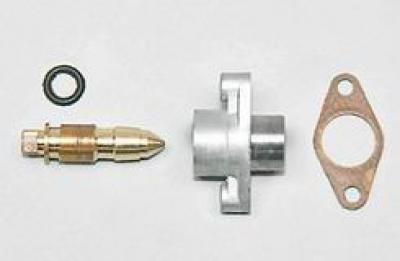
22. Unscrew and remove the screw with the rubber sealing ring.


23. Using a slotted screwdriver, unscrew and remove the quality screw with a rubber sealing ring. For ease of subsequent installation, remember the number of turns of the screw.

Note: If the screw has a limiting sleeve, use a slotted screwdriver to turn this sleeve until it breaks and remove its parts from the hole.
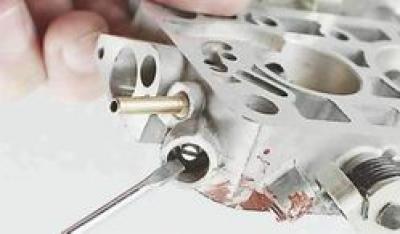

Note: If the screw has a limiting sleeve, use a slotted screwdriver to turn this sleeve until it…


Assembly


1. Before assembly, wash the carburetor parts with a cleaner or acetone. Blow out the fuel and air channels with compressed air. Check the condition of the gaskets: breaks and cracks are not allowed. If necessary, replace the gaskets with new ones. When assembling, lubricate all rubber sealing rings with engine oil. Assemble the carburetor body in the reverse order.

2. Install previously removed parts in the reverse order.


This article is available at russian, bulgarian, belarusian, ukrainian, serbian, croatian, romanian, polish, slovak, hungarian
The text was reviewed by the specialist: Grigory Vologodtsev

Share with friends:

Previous articles
VAZ-2106: Supply system
Next articles

Carburetor — removal and installation
Carburetor Cover — Removal and Disassembly
Idle speed — adjustment
Air damper drive — checking and adjustment
Carburetor Drive — Checking and Adjusting
Fuel level in the float chamber — checking and adjustment
Needle valve and float — replacement
Starter — checking and adjustment
Pneumatic throttle actuator — removal and installation
Solenoid valve — checking and replacement

More articles from other manuals on VAZ cars:
➠ Carburetor body — disassembly VAZ-2104 (1984-2012)
➠ Carburetor body — disassembly VAZ-2107 (1982-2012)
➠ Body frame and attachments VAZ-1111 (1988-1996)
➠ The structure of the car body and its parts VAZ-2101 (1970-1983)
➠ Carburetor device VAZ-2109 (1984-1997)
Link in different formats to this page


Visitor comments

No comments yet


How much will 43 + 11 ?


VAZ-2106 (1976-2006) 
  • General information
  • Vehicle device
  • Operation and maintenance
  • Power unit
  • Engine repair
  • Supply system
  • Cooling system
  • Exhaust system
  • Transmission
  • Clutch
  • Car gearbox
  • Cardan gear
  • Rear axle
  • Chassis
  • Front suspension
  • Rear suspension
  • Wheels and tires
  • Steering
  • Brake system
  • Body
  • Exterior
  • Interior
  • Doors and glass
  • Electrical equipment
  • Equipment and devices
  • Headlights and lighting
  • Engine electrics
  • Electrical circuits


VAZ-21061 (1976-2006) 
  • General information
  • Specifications
  • Troubleshooting
  • Power unit
  • Engine repair
  • Cooling and lubrication system
  • Power and exhaust system
  • Transmission
  • Clutch
  • Car gearbox
  • Cardan gear
  • Rear axle
  • Chassis
  • Front suspension
  • Rear suspension
  • Steering
  • Brake system
  • Body
  • Exterior
  • Interior
  • Doors and windows
  • Heating and ventilation
  • Electrical equipment
  • Equipment and devices
  • Engine electrics
  • Ignition system
  • Lighting and signaling


VAZbook.ru © 2017 · Mobile version · Contact with administration · Sitemap: EN BG BY UA RS HR RO PL SK HU · Site search · News and articles VAZ-1111 · VAZ-11113 · VAZ-2101 · VAZ-21011 · VAZ-2104 · VAZ-2105 · VAZ-21051 · VAZ-2106 · VAZ-21061 · VAZ-2107 · VAZ-21099 · VAZ-2109 · VAZ-2108 · VAZ-2110 · VAZ-2112 · VAZ-2114 · VAZ-2115 · VAZ-2121 · VAZ-21213 · VAZ-21214 ·
The site stores technical data using cookies to improve the service.