




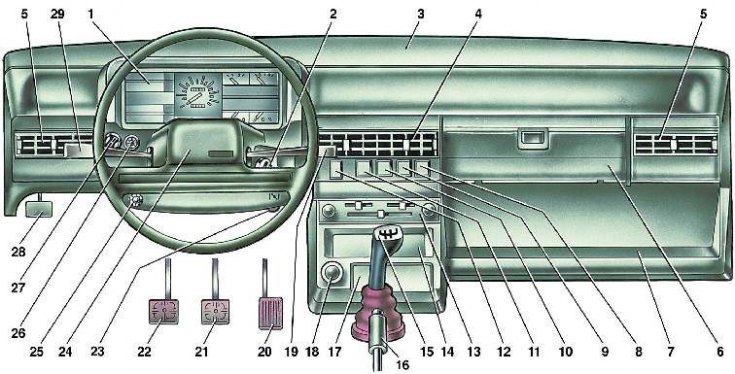
Figure 1. "Low" instrument panel: 1. Instrument cluster. 2. Ignition switch. 3. Instrument panel. 4. Central vents of the ventilation and heating system. 5. Side vents of the ventilation and heating system. 6. Glove compartment lid. 7. Shelf. 8. Plug. 9. Tailgate window heating switch. 10. Rear fog light switch. 11. Hazard warning light switch. 12. Central exterior lighting switch. 13. Ventilation and heating control panel. 14. Radio socket. 15. Gear shift lever. 16. Parking brake lever. 17. Ashtray. 18. Cigarette lighter. 19. Windscreen wiper and washer selector lever. 20. Accelerator pedal. 21. Brake pedal. 22. Clutch pedal. 23. Carburetor air damper cover handle. 24. Horn switch. 25. Trip meter reset handle. 26. Instrument lighting switch. 27. Headlight corrector handle. 28. Hood lock drive lever. 29. Direction indicator and headlight switch lever.
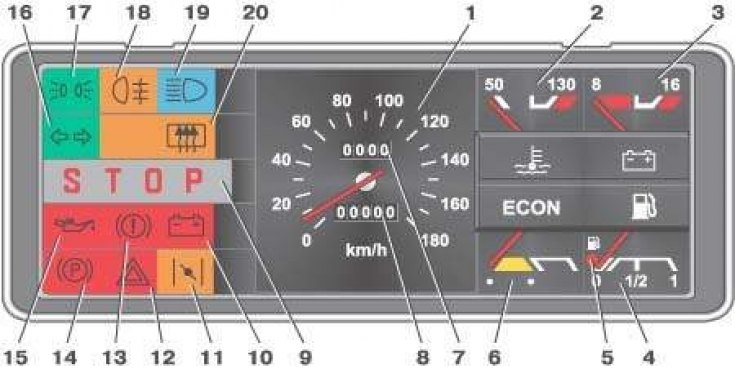
Figure 1a. Instrument cluster: 1. Speedometer. 2. Coolant temperature indicator. 3. Voltmeter. 4. Fuel level indicator. 5. Fuel reserve balance indicator light. 6. Econometer. 7. Daily mileage counter. 8. Total mileage counter. 9. "STOP" indicator light. 10. Battery charge indicator light. 11. Indicator light for covering the carburetor air flap. 12. Warning light for switching on the alarm system. 13. Brake fluid level drop indicator light. 14. Parking brake indicator light. 15. Emergency oil pressure indicator light. 16. Indicator light for turning on direction indicators. 17. Indicator lamp for turning on parking lights. 18. Warning lamp for switching on the rear fog lights. 19. Indicator lamp for switching on the high beam of the headlights. 20. Indicator light for switching on the rear door glass heating.
In the ignition switch (see item 7) the key can occupy the following positions:
- 0 - all consumers are off. The key cannot be removed. The steering is not locked;
- I — ignition on. Key cannot be removed. Steering not locked;
- II — ignition and starter are on. The key is turned clockwise until it stops, overcoming the spring force. The steering is not locked. In this position, the key is not fixed — to operate the starter, it must be held by hand. Immediately after starting the engine, the key should be released, and under the action of the return spring, it will return to position I.
The ignition switch has a built-in interlock device that will not allow the starter to be engaged when the engine is running. You can only turn the key back to position II after you have returned the key to position 0;
- III — ignition is off. The key is removed. When the key is removed, the steering is locked. To turn off the anti-theft device, insert the key into the ignition switch and, while turning the steering wheel slightly left and right, turn the key to position 0.
Set the headlight range control knob (see item 8) to one of four positions depending on the vehicle load:
- a) driver or driver and front seat passenger;
- b) driver and four passengers;
- v) driver, four passengers and cargo in the luggage compartment;
- g) driver and a fully loaded luggage compartment.
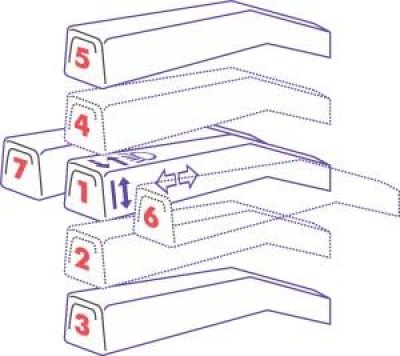
The direction indicator and headlight switch lever (see item 13) can be set to one of the following positions:
- 1 – in this position everything is off. You can turn on the low beam headlights by moving the central switch to the second fixed position;
- 2 – by moving the lever down, you turn on the left turn signals. The indicator lamp 16 in the instrument cluster will light up green. The lever is not fixed and will return to position I when released. This is convenient when the steering wheel turns at a small angle, for example when overtaking or changing lanes;
- 3 – if you need to fix the lever in the left turn position, move it further down until it stops. After returning the steering wheel to the straight-ahead position, the lever will automatically return to position I;
- 4 – by moving the lever up, you turn on the right turn signals. The indicator lamp 16 in the instrument cluster will light up green. The lever is not fixed and will return to position I when released;
- 5 – if you want to lock the lever in the right turn position, move it up to the stop. After returning the steering wheel to the straight-ahead position, the lever will automatically return to position I;
- 6 – if you need to signal with high beam headlights ("blink"), move the lever towards you several times. In this position, the lever is not fixed;
- 7 – when you move the lever away from you, the high beam headlights are turned on. The central switch of the external lighting should be in the second fixed position. When the high beam headlights are turned on, the indicator lamp 19 in the instrument cluster will light up blue. In this position, the lever is fixed.
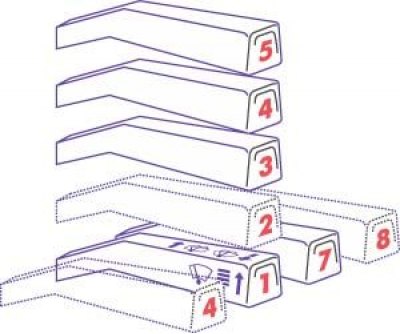
The windshield wiper and washer switch lever (see item 14) can be set to one of the following positions:
- 1 - in this position everything is off;
- 2 – by moving the lever up, you turn on the intermittent mode of the windshield wiper. In this case, the lever is not fixed and, when you release it, returns to position I;
- 3 – if you need to lock the lever in the intermittent wiper mode, move it further up. This mode is convenient to use in light rain or drizzle;
- 4 – by moving the lever up to the next fixed position, you turn on the low speed of the windshield wiper;
- 5 – by moving the lever even higher to the next fixed position, you turn on a higher speed of the windshield wiper;
- 6 – if you need to turn on the windshield washer, pull the lever towards you. In this position, the lever is not fixed. The windshield wiper will turn on simultaneously with the washer. If your car is equipped with headlight washers, then with the headlights on, in this position of the lever, the headlight washers will also turn on;
- 7 – if you want to turn on the rear window wiper, push the lever away from you. This position of the lever is fixed;
- 8 – if you need to turn on the rear window washer, move the lever further away from you to the non-fixed position. In this position of the lever, the rear window wiper continues to operate.
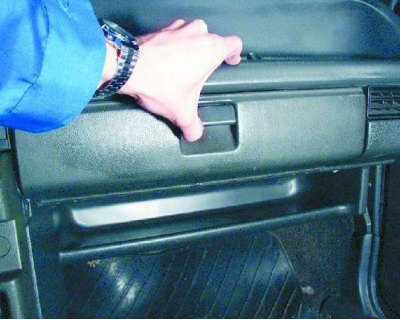
1. The glove box is designed to store small items. To open it, lift the lock handle up and lower the box lid. The open box is illuminated from the inside by a lamp that only lights up when the ignition is on.
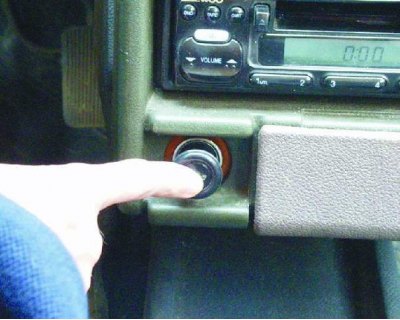
2. To turn on the cigarette lighter, press the handle of the cigarette lighter until it locks into place. After approximately 20 seconds, the handle will return to its original position with a click. Now remove the cigarette lighter from the socket. You can use the cigarette lighter again after 30 seconds.
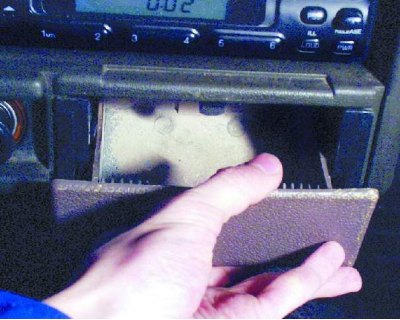
3. To open the ashtray, pull it towards you.
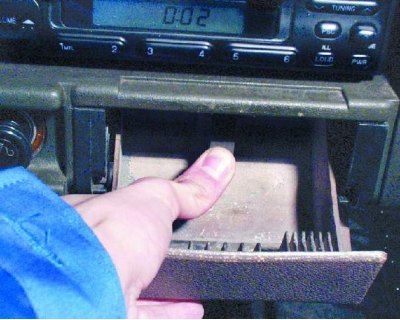
4. To clean the ashtray, you need to remove it. To do this, press on the cigarette extinguisher plate.
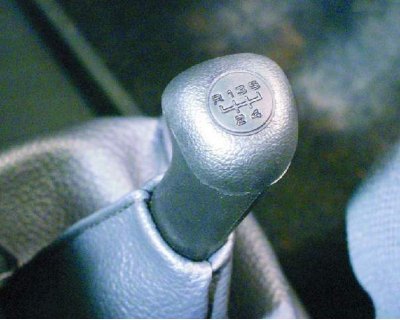
5. The gear shift pattern is shown on the lever handle. Reverse gear can only be engaged after the vehicle has come to a complete stop, 3 seconds after pressing the clutch pedal. When engaging reverse gear, the lever moves with noticeable resistance after passing the first gear position. Overcoming this resistance, move the lever to the left and forward.
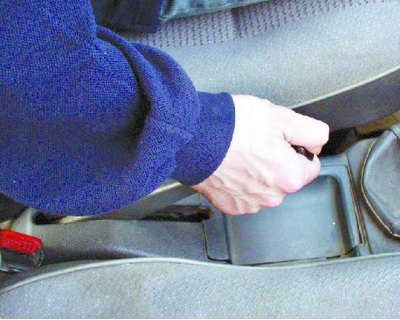
6. To engage the parking brake, lift the lever all the way up (when the brake is adjusted correctly, no more than 8 clicks). At the same time, the control lamp 14 in the instrument cluster will light up red. To release the parking brake, pull the lever up slightly by pressing the button on the end of the lever handle and lower it all the way down.
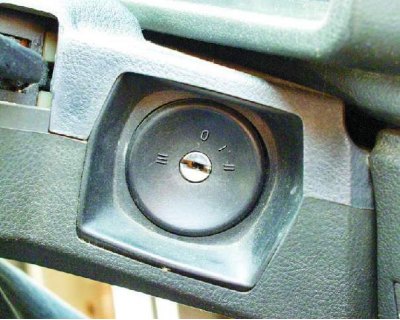
7. The ignition switch (lock), combined with the anti-theft device that locks the steering wheel, is located on the right side of the steering column.
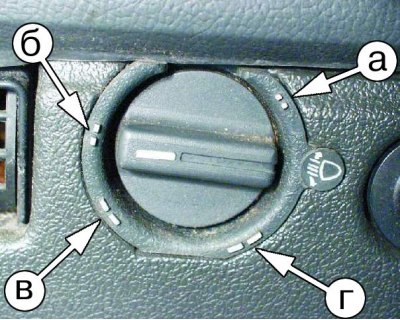
8. The hydraulic corrector is used to adjust the direction of the headlight beam depending on the vehicle load.
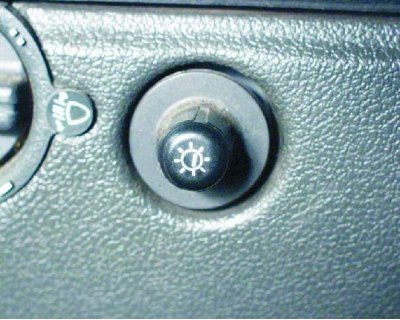
9. To turn off the instrument lighting, turn the knob of switch 26 counterclockwise. To increase the brightness, turn the knob clockwise. The instrument lighting turns on simultaneously with the side lights.
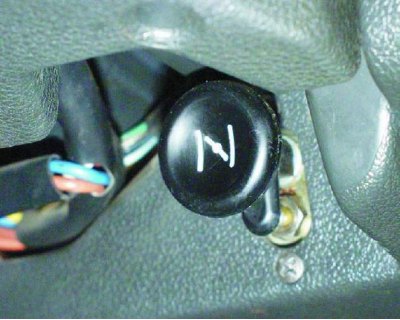
10. To close the carburetor air damper, pull handle 23 all the way towards you. At the same time, control lamp 11 in the instrument cluster will light up orange.
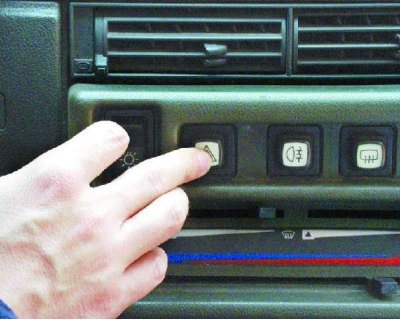
11. To turn on the hazard warning lights, press switch button 11. The turn signals and indicator lamp 12 in the instrument cluster will flash (red light). Pressing the button again will turn off the alarm.
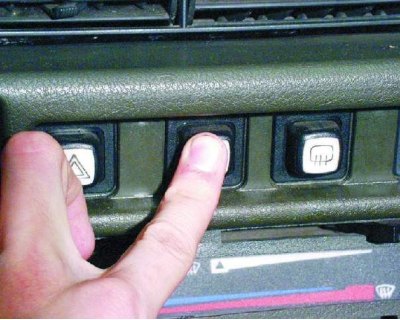
12. To turn on the rear fog lights, press switch button 10, which will cause indicator lamp 18 in the instrument cluster to light orange. Press the button again to turn off the lights. The rear fog lights can only be turned on if the low beam headlights are on.
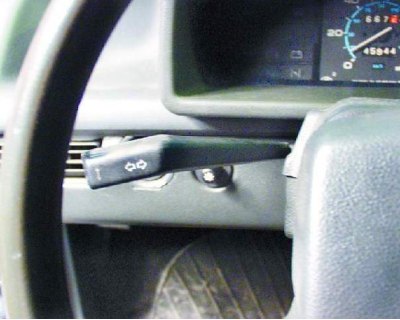
13. The lever for the direction indicators and headlights is located on the left side of the steering column.
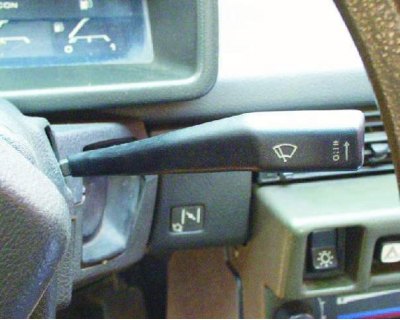
14. The windshield wiper and washer switch lever is located on the steering column on the right.
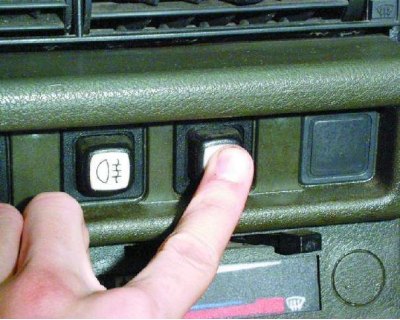
15. To turn on the rear door glass heating, press the switch button 9, which will cause the control lamp 20 in the instrument cluster to light orange. Pressing the button again turns off the heating. The rear door glass heating only works when the ignition is on, and it consumes a lot of power. To avoid discharging the battery, we recommend turning on the heating when the engine is running and only for the time required to clean the glass.
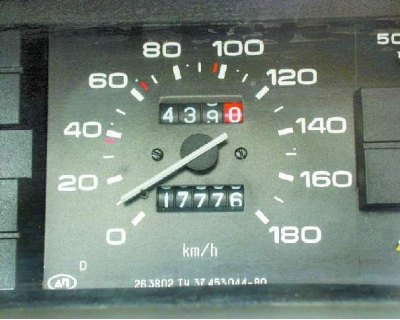
16. The speedometer scale shows the speed of the car in kilometers per hour. The speedometer has built-in total and daily mileage counters. The counters show the mileage in kilometers, and the last digit is in hundreds of meters. The daily mileage counter readings are reset by turning handle 25 clockwise. Resetting the readings is only done when the car is stationary.
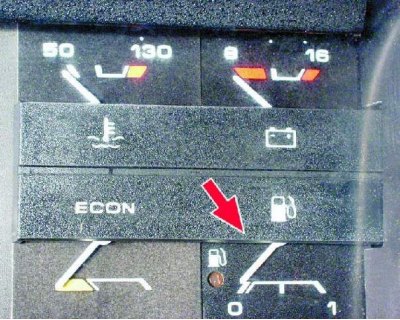
17. The fuel gauge can be used to roughly determine the amount of petrol in the tank. The scale of the gauge has divisions: 0 – empty tank; 1 – full tank. The indicator has a built-in fuel reserve indicator light. It lights up orange if there is less than 4–6 liters of gasoline left in the tank.
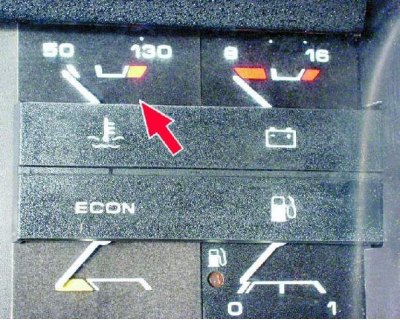
18. The red zone of the coolant temperature gauge scale warns of engine overheating. If the needle has moved into the red zone, you must stop, let the engine cool down and eliminate the cause of overheating.
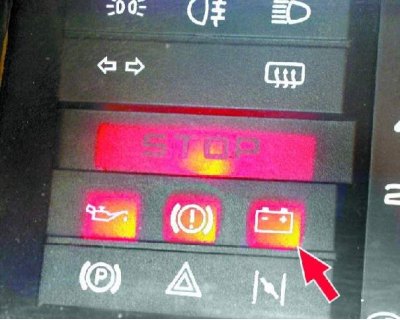
19. The battery charge indicator lamp 10 lights up red when the ignition is turned on and goes out immediately after the engine starts. If the lamp does not go out after the engine starts or lights up when the engine is running, the battery is not charging.
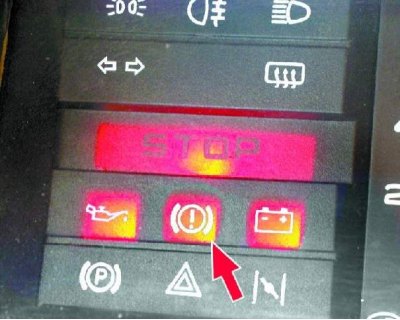
20. The brake fluid level warning lamp 13 lights up red when the fluid level in the brake master cylinder reservoir drops below the "MIN" mark and when the parking brake is applied (to check the serviceability).
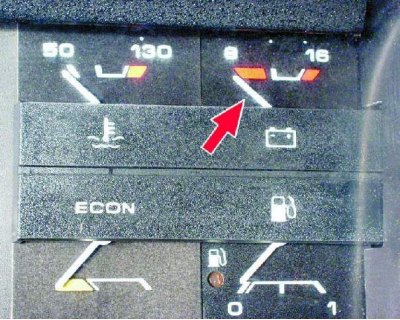
21. The voltmeter determines the voltage in the vehicle's on-board network. The scale has divisions corresponding to voltages of 8 and 16 V. There are red zones at the beginning and end of the scale. The red zone at the beginning of the scale indicates a discharged battery, and at the end of the scale - an overcharged battery.
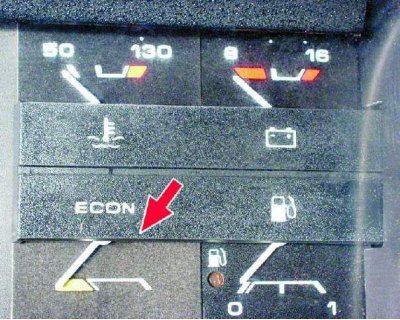
22. The economizer will help you choose the most economical engine operating mode. The economizer scale has two zones: the white zone corresponds to the economical mode, the yellow zone to the high fuel consumption mode.
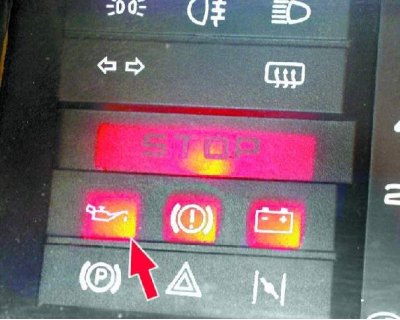
23. The 15 oil pressure warning lamp lights up red when there is insufficient pressure in the lubrication system. Engine operation is not permitted when the warning lamp is lit.
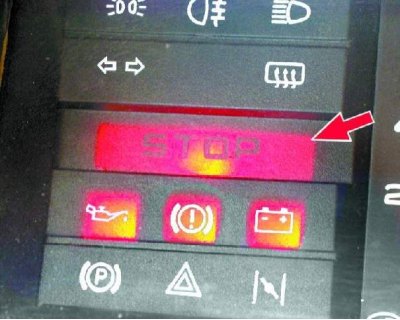
24. The "STOP" indicator lamp 9 lights up red simultaneously with one of the three indicator lamps 10, 13 and 15. If the "STOP" lamp lights up while the vehicle is moving, stop, find and eliminate the cause of the malfunction.
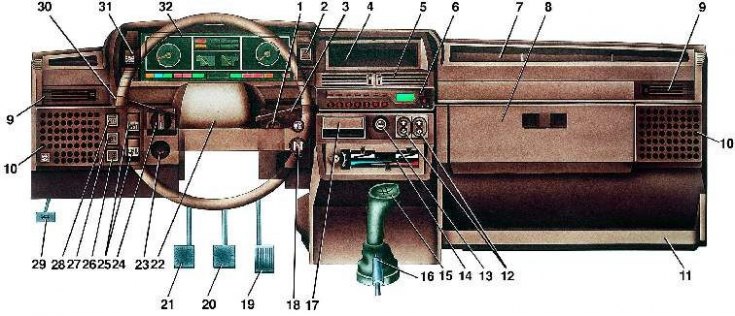
Figure 2. "High" instrument panel: 1. Ignition switch. 2. Hazard warning switch. 3. Windscreen wiper and washer lever. 4. Radio socket. 5. Central ventilation and heating vents. 6. Trip computer (installed as per package). 7. Instrument panel. 8. Glove compartment lid. 9. Side ventilation and heating vents. 10. Loudspeaker trim. 11. Shelf. 12. Electric window switches (are installed as per the configuration). 13. Cigarette lighter. 14. Control panel for ventilation and heating system. 15. Gear shift lever. 16. Parking brake lever. 17. Ashtray. 18. Carburetor air damper cover handle. 19. Accelerator pedal. 20. Brake pedal. 21. Clutch pedal. 22. Horn switch. 23. Instrument lighting switch. 24. Headlight corrector. 25. Front seat heating switch (are installed as per the configuration). 26. Rear fog light switch. 27. Fog light switch (are installed as per the configuration). 28. Tailgate glass heating switch. 29. Bonnet lock drive lever. 30. Direction indicator and headlight switch lever. 31. Exterior lighting switch. 32. Instrument cluster.
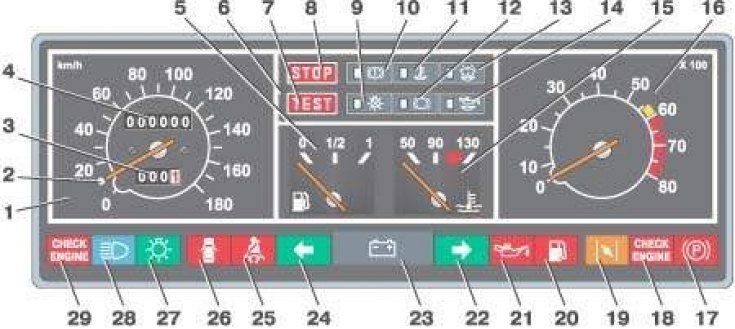
Figure 2a. Instrument cluster: 1. Speedometer. 2. Trip meter reset handle. 3. Trip meter. 4. Total mileage meter. 5. Fuel gauge. 6. On-board monitoring system light panel. 7. "TEST" board. 8. "STOP" board. 9. Brake light and side light failure indicator lamp. 10. Brake fluid level drop indicator lamp. 11. Coolant level drop indicator lamp. 12. Front brake pad wear indicator lamp. 13. Washer fluid reservoir level drop indicator lamp. 14. Engine oil level drop indicator lamp. 15. Coolant temperature gauge. 16. Tachometer. 17. Parking brake on indicator lamp. 18. Indicator lamp "CHECK ENGINE" ("Check the engine") of the injection system*. 19. Indicator light for covering the carburetor air flap. 20. Fuel reserve balance indicator light. 21. Warning lamp for emergency oil pressure in the engine lubrication system. 22. Warning lamp for turning on the right turn indicators. 23. Battery charge indicator light. 24. Indicator light for turning on left turn indicators. 25. Warning light for unfastened seat belts*. 26. Warning light for open doors*. 27. Indicator lamp for turning on parking lights. 28. Indicator lamp for switching on the high beam of the headlights. 29. Warning light "CHECK ENGINE" ("Check the engine") of the toxicity reduction system*.
*The equipment is installed as per the package. If the equipment is not installed, the lamps are replaced by plugs.
In the ignition switch (see item 6) the key can occupy the following positions:
- 0 - all consumers are off. The key cannot be removed. The steering is not locked;
- I — ignition on. Key cannot be removed. Steering not locked;
- II — ignition and starter are on. The key is turned clockwise until it stops, overcoming the spring force. The steering is not locked. In this position, the key is not fixed — to operate the starter, it must be held by hand. Immediately after starting the engine, the key should be released, and under the action of the return spring, it will return to position I.
The ignition switch has a built-in interlock device that will not allow the starter to be engaged when the engine is running. You can only turn the key back to position II after you have returned the key to position 0;
- III — ignition is off. The key is removed. When the key is removed, the steering is locked. To turn off the anti-theft device, insert the key into the ignition switch and, while turning the steering wheel slightly left and right, turn the key to position 0.
Set the headlight range control knob (see item 7) to one of four positions depending on the vehicle load:
- driver or driver and front seat passenger;
- driver and four passengers;
- driver, four passengers and cargo in the luggage compartment;
- driver and a fully loaded luggage compartment.
The direction indicator and headlight switch lever (see item 13) can be set to one of the following positions:
- 1 – in this position everything is off. You can turn on the low beam headlights by moving the central switch to the second fixed position;
- 2 – by moving the lever down, you turn on the left turn signals. The indicator lamp 16 in the instrument cluster will light up green. The lever is not fixed and will return to position I when released. This is convenient when the steering wheel turns at a small angle, for example when overtaking or changing lanes;
- 3 – if you need to fix the lever in the left turn position, move it further down until it stops. After returning the steering wheel to the straight-ahead position, the lever will automatically return to position I;
- 4 – by moving the lever up, you turn on the right turn signals. The indicator lamp 16 in the instrument cluster will light up green. The lever is not fixed and will return to position I when released;
- 5 – if you want to lock the lever in the right turn position, move it up to the stop. After returning the steering wheel to the straight-ahead position, the lever will automatically return to position I;
- 6 – if you need to signal with high beam headlights ("blink"), move the lever towards you several times. In this position, the lever is not fixed;
- 7 – when you move the lever away from you, the high beam headlights are turned on. The central switch of the external lighting should be in the second fixed position. When the high beam headlights are turned on, the indicator lamp 19 in the instrument cluster will light up blue. In this position, the lever is fixed.
The windshield wiper and washer switch lever (see item 15) can be set to one of the following positions:
- 1 - in this position everything is off;
- 2 – by moving the lever up, you turn on the intermittent mode of the windshield wiper. In this case, the lever is not fixed and, when you release it, returns to position I;
- 3 – if you need to lock the lever in the intermittent wiper mode, move it further up. This mode is convenient to use in light rain or drizzle;
- 4 – by moving the lever up to the next fixed position, you turn on the low speed of the windshield wiper;
- 5 – by moving the lever even higher to the next fixed position, you turn on a higher speed of the windshield wiper;
- 6 – if you need to turn on the windshield washer, pull the lever towards you. In this position, the lever is not fixed. The windshield wiper will turn on simultaneously with the washer. If your car is equipped with headlight washers, then with the headlights on, in this position of the lever, the headlight washers will also turn on;
- 7 – if you want to turn on the rear window wiper, press the lever. This position of the lever is fixed;
- 8 – if you need to turn on the rear window washer, move the lever further away from you to the non-fixed position. In this position of the lever, the rear window wiper also turns on.
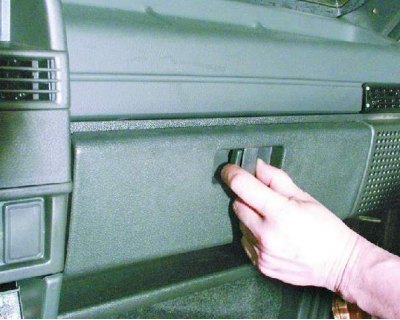
1. The storage box is designed to store small items. To open it, press your fingers on the two lock buttons and fold the box lid down. The open box is illuminated from the inside by a lamp (only when the ignition is on).
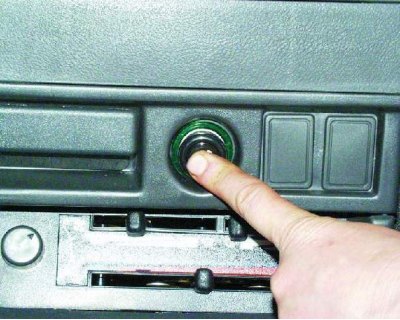
2. To turn on the cigarette lighter, press the handle of the cigarette lighter until it locks into place. After approximately 20 seconds, the handle will return to its original position with a click. Now remove the cigarette lighter from the socket. You can use the cigarette lighter again after 30 seconds.
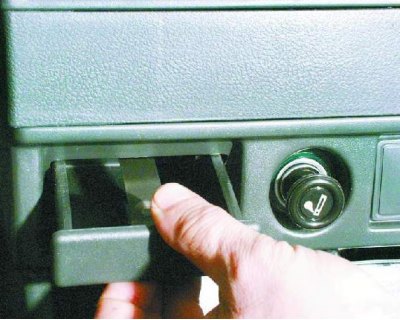
3. To open the ashtray, pull it towards you.
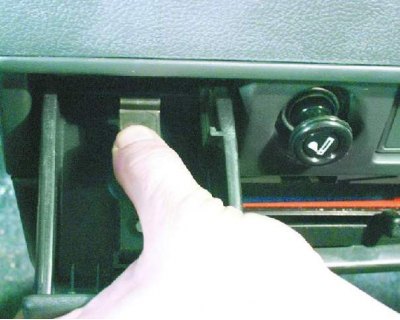
4. To clean the ashtray, you need to remove it. To do this, press on the cigarette extinguisher plate.
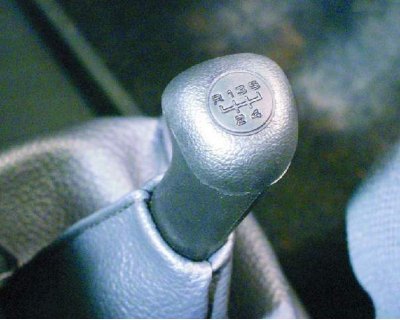
5. The gear shift pattern is shown on the lever handle. Reverse gear should be engaged only after the car has come to a complete stop, 3 seconds after pressing the clutch pedal. When engaging reverse gear, the lever moves with noticeable resistance after passing the first gear position. Overcoming this resistance, move the lever to the left and forward.
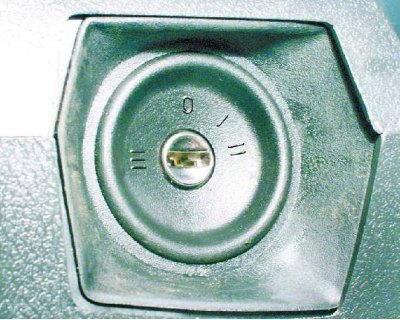
6. The ignition switch (lock), combined with the anti-theft device that locks the steering wheel, is located on the right side of the steering column.
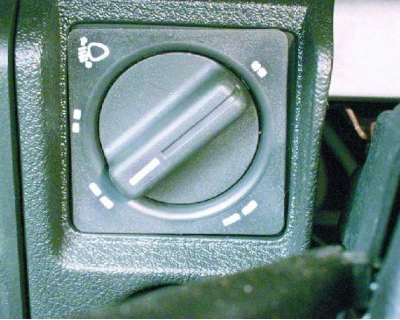
7. The headlight hydraulic corrector is used to adjust the direction of the headlight beam depending on the vehicle load.
The source is on the website: VAZBOOK
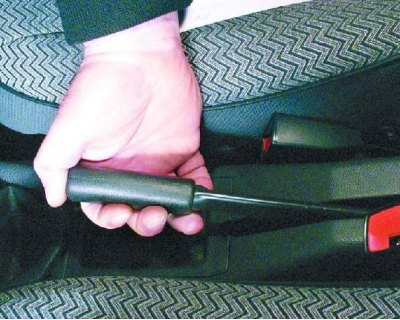
8. To engage the parking brake, lift the lever all the way up (when the brake is adjusted correctly, no more than 8 clicks). At the same time, the control lamp 17 in the instrument cluster will light up red.
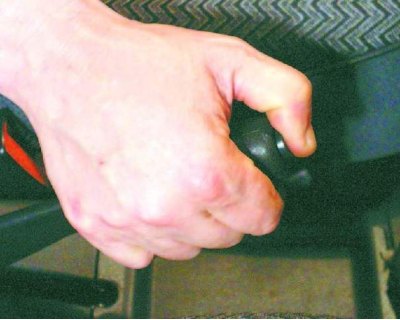
9. To release the parking brake, pull the lever up slightly, press the button on the end of the lever handle and lower it all the way down.
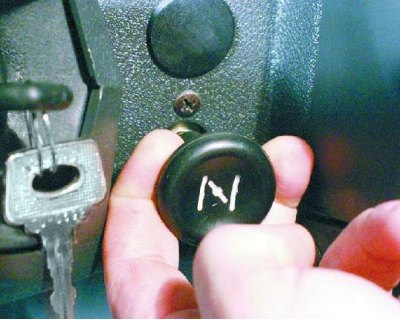
10. To close the carburetor air damper, pull the handle towards you. The control lamp 19 on the instrument panel will light orange.
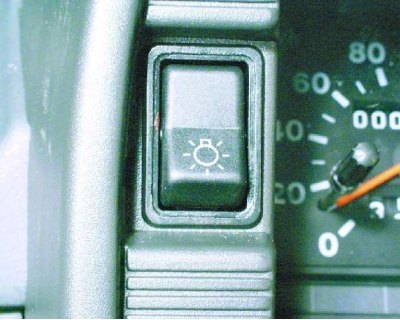
11. By pressing the lower part of the key of the central switch of the external lighting to the first fixed position, the side lights and the license plate lights are switched on. At the same time, the control lamp 27 in the instrument cluster lights up green. By pressing the key to the second fixed position, the low beam headlights are additionally switched on.
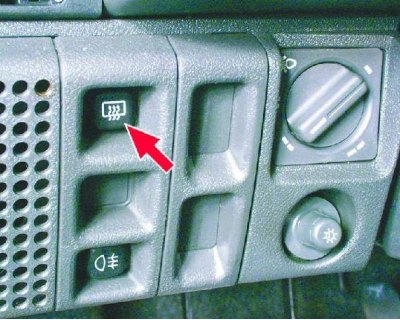
12. To turn on the rear window heating, press the switch button, the lamp in it will light up. Pressing it again turns off the heating. The window heating only works when the ignition is on. When the rear window heating is on, a lot of power is consumed. To avoid discharging the battery, we recommend turning on the heating when the engine is running and only for the time required to clean the glass.
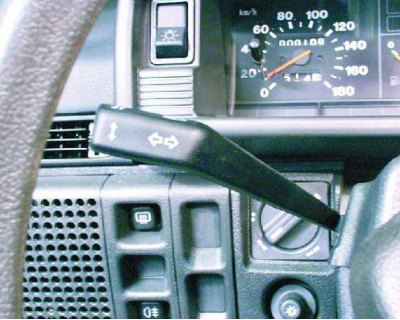
13. The lever for the direction indicators and headlights is located on the left side of the steering column.
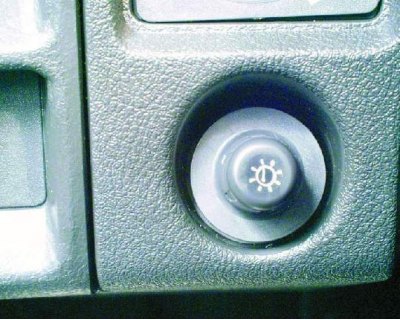
14. To turn off the instrument lighting, turn the knob counterclockwise. To increase brightness, turn the knob clockwise. The instrument lighting turns on simultaneously with the side lights.
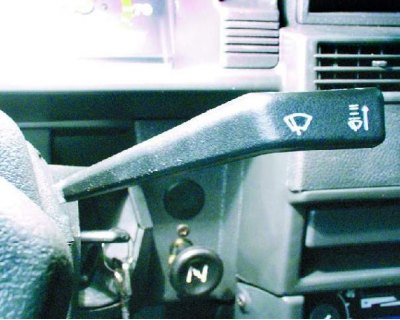
15. The windshield wiper and washer switch lever is located on the steering column on the right.
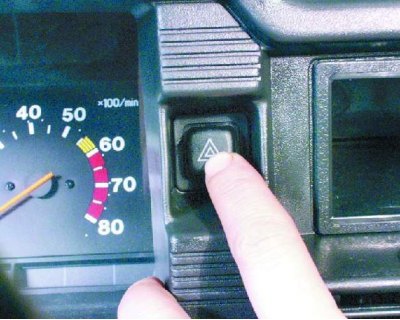
16. To turn on the hazard warning lights, press the switch button, the turn signals and the lamp in the switch button will flash. Pressing it again turns off the alarm.
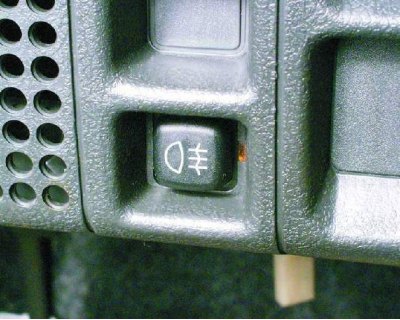
17. To turn on the rear fog lights, press the switch button, the lamp in it will light. Pressing it again turns the lights off. The rear fog lights can be turned on if the low beam headlights are on.
18. If the car is equipped with fog lights, press switch button 27 to turn them on. The fog lights are turned on only when the headlights or parking lights are on. Pressing the button again turns the lights off. If the car is equipped with heated front seats, press the lower part of switch button 25 to turn it on — a lamp in it will light. Pressing the upper part of the button turns off the heating. Some cars are equipped with electric windows. Pressing the lower part of switch button 12 lowers the window, pressing the upper part raises it. Releasing the button turns off the electric drive.
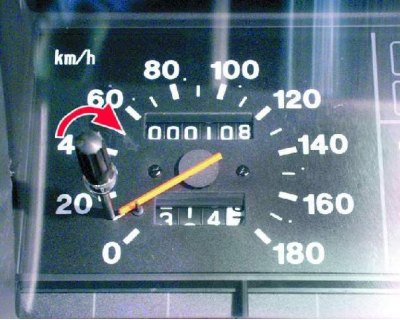
19. The speedometer scale shows the speed of the car in kilometers per hour. The speedometer has built-in total and daily mileage counters, which show the car's mileage in kilometers, and the last digit - in hundreds of meters. The daily mileage counter readings are reset by turning the handle clockwise. Resetting the readings is done only when the car is stationary.
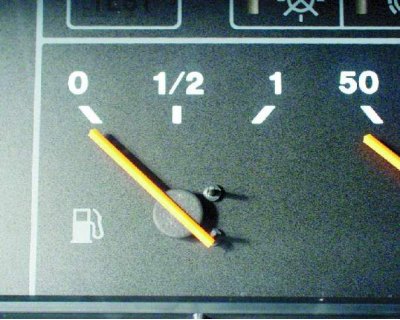
20. The fuel gauge shows the approximate amount of petrol in the tank. The scale of the gauge has divisions: 0 – empty tank; ½ – half a tank; 1 – full tank. If there is less than 4–6 liters of gasoline left in the tank, the indicator lamp 20 for the reserve fuel level in the instrument cluster will light up orange.
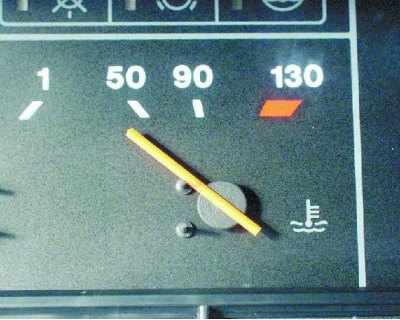
21. The coolant temperature gauge scale has divisions corresponding to values of 50, 90 and 130°C. The red zone warns of engine overheating. If the pointer moves into the red zone, you should stop, let the engine cool down and try to eliminate the cause of overheating.
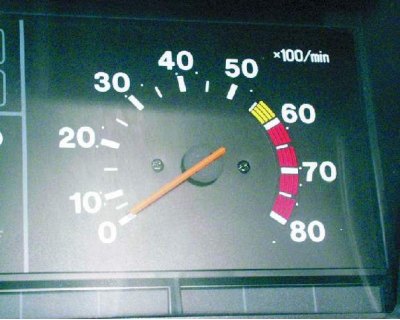
22. The tachometer shows the engine crankshaft speed. The tachometer readings should be multiplied by 100. The red zone on the tachometer scale shows a dangerous speed, and the yellow zone warns of approaching a dangerous speed.
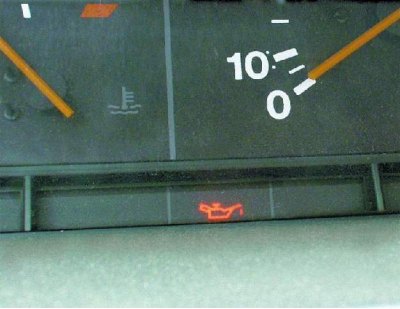
23. The 21 oil pressure warning lamp lights up red when there is insufficient pressure in the engine lubrication system.
24. Indicator lamp 25 lights up red if the driver's seat belt is not fastened. Installed as standard. Indicator lamp 26 (figure 2) open doors lights up red if one of the side doors is not closed. Installed as per the configuration. Control lamps "CHECK ENGINE" ("Check engine") 18 injection system and 29 emission control system lights up red when the ignition is turned on and goes out immediately after the engine starts (only on vehicles with fuel injection system). If the lamps do not go out or flicker after starting the engine or come on while the engine is running, stop the engine and eliminate the cause of the malfunction.