




- thermometer
- hydrometer
- glass tube
- rubber bulb
- charger-starter
Frequency: Check the electrolyte level and density every 15,000 km.
Clean the battery regularly from dust and dirt. If cracks appear on the case or swelling of the top cover, replace the battery.
The electrolyte should be transparent. A brownish tint indicates that the active mass of the plates is crumbling - the battery needs to be replaced.
Attention! During operation, the electrolyte level gradually decreases due to the evaporation of water contained in it. To restore the level, add only distilled water to the battery.
Warning! Be careful when checking the density: the electrolyte contains sulfuric acid! Any drops of electrolyte that get on the car parts or on exposed areas of the body should be immediately washed with plenty of water.
Warning: Do not smoke or use open flames while charging the battery.
Attention! Before charging, remove the battery from the car, otherwise the "boiled" electrolyte may splash onto the car body and parts.
Table 1. Correction of electrolyte density depending on temperature
Electrolyte temperature, °C | Correction, g/cm³ |
From -40 to -26 | -0,04 |
From -25 to -11 | -0,03 |
From -10 to 4 | -0,02 |
From 5 to 19 | -0,01 |
From 20 to 30 | -0,00 |
From 31 to 45 | 0,01 |
Table 2. Electrolyte density at 25°C, g/cm³
| Climate region (average monthly air temperature in January, °C) | Time of year | Fully charged battery | The battery is charged | |
by 25% | by 50% | |||
Very cold | Winter | 1,30 | 1,26 | 1,22 |
Cold | All year round | 1,28 | 1,24 | 1,20 |
Moderate | All year round | 1,28 | 1,24 | 1,20 |
Warm and humid | All year round | 1,23 | 1,19 | 1,15 |
Hot dry | All year round | 1,23 | 1,19 | 1,15 |
Table 3. Approximate norms for adjusting the electrolyte density
Required density of electrolyte in the battery, g/cm³ | 1,24 | 1,26 | 1,28 | 1,30 |
| Real density of electrolyte, g/cm³ | Volume of electrolyte removed from the battery, cm³ | |||
1,15 | 254 | 290 | 342 | 396 |
1,16 | 220 | 275 | 330 | 385 |
1,17 | 201 | 259 | 316 | 374 |
1,18 | 181 | 241 | 301 | 362 |
1,19 | 158 | 222 | 285 | 348 |
1,20 | 133 | 200 | 266 | 333 |
1,21 | 105 | 176 | 246 | 316 |
1,22 | 74 | 149 | 223 | 242 |
1,23 | 40 | 119 | 198 | 277 |
1,24 | 0 | 84 | 169 | 253 |
1,25 | 24 | 45 | 136 | 226 |
1,26 | 47 | 0 | 97 | 194 |
1,27 | 68 | 23 | 53 | 158 |
1,28 | 87 | 44 | 0 | 115 |
1,29 | 105 | 63 | 21 | 63 |
1,30 | 112 | 82 | 41 | 0 |
1,31 | 138 | 90 | 59 | 20 |
| After removing the electrolyte, it is necessary to add the same amount of electrolyte with a density of 1.40 g/cm³. | |
| After removing the electrolyte, it is necessary to add the same amount of distilled water. |
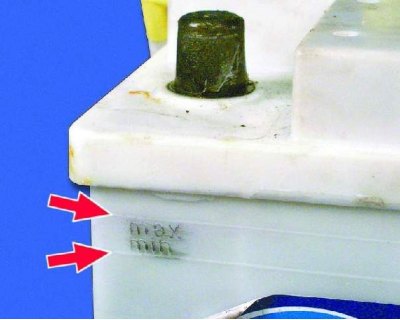
1. If the battery has a translucent casing, the electrolyte level is determined visually: it should be between the "MIN" and "MAX" marks on the side surface of the battery.
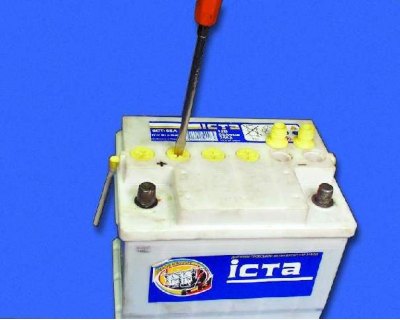
2. If the battery case is opaque, unscrew the six plugs on the lid.
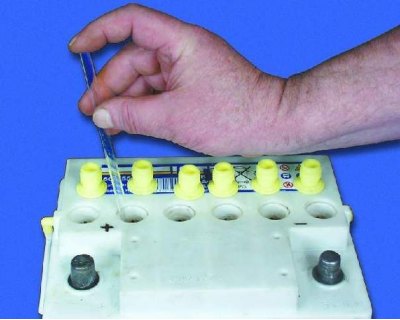
3. Check the electrolyte level in the first cell of the battery by inserting a glass tube (it is sold complete with a hydrometer) into the hole until it stops against the safety net and holding the tube with your finger...
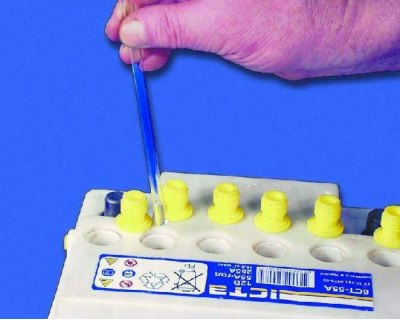
4....remove the tube. The electrolyte level should be 10-15 mm.
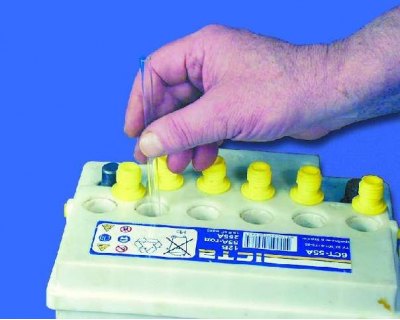
5. Insert the tube into the hole and drain the electrolyte. Check the level in the other cans of the battery in the same way. If the level in any of the cans is lower, add distilled water to them to the recommended level (the "MIN" mark or 10-15 mm according to the level in the tube).
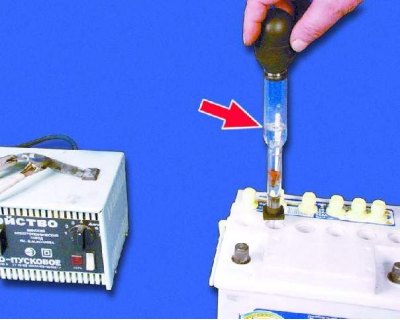
6. After filling, the density of the electrolyte can be measured only after two hours: the water must mix with the electrolyte. To check the density, insert the hydrometer into the hole until it stops in the safety net and suck in the electrolyte with a bulb so that the hydrometer float floats up.
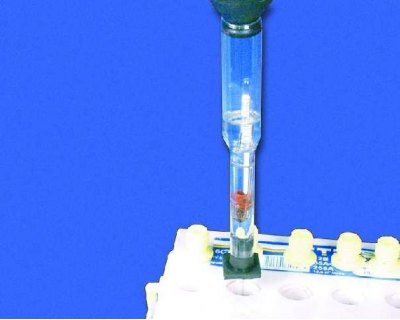
7. The division on the float, located at the electrolyte level, shows its density, which should be 1.28 g / cm³ for a moderate climate (at an electrolyte temperature of 25°C). The density depends on the temperature of the electrolyte, so make a correction to the measurement result (see table 1). This indicator can be used to judge the degree of battery discharge (see table 3). If the density is lower than specified or differs in the cans by more than 0.02 g/cm³, the battery must be recharged.
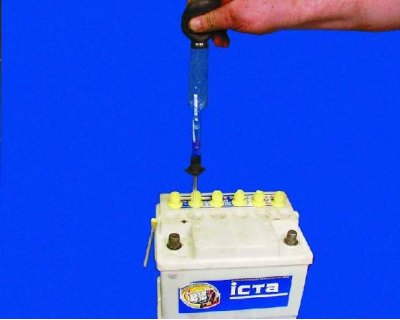
8. Drain the electrolyte from the hydrometer into the battery jar.
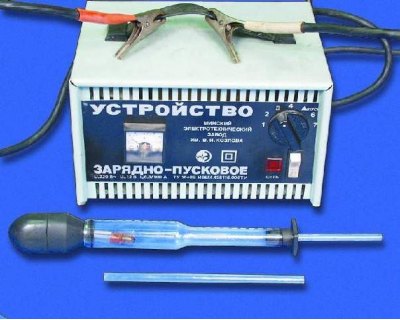
9. To charge the battery, use a charger or a charger-starter in accordance with the instructions.
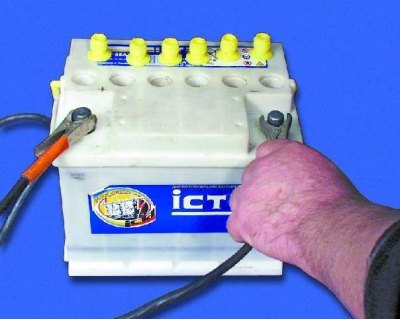
12. During charging, regularly check the temperature and density of the electrolyte. If the electrolyte temperature exceeds 40°C, reduce the charging current by half or stop charging and allow the electrolyte to cool to 27°C.
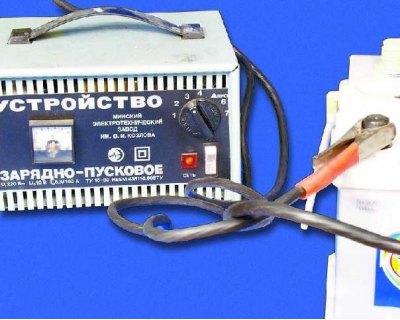
10. Remove all the caps from the jars and connect the charger wires to the battery terminals, observing the polarity, then turn on the charger.
View the original on the internet resource VazBook
11. Set the charging current to 0.1 of the battery capacity (for a 5 Ah battery – 5.5 A; for a battery with a capacity of 65 Ah – 6.5 A, etc.). During charging, periodically adjust the charging current.
13. If the density does not change within two hours and the electrolyte begins to "boil" violently, the battery is fully charged. First, turn off the charger, then disconnect the wires from the battery terminals.
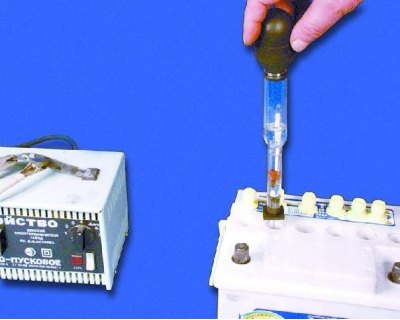
14. Measure the density of the electrolyte in all the jars. If it is higher than the norm, suck out some of the electrolyte from the jar with a rubber bulb and add the same amount of distilled water. If the density of the electrolyte is lower than the norm, suck out some of the electrolyte with a hydrometer and add the same amount of electrolyte with a density of 1.40 g/cm³ (see table 3). After this, reconnect the charger and charge the battery for 30 minutes. Measure the electrolyte density again and, if necessary, bring it to the norm, as indicated above.