




Contents: Cleaning and lubricating the…↓ Checking the electrolyte level ↓ Checking the density of the…↓
Modern batteries do not require special care and remain functional for quite a long time.
To increase battery life, you must:
- do not allow the battery to discharge completely;
- check regularly for secure battery mounting;
- regularly wash the battery cover with a soda solution or ammonia to remove dirt, preventing possible short circuits and self-discharge of the battery;
- tighten the wire terminals tightly;
- periodically clean the terminals of the wires and battery from oxides formed on the contact surfaces (see "Periodic maintenance").
After a long period of parking, the battery must be recharged using a special charger according to the instructions supplied with the device.
Caution! If the vehicle is regularly used in short trips with frequent stops and starts of the engine, the battery should be checked regularly and, if necessary, recharged (especially in winter).
Cleaning and lubricating the terminals and clamps of the battery cables
To complete the job, you will need fine-grained sandpaper or a special device for cleaning terminals.
1. Disconnect the wires from the battery terminals (see "Battery - Removal and Installation").
2. Clean the battery cover from dirt.
3. Using sandpaper or a brush, clean the inner surface of the terminals until traces of oxides disappear.
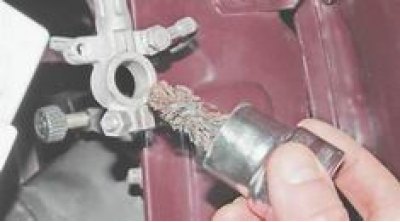
4. Using the other part of the device, we clean the battery terminals.
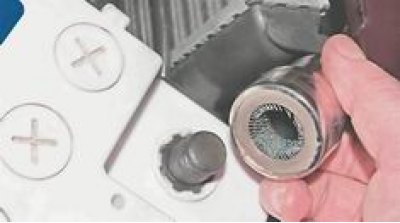
Attention! Constant formation of oxides on the contact surfaces of the wire terminals and battery terminals indicates increased voltage in the vehicle's on-board network due to improper operation of the generator voltage regulator.
5. Connect the wires to the battery terminals.
6. To prevent oxidation, cover the wire terminals and battery leads with plastic grease.
If the vehicle is equipped with a serviceable battery, then to maintain it in working condition, periodic monitoring of the electrolyte level and density is required in accordance with the maintenance schedule (see "Periodic maintenance").
Checking the electrolyte level
If the battery case is opaque, a glass tube at least 100 mm long and with an internal diameter of 3-5 mm will be required to perform the work.
Attention! When servicing the battery, avoid getting electrolyte on your clothes and skin. If electrolyte gets on your clothes, wash the contact area with water or ammonia. Wear goggles and rubber gloves when working.
1. If the battery case is made of transparent plastic, check the electrolyte level visually. The level should be between the minimum and maximum level marks on the side wall.
2. If the battery case is opaque or there are no electrolyte level marks on it, use a flat-blade screwdriver with a wide blade to unscrew the battery caps.
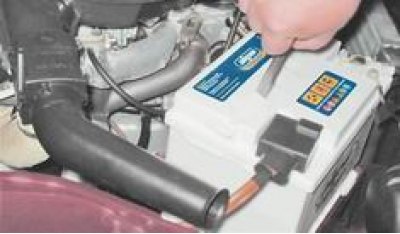
3. Check the electrolyte level, which should be at least 10 mm above the top edge of the plates and below the electrolyte level indicator.
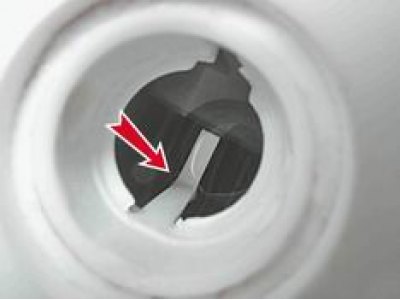
4. If there is no indicator, check the level using a glass tube. Lower the tube into the battery filler hole until it stops at the upper edge of the plates. Close the upper opening of the tube with your finger and remove it. The height of the electrolyte column remaining in the tube should be within 10-15 mm.
5. We check all batteries one by one.
6. If the electrolyte level is low, add distilled water through the filler holes to the required level.
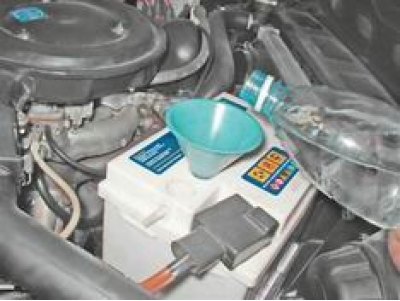
6. Screw in the filler plugs.
Attention! Only distilled water is used to replenish the electrolyte level. Adding electrolyte is not allowed, as this will cause the active mass of the electrodes to float off and the battery to fail. Topping up the electrolyte is only possible if it spills out of the battery.
Checking the density of the electrolyte
To complete the work you will need a density meter or hydrometer.
The electrolyte density can be used to estimate the battery discharge level. Density testing is performed using a density meter or hydrometer, at an electrolyte temperature of 20-30°C. If the temperature differs from the specified one, then when measuring the density, it is necessary to take into account temperature corrections to the density meter readings (see table).
Table 13.6. Temperature corrections to densitometer readings
| Temperature range,°C | Correction, g/cm³ |
| From -40 to -26 | -0,04 |
| From -40 to -11 | -0,03 |
| From -10 to +4 | -0,02 |
| From +5 to +19 | -0,01 |
| From +20 to +30 | 0,00 |
| From +31 to +45 | +0,01 |
On the installed battery, we check the density of the electrolyte in the following order:
1. Using a wide-blade screwdriver, unscrew the battery filler caps (see above, "Checking the electrolyte level").
2. We lower the tube of the density meter into the hole of the battery and use a rubber bulb to collect the electrolyte into the density meter.
3. We determine the density by the float with the highest indicator. The normal working density of the electrolyte is 1.27 g/cm³.
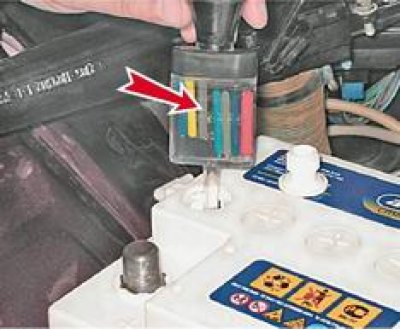
6. We check the density of all batteries in turn.
7. If the density drops to less than 1.24 g/cm³, remove the battery from the vehicle (see below "Battery - Removal and Installation") and charge it.