
English Русский
Български
Беларускі
Український
Српски
Hrvatski
Română
Polski
Slovenský
Magyar
| Articles | Contacts | Sitemap |   
Repair and maintenance Lada Repair and maintenance Mazda Repair and maintenance Mitsubishi Repair and maintenance Toyota Repair and maintenance Land Rover Repair and maintenance Hyundai Repair and maintenance Nissan
VAZbook.ru


Main     1111   2101   2105   2106   2107   2109   2110   2115   2121  
VAZ-2110 (1995-2007) VAZ-2112 (1999-2007)
  • Main
  • «Lada»
  • VAZ-2112
  • Transmission
  • Front wheel drives
  • Outer drive joint — removal, replacement of protective cover and installation

Outer drive joint — removal, replacement of protective cover and installation (VAZ-2112)

            0

Contents: Removal ↓ Installation ↓
To complete the work you will need:
  • special pliers for installing clamps for fastening CV joint covers or sliding pliers;
  • sliding circlip pliers;
  • cV joint grease 40 cm³;
  • new hinge protective cover;
  • new hinge locking and retaining rings.

Removal


1. Remove the drive assembly (see above, "Front Wheel Drive - Removal and Installation").

2. The ends of all four inner and outer joint clamps on both shafts point in the direction opposite to the drives' forward rotation. To ensure proper assembly, if the clamps are to be reused, use a marker to mark them to indicate the direction of rotation.
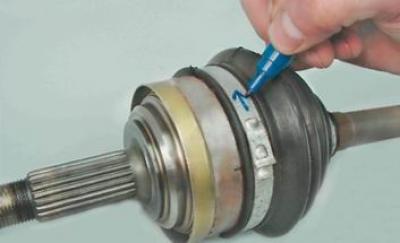
2. The ends of all four inner and outer joint clamps on both shafts point in the direction opposite…


3. Using large sliding pliers or special tongs, squeeze the large clamp and, using a slotted screwdriver, disconnect the clamp lock.
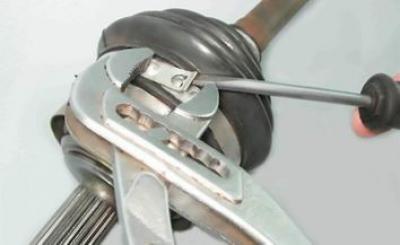
3. Using large sliding pliers or special tongs, squeeze the large clamp and, using a slotted…


4. In the same way, remove the small clamp of the outer hinge protective cover.
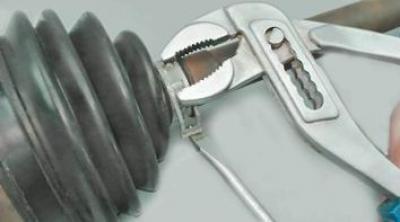


4. In the same way, remove the small clamp of the outer hinge protective cover.


5. Secure the drive shaft in a vice. Use a slotted screwdriver to pry up and remove the protective cover from the outer hinge housing.
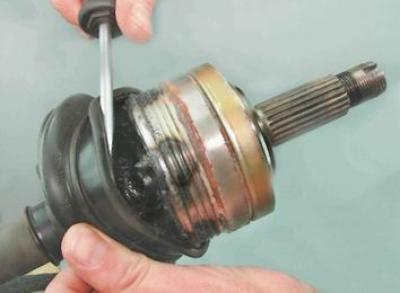
5. Secure the drive shaft in a vice. Use a slotted screwdriver to pry up and remove the protective…


Warning! If the joint is to be reused, do not strike the separator or the joint housing.


6. By striking the inner race of the joint with a punch made of soft metal, we press the outer joint off the drive shaft.
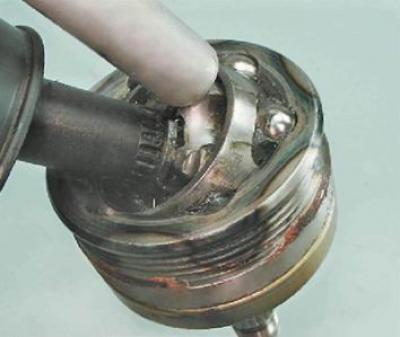
6. By striking the inner race of the joint with a punch made of soft metal, we press the outer…


7. Using a slotted screwdriver, pry up and remove the retaining ring from the drive shaft splines.


The original can be seen on the website www.VAZbook.ru
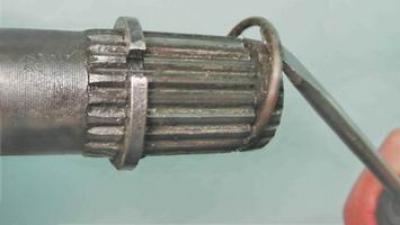
7. Using a slotted screwdriver, pry up and remove the retaining ring from the drive shaft splines.


8. Using expansion pliers, remove the thrust ring.
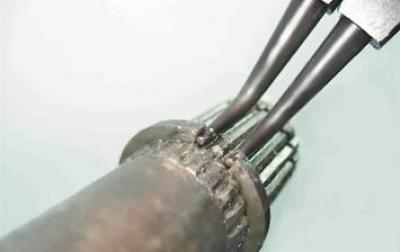
8. Using expansion pliers, remove the thrust ring.


9. Remove the cover from the drive shaft.

10. Wash the joint in kerosene, wipe with a clean cloth and let dry.

Installation


1. To avoid damaging the new cover during installation, wrap the shaft splines with tape or electrical tape.

2. Put a new protective cover on the shaft, move the cover to the center of the shaft and remove the adhesive tape.
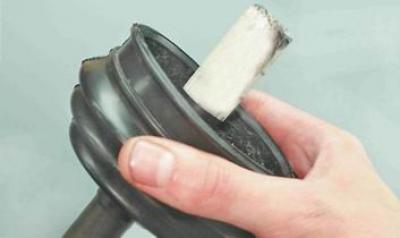
2. Put a new protective cover on the shaft, move the cover to the center of the shaft and remove…


Tip: Do not use a socket head to install the thrust washer. The internal chamfer found on almost all sockets will compress the washer, preventing it from being installed on the shaft.


3. Secure the drive shaft in a vice vertically. Using an open-end wrench by 24 mm we install a thrust ring on the splined end of the shaft as a mandrel.
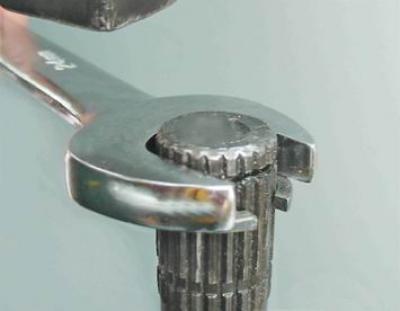
3. Secure the drive shaft in a vice vertically. Using an open-end wrench by 24 mm we install a…


4. Install the retaining ring in the same way.

5. Lubricate the shaft splines with CV joint grease.

6. Install the hinge on the splined end of the shaft. Using a wooden spacer, press the hinge onto the shaft until it is secured with a locking ring.

Warning! The outer joint requires 40 cm³ of grease


7. Fill the joint with constant velocity joint grease. Place the remaining 40 cm³ of grease into the protective cover.

8. Move the protective cover towards the hinge so that the large sealing belt of the protective cover is completely placed on the hinge housing, and the small sealing belt fits into the groove of the shaft.
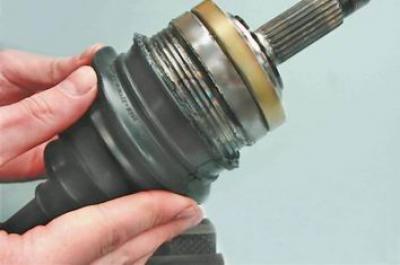
8. Move the protective cover towards the hinge so that the large sealing belt of the protective…


9. By lifting the small diameter sealing belt with a slotted screwdriver, we release excess air from the inner cavity of the cover.
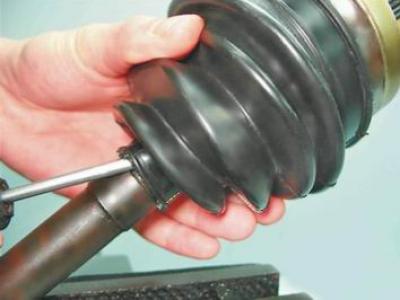
9. By lifting the small diameter sealing belt with a slotted screwdriver, we release excess air…


10. Using sliding pliers or special clamp installation pliers and a slotted screwdriver, install the large and small clamps of the protective cover. Install the clamps taking into account the direction of rotation of the drive. The outer end of the clamps should be directed in the direction opposite to the rotation of the drive when moving forward.
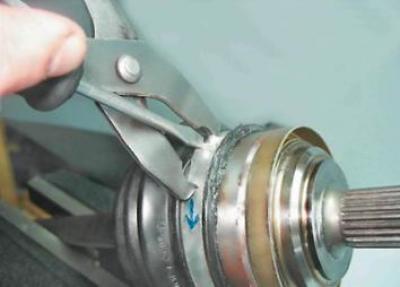
10. Using sliding pliers or special clamp installation pliers and a slotted screwdriver, install…


Recommendation: Before installing the assembled drive on the vehicle, be sure to install a new retaining ring on the splined tailpiece of the inner joint.


11. Install the drive assembly on the vehicle (see "Front Wheel Drive - Removal and Installation").


This article is available at russian, bulgarian, belarusian, ukrainian, serbian, croatian, romanian, polish, slovak, hungarian
The text was reviewed by the specialist: Grigory Vologodtsev

Share with friends:

Previous articles
VAZ-2112: Front wheel drives
Next articles

Front Wheel Drive — Removal and Installation
Front Wheel Drives — Checking Technical Condition
Front wheel drive arrangement
Inner drive joint — removal, replacement of protective cover and installation

More articles from other manuals on VAZ cars:
➠ Outer drive joint — removal, replacement of protective cover and… VAZ-2114 (2004-2013)
➠ Replacing the ball joint protective cover VAZ-11113 (1996-2003)
➠ Replacing the bearing and seal of the inner drive joint housing VAZ-21214 (1994-2006)
➠ Clutch release drive VAZ-2101 (1970-1983)
➠ Auxiliary drive units VAZ-2104 and VAZ-2105 VAZ-2105 (1979-2010)
Link in different formats to this page


Visitor comments

No comments yet


How much will 14 + 19 ?


VAZ-2110 (1995-2007) 
  • General information
  • Vehicle description
  • Specifications
  • User manual
  • Maintenance
  • Operation and maintenance
  • Tips for car owner
  • Power unit
  • Engine repair
  • Supply system
  • Control system
  • Cooling system
  • Exhaust system
  • Transmission
  • Clutch
  • Car gearbox
  • Front wheel drives
  • Chassis
  • Suspension and wheels
  • Steering
  • Brake system
  • Body
  • Exterior
  • Interior
  • Doors and glass
  • Tailgate
  • Ventilation and heating
  • Electrical equipment
  • Equipment and devices
  • Headlights and lighting
  • Engine electrics
  • Electrical circuits


VAZ-2112 (1999-2007) 
  • General information
  • Operation and maintenance
  • Power unit
  • Engine repair
  • Supply system
  • Control system
  • Cooling system
  • Exhaust system
  • Transmission
  • Clutch
  • Car gearbox
  • Front wheel drives
  • Chassis
  • Wheels and tires
  • Car suspension
  • Steering
  • Brake system
  • Body
  • Exterior
  • Interior
  • Doors and glass
  • Tailgate
  • Ventilation and heating
  • Electrical equipment
  • Equipment and devices
  • Headlights and lighting
  • Engine electrics
  • Electrical circuits


VAZbook.ru © 2017 · Mobile version · Contact with administration · Sitemap: EN BG BY UA RS HR RO PL SK HU · Site search · News and articles VAZ-1111 · VAZ-11113 · VAZ-2101 · VAZ-21011 · VAZ-2104 · VAZ-2105 · VAZ-21051 · VAZ-2106 · VAZ-21061 · VAZ-2107 · VAZ-21099 · VAZ-2109 · VAZ-2108 · VAZ-2110 · VAZ-2112 · VAZ-2114 · VAZ-2115 · VAZ-2121 · VAZ-21213 · VAZ-21214 ·
The site stores technical data using cookies to improve the service.