
English Русский
Български
Беларускі
Український
Српски
Hrvatski
Română
Polski
Slovenský
Magyar
| Articles | Contacts | Sitemap |   
Repair and maintenance Lada Repair and maintenance Mazda Repair and maintenance Mitsubishi Repair and maintenance Toyota Repair and maintenance Land Rover Repair and maintenance Hyundai Repair and maintenance Nissan
VAZbook.ru


Main     1111   2101   2105   2106   2107   2109   2110   2115   2121  
VAZ-2114 (2004-2013) VAZ-2115 (1997-2012)
  • Main
  • «Samara-2»
  • VAZ-2114
  • Power unit
  • Engine repair
  • Valves — lapping

Valves — lapping (VAZ-2114)

            0

Checking the condition of the valves and grinding them in must be performed if, when checking the compression in the cylinders (see "Compression in engine cylinders - check") their leakage was discovered.

To complete the work you need:
  • valve grinding tool;
  • lapping paste.

Sequence of execution


1. Remove the cylinder head (see "Cylinder head - removal and installation").

Advice: If the cylinder head is removed for one reason or another, check the valves for leaks and, if necessary, grind them.


2. To check the tightness of the cylinder head valves, place it on a horizontal surface with the mating surface facing up.

3. Fill the combustion chambers of the cylinder head with kerosene and wait a few minutes. If the kerosene level in any chamber decreases, one or both valves are leaky.
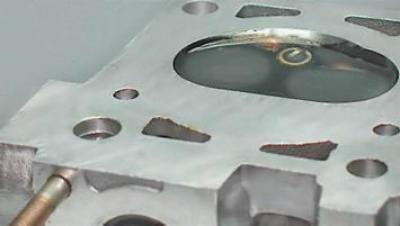
3. Fill the combustion chambers of the cylinder head with kerosene and wait a few minutes. If the…


4. Remove the oil seal from the valve (see "Valve stem seals - replacement").

5. Remove the valve from the guide bushing.
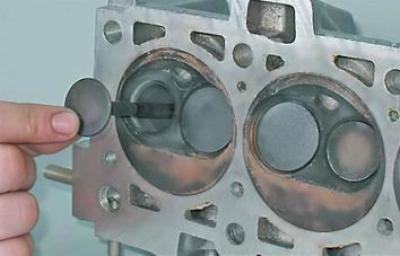
5. Remove the valve from the guide bushing.


6. Apply lapping paste to the working edge of the valve.
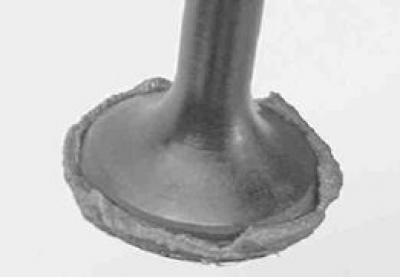


6. Apply lapping paste to the working edge of the valve.


7. Install the valve into the cylinder head and attach the valve grinding tool to its rod.

8. Pressing the valve to the seat, turn it from side to side. After 10-15 movements, turn the valve 90° and continue grinding.
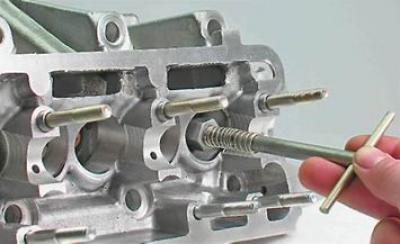
8. Pressing the valve to the seat, turn it from side to side. After 10-15 movements, turn the valve…


9. We grind until a uniform ring-shaped rim is formed on the valve plate...
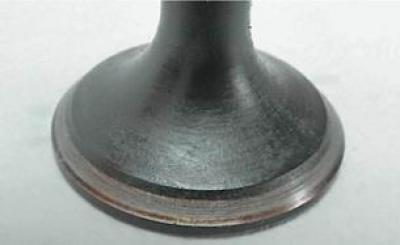
9. We grind until a uniform ring-shaped rim is formed on the valve plate...


...and his saddle.
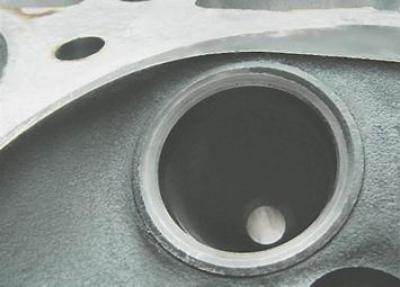

...and his saddle.


10. Remove any remaining lapping paste from the valve and its seat.

11. We grind the remaining valves in the same way.

12. Install the valve and the new oil seal in the reverse order of removal.

Recommendation: After grinding, check the valves for leaks (see above p. 3) and, if necessary, repeat the grinding.


This article is available at russian, bulgarian, belarusian, ukrainian, serbian, croatian, romanian, polish, slovak, hungarian
The text was reviewed by the specialist: Grigory Vologodtsev

Share with friends:

Previous articles
VAZ-2114: Engine repair
Next articles

Cylinder head — check
Cylinder head — removal and installation
Valve stem seals — replacement
Camshaft — Removal and Installation
Adjusting the clearances in the timing drive valves
Flywheel — removal and installation
Rear Crankshaft Oil Seal — Replacement
Engine Oil Pan — Gasket Replacement
Oil intake — removal and installation
Oil pump — removal, disassembly, inspection, assembly and installation

More articles from other manuals on VAZ cars:
➠ Lapping valves VAZ-11113 (1996-2003)
➠ Lapping valves VAZ-21099 (1990-2004)
➠ Valves — lapping VAZ-2112 (1999-2007)
➠ Features of the cylinder head and valves VAZ-21011 (1974-1983)
➠ Valves — Check for wear VAZ-21051 (1979-2010)
Link in different formats to this page


Visitor comments

No comments yet


How much will 28 + 26 ?


VAZ-2114 (2004-2013) 
  • General information
  • Operation and maintenance
  • Power unit
  • Engine repair
  • Cooling system
  • Supply system
  • Control system
  • Exhaust system
  • Transmission
  • Clutch
  • Car gearbox
  • Front wheel drives
  • Chassis
  • Wheels and tires
  • Front suspension
  • Rear suspension
  • Steering
  • Brake system
  • Body
  • Exterior
  • Interior
  • Doors and glass
  • Tailgate
  • Ventilation and heating
  • Electrical equipment
  • Equipment and devices
  • Headlights and lighting
  • Engine electrics
  • Electrical circuits


VAZ-2115 (1997-2012) 
  • General information
  • Vehicle device
  • Operation manual
  • Vehicle malfunctions
  • Car care
  • Power unit
  • Engine repair
  • Cooling system
  • Supply system
  • Control system
  • Exhaust system
  • Transmission
  • Clutch
  • Car gearbox
  • Front wheel drives
  • Chassis
  • Front suspension
  • Rear suspension
  • Steering
  • Brake system
  • Body
  • Exterior
  • Interior
  • Doors, covers and windows
  • Electrical equipment
  • Equipment and devices
  • Headlights and lighting
  • Engine electrics
  • Anti-theft system


VAZbook.ru © 2017 · Mobile version · Contact with administration · Sitemap: EN BG BY UA RS HR RO PL SK HU · Site search · News and articles VAZ-1111 · VAZ-11113 · VAZ-2101 · VAZ-21011 · VAZ-2104 · VAZ-2105 · VAZ-21051 · VAZ-2106 · VAZ-21061 · VAZ-2107 · VAZ-21099 · VAZ-2109 · VAZ-2108 · VAZ-2110 · VAZ-2112 · VAZ-2114 · VAZ-2115 · VAZ-2121 · VAZ-21213 · VAZ-21214 ·
The site stores technical data using cookies to improve the service.