
English Русский
Български
Беларускі
Український
Српски
Hrvatski
Română
Polski
Slovenský
Magyar
| Articles | Contacts | Sitemap |   
Repair and maintenance Lada Repair and maintenance Mazda Repair and maintenance Mitsubishi Repair and maintenance Toyota Repair and maintenance Land Rover Repair and maintenance Hyundai Repair and maintenance Nissan
VAZbook.ru


Main     1111   2101   2105   2106   2107   2109   2110   2115   2121  
VAZ-1111 (1988-1996) VAZ-11113 (1996-2003)
  • Main
  • «Oka»
  • VAZ-11113
  • Power unit
  • Engine repair
  • Lapping valves

Lapping valves (VAZ-11113)

            0

You will need:
  • valve grinding tool
  • lapping paste

Remove the oil seals (see subsection 10.4.3.). Clean the valves and seats thoroughly.
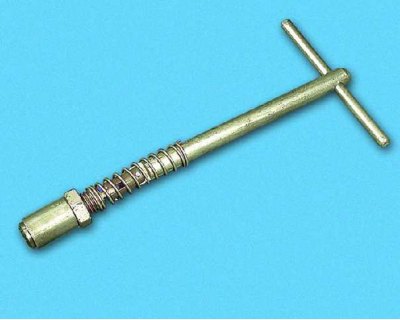
Valve grinding tool
Valve grinding tool


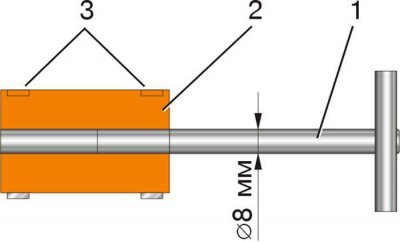
If you don't have a special device, you can use a device made according to this sketch:

If you don't have a special device, you can use a device made according to this sketch:
1 – metal rod
2 – rubber hose
3 – screw clamps

3 – screw clamps


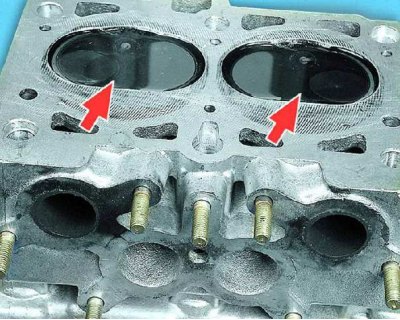
To check the tightness of the valve, install it in the head with springs and crackers. Then turn the head over and pour kerosene into the combustion chamber corresponding to the valve being checked. If kerosene does not leak out of the combustion chamber within three minutes, the valve is tight.


To check the tightness of the valve, install it in the head with springs and crackers. Then turn…


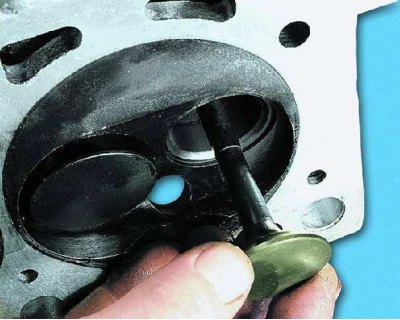
1. Insert the valve into the cylinder head and...
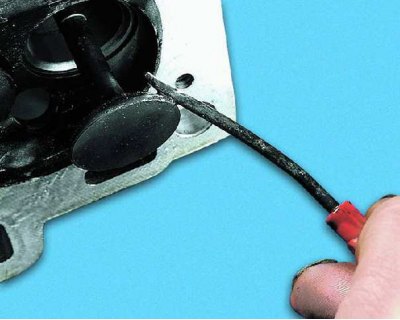
1. Insert the valve into the cylinder head and...


2....apply a thin layer of lapping paste to the working chamfer of the valve.

[The original is on the portal vazbook]
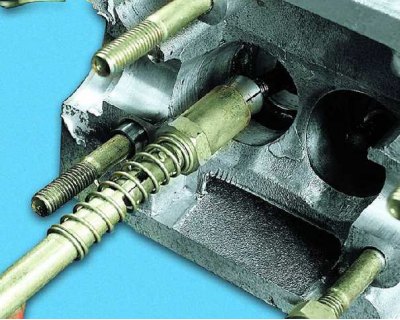
2....apply a thin layer of lapping paste to the working chamfer of the valve.


3. Clamp the valve stem in the fixture (or secure the rubber hose of the device to the valve stem with a clamp).
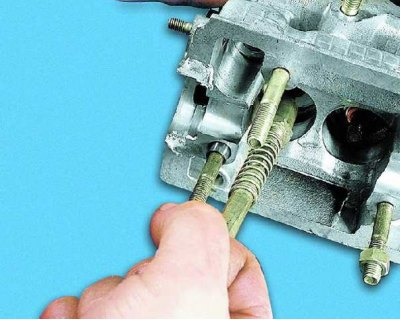
3. Clamp the valve stem in the fixture (or secure the rubber hose of the device to the valve stem…


4. Turn the valve in both directions using the device, periodically pressing the valve against the seat.
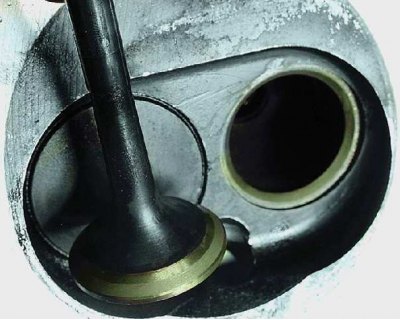

4. Turn the valve in both directions using the device, periodically pressing the valve against the…


5. An external sign of satisfactory lapping is a uniform matte gray color of the working chamfer of the valve and seat.
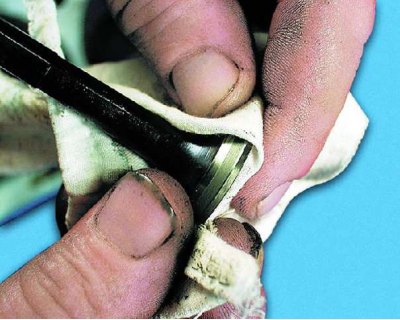
5. An external sign of satisfactory lapping is a uniform matte gray color of the working chamfer of…


6. After lapping, wipe the valve thoroughly and...
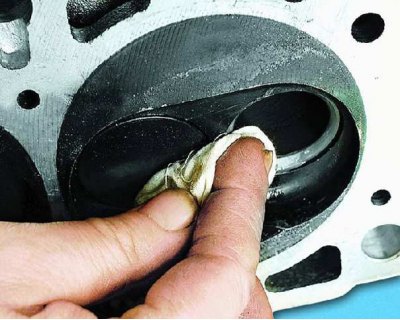
6. After lapping, wipe the valve thoroughly and...


7....the seat with a clean cloth and rinse to remove any remaining lapping paste.


This article is available at russian, bulgarian, belarusian, ukrainian, serbian, croatian, romanian, polish, slovak, hungarian
The text was reviewed by the specialist: Grigory Vologodtsev

Share with friends:

Previous articles
VAZ-11113: Engine repair
Next articles

Cylinder head repair
Replacing the rear crankshaft oil seal
Replacing the front crankshaft oil seal
Replacing the oil pan gasket
Replacing valve stem seals
Removal and installation of the power unit
Disassembling the engine
Engine parts defect detection
Engine assembly

More articles from other manuals on VAZ cars:
➠ Lapping valves VAZ-21099 (1990-2004)
➠ Valves — lapping VAZ-2112 (1999-2007)
➠ Lapping valves VAZ-2115 (1997-2012)
➠ Features of the cylinder head and valves VAZ-21011 (1974-1983)
➠ Valves — Check for wear VAZ-21051 (1979-2010)
Link in different formats to this page


Visitor comments

No comments yet


How much will 22 + 50 ?


VAZ-1111 (1988-1996) 
  • General information
  • Vehicle description
  • Vehicle device
  • Vehicle operation
  • Maintenance
  • Applications
  • Power unit
  • Engine repair
  • Cooling system
  • Lubrication system
  • Supply system
  • Transmission
  • Clutch
  • Transmission
  • Chassis
  • Front suspension and wheels
  • Rear suspension
  • Steering
  • Brake system
  • Body
  • Exterior
  • Interior
  • Electrical equipment
  • Engine electrics
  • Equipment and devices


VAZ-11113 (1996-2003) 
  • General information
  • Introduction to the guide
  • User manual
  • Maintenance
  • Power unit
  • Engine repair
  • Cooling and lubrication system
  • Fuel system
  • Exhaust system
  • Transmission
  • Car gearbox
  • Clutch and drive shafts
  • Chassis
  • Front suspension
  • Rear suspension
  • Steering
  • Brake system
  • Body
  • Exterior
  • Interior
  • Doors and locks
  • Electrical equipment
  • Equipment and devices
  • Lighting and signaling
  • Engine electrics
  • Ignition system


VAZbook.ru © 2017 · Mobile version · Contact with administration · Sitemap: EN BG BY UA RS HR RO PL SK HU · Site search · News and articles VAZ-1111 · VAZ-11113 · VAZ-2101 · VAZ-21011 · VAZ-2104 · VAZ-2105 · VAZ-21051 · VAZ-2106 · VAZ-21061 · VAZ-2107 · VAZ-21099 · VAZ-2109 · VAZ-2108 · VAZ-2110 · VAZ-2112 · VAZ-2114 · VAZ-2115 · VAZ-2121 · VAZ-21213 · VAZ-21214 ·
The site stores technical data using cookies to improve the service.