




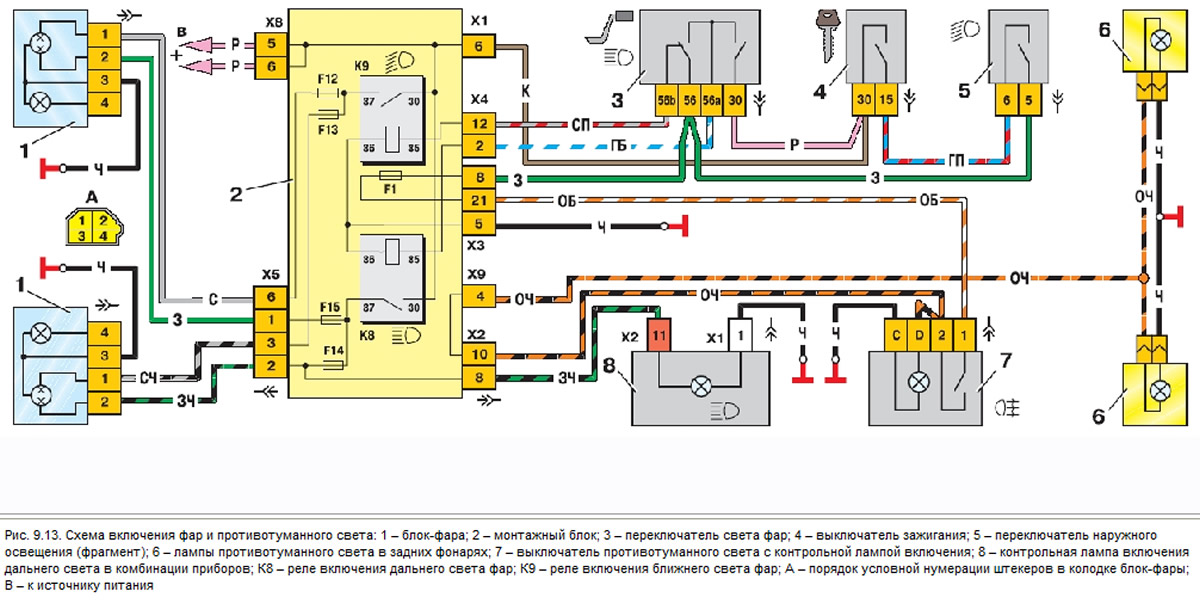
Open large image in new tab »
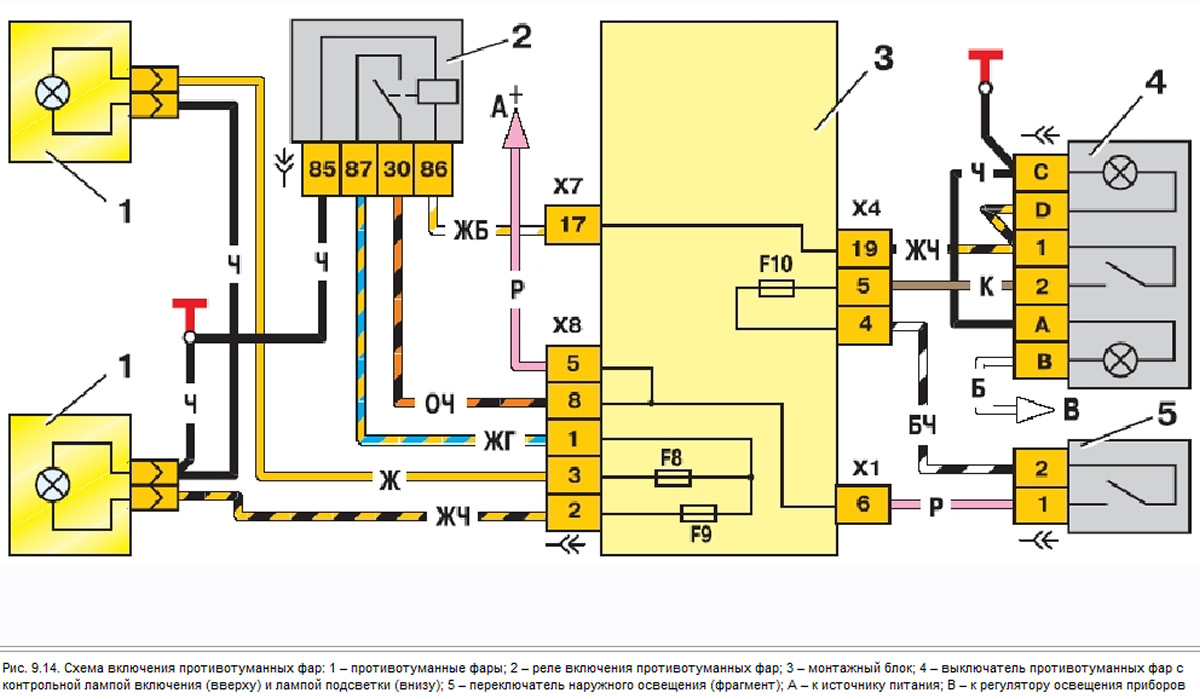
Fog lights. On vehicles with a variant design, fog lights can be installed in the front buffers. The circuit diagram for the fog lights is shown below. The lights are switched on by switch 4 using auxiliary relay 2 type 113.3747-10, installed in the engine compartment on the left mudguard. The fog lights can only be switched on if the external lighting is switched on by switch 5.
Open large image in new tab »
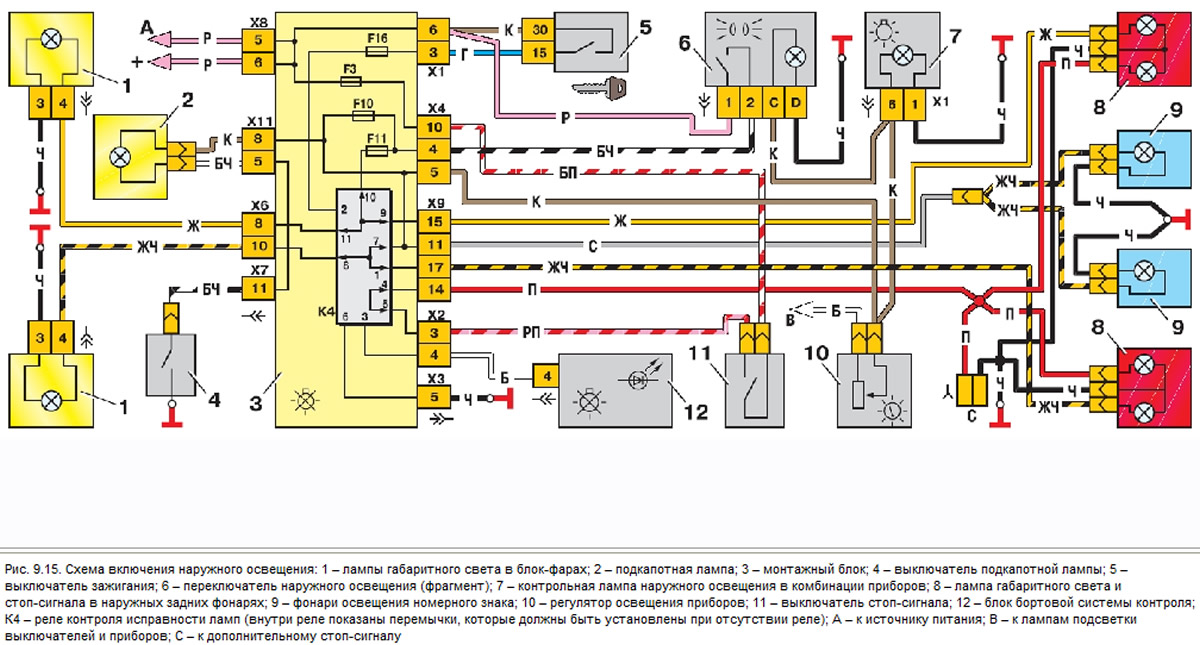
Outdoor lighting. The diagram for switching on the external lighting is shown below. The side light is switched on by the external lighting switch 6. The side light and brake light lamps are powered via the K4 lamp health monitoring relay. If any lamp burns out, the relay switches on the corresponding LED indicator in the 12 on-board monitoring system indicator block. If the lamp health monitoring relay is not installed in the mounting block, then the contact jumpers shown by the arrows should be installed instead.
Open large image in new tab »
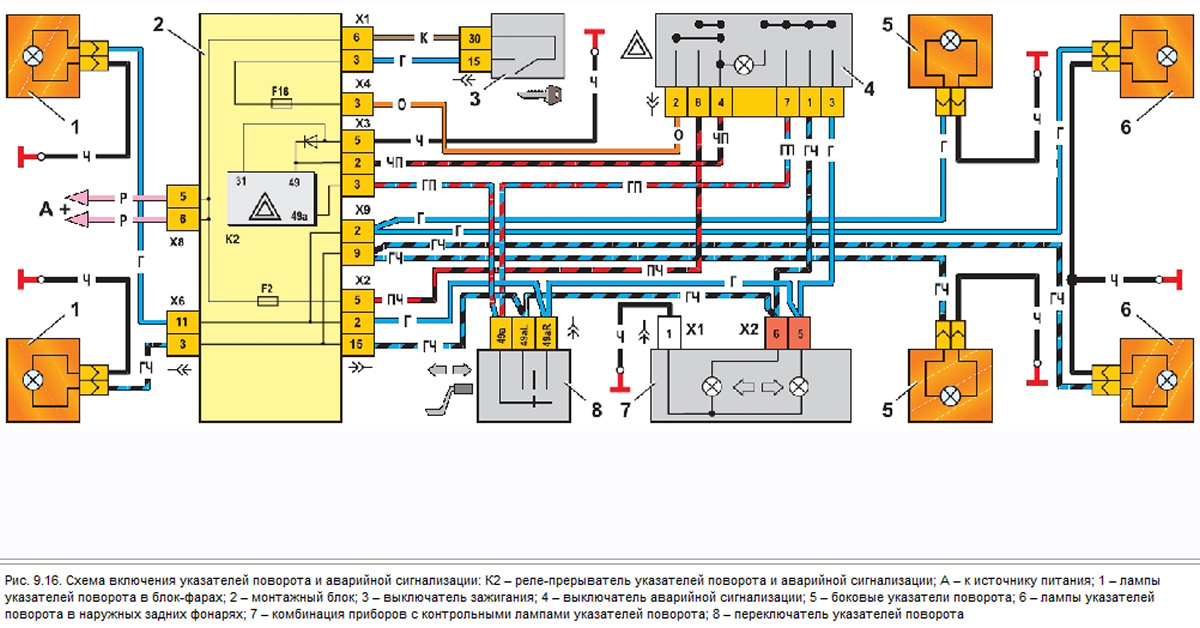
Direction indicators. The diagram for switching on the direction indicators and hazard warning lights is shown below. The right and left side direction indicators are switched on by switch 8. In the hazard warning mode, switch 4 switches on all direction indicators. Flashing of the lamps is provided by the relay-breaker K2 in the mounting block.
Open large image in new tab »
Helpful tips: If the headlights suddenly start to shine dimly, and when you turn on the turn signal the parking light starts to flash, restore the contact of the "ground" wire with the body.
Make it a habit to change your light bulbs regularly (especially headlights). Over time, the bulb becomes cloudy and the brightness of the lamp decreases. Moreover, this process occurs quite slowly and the driver does not notice the gradual deterioration of the illumination of the road.
Recently, more and more cars have appeared whose headlights shine like a Christmas tree, with a bright light with various shades of blue. All this is called "xenon" and is considered very cool. There is no dispute that xenon headlights installed as standard on foreign cars illuminate the road much better, and the car with them looks much more impressive. It is not surprising that many are also trying to improve their car, especially since now on the shelves there are many "xenon" lamps of various manufactures (most often Chinese). Don't buy into cheap stuff - these lamps have nothing in common with real xenon gas-discharge lamps without filaments. These are ordinary lamps with tinted glass. The light transmittance of such glass is significantly lower than that of standard lamps, the filaments of fakes are usually installed out of focus, and a headlight with such a lamp, despite its external effectiveness, practically does not illuminate anything, and additionally mercilessly blinds oncoming drivers. In addition, manufacturers of such lamps, in order to compensate for the decrease in luminous flux, increase their power above the norm. Often, their installation leads to melting of wire insulation and burnout of printed circuit boards of mounting blocks. And a fire is possible. It is better not to buy a "headache" for your money, but buy high-quality ordinary lamps.
Sooner or later, the bulbs in the rear lights burn out. It would seem that nothing could be simpler - take a new bulb that matches the size of the base and voltage, and install it instead of the burnt out one. However, keep in mind that the rear lights use bulbs with the same base, but different power: 4W and 21W. And this is a significant detail: 4-watt bulbs are installed for the side lights, and 21-watt bulbs are installed in the turn signals and brake lights. Do not mix them up. If you install low-power bulbs in the brake lights and turn signals, other drivers simply will not see your signals in inclement weather. And powerful bulbs in the "side lights" will greatly interfere with drivers driving behind you and irritate them. Their attitude towards you will be corresponding.