English Русский
Български
Беларускі
Український
Српски
Hrvatski
Română
Polski
Slovenský
Magyar
| Articles | Contacts | Sitemap |   
Repair and maintenance Lada Repair and maintenance Mazda Repair and maintenance Mitsubishi Repair and maintenance Toyota Repair and maintenance Land Rover Repair and maintenance Hyundai Repair and maintenance Nissan
VAZbook.ru


Main     1111   2101   2105   2106   2107   2109   2110   2115   2121  
VAZ-1111 (1988-1996) VAZ-11113 (1996-2003)
  • Main
  • «Oka»
  • VAZ-11113
  • Body
  • Interior
  • Heater repair

Heater repair (VAZ-11113)

            0

You will need:
  • key "8", "10"
  • screwdriver

screwdriver


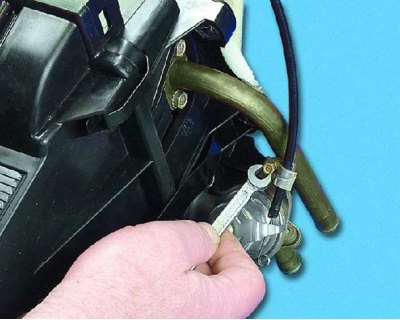
1. Loosen the clamp securing the heater tap drive rod casing and remove the rod from under the clamp.
1. Loosen the clamp securing the heater tap drive rod casing and remove the rod from under the…


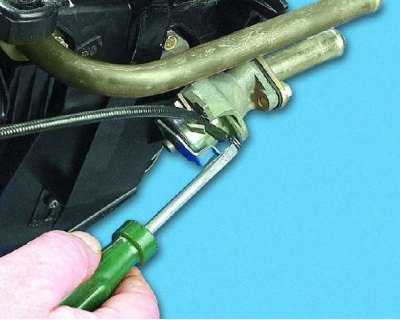
2. Use a screwdriver to pry up the heater control rod cable and...
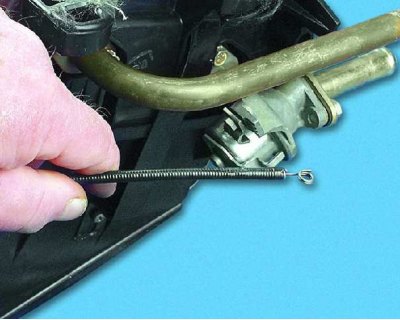
2. Use a screwdriver to pry up the heater control rod cable and...


3....disconnect the heater valve drive rod from the valve lever.
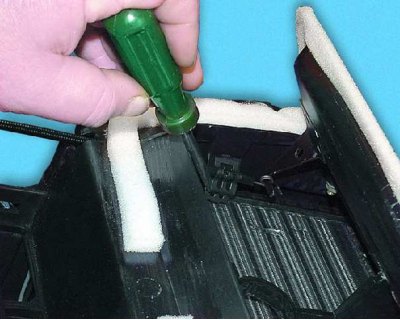
3....disconnect the heater valve drive rod from the valve lever.


4. Open the air intake cover and remove the traction casing mounting bracket.
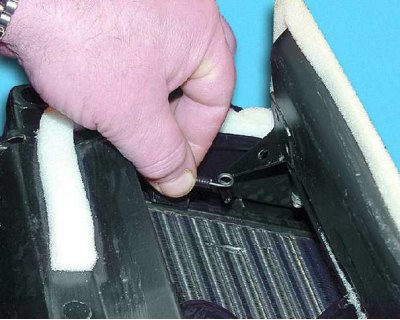


4. Open the air intake cover and remove the traction casing mounting bracket.


5. Remove the air intake cover drive cable from the cover lever.
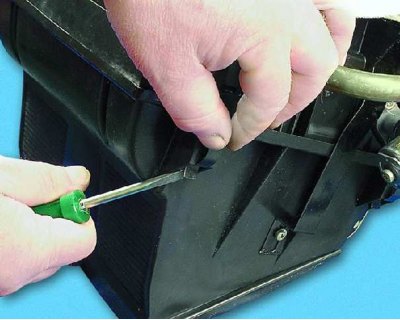
5. Remove the air intake cover drive cable from the cover lever.


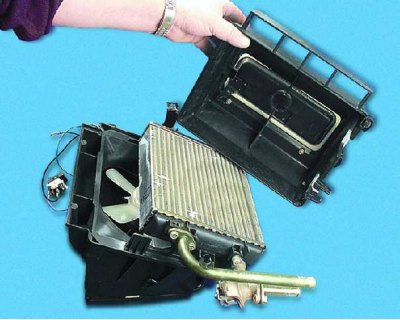
6. Use a screwdriver to pry up and remove the four spring clips on the radiator and heater shrouds (one is shown).
6. Use a screwdriver to pry up and remove the four spring clips on the radiator and heater shrouds…


7. Remove the radiator shroud.

7. Remove the radiator shroud.


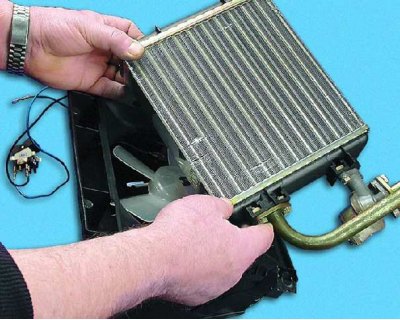
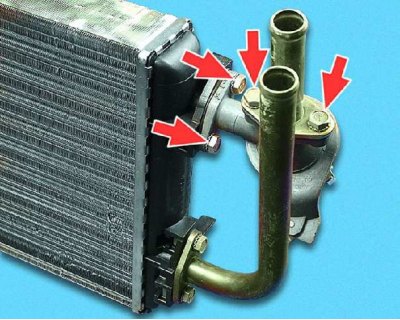
8. Remove the heater core from the heater housing.

8. Remove the heater core from the heater housing.


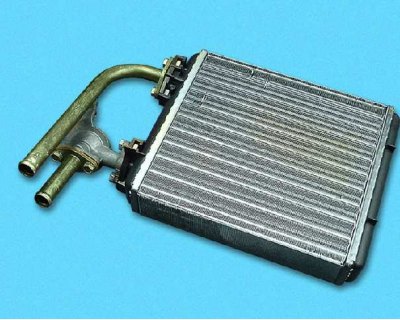
9. To replace the heater tap, unscrew the four bolts that secure it (two to the radiator and two to the coolant supply pipe). Replace the sealing gaskets (two) between the flanges of the tap and the radiator, as well as the pipes, with new ones.
9. To replace the heater tap, unscrew the four bolts that secure it (two to the radiator and two to…


10. Install the heater radiator in the reverse order of removal.
10. Install the heater radiator in the reverse order of removal.


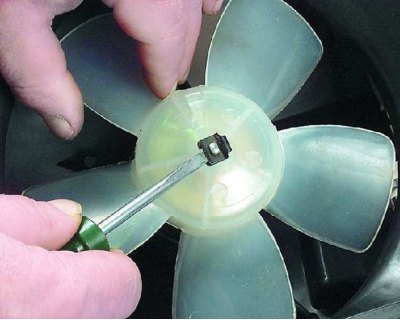
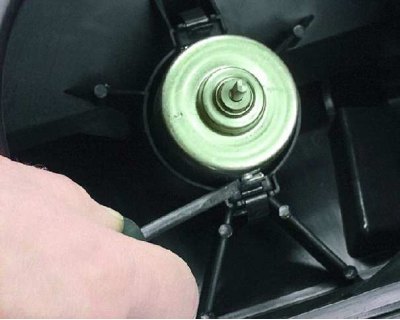
11. Remove the heater motor impeller retaining plate by prying it off with a screwdriver.
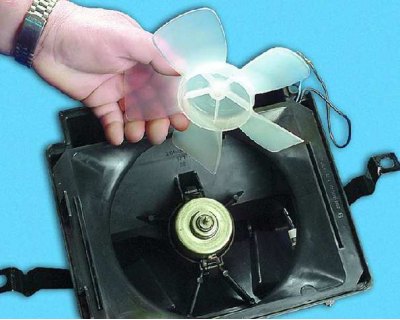
11. Remove the heater motor impeller retaining plate by prying it off with a screwdriver.


12. Remove the impeller from the motor shaft.
12. Remove the impeller from the motor shaft.


13. Using a screwdriver, remove the two spring clips securing the electric motor to the heater casing.
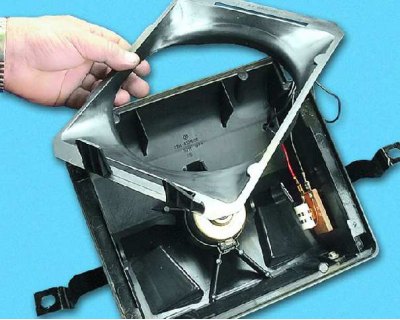
13. Using a screwdriver, remove the two spring clips securing the electric motor to the heater…


14. Remove the fan guide shroud.

14. Remove the fan guide shroud.


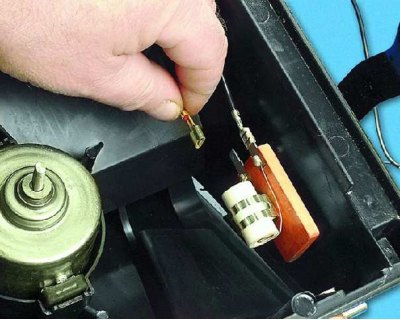
15. Remove the wire ends from the contacts of the additional resistor.
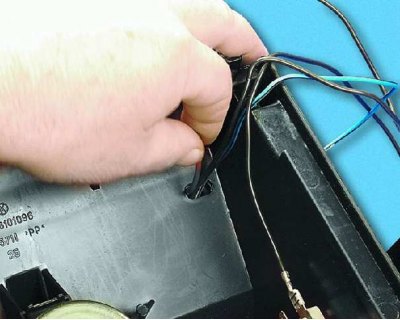
15. Remove the wire ends from the contacts of the additional resistor.


16. Remove the electric motor wires from the lower heater cover (under the air distribution cover) and...
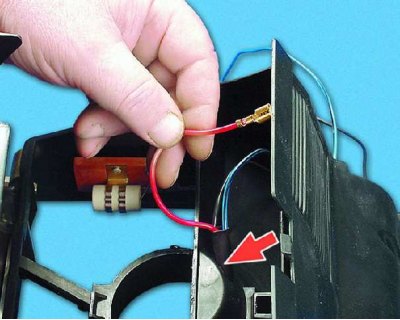
16. Remove the electric motor wires from the lower heater cover (under the air distribution cover)…


17....from the hole in the electric motor bracket in the heater casing.
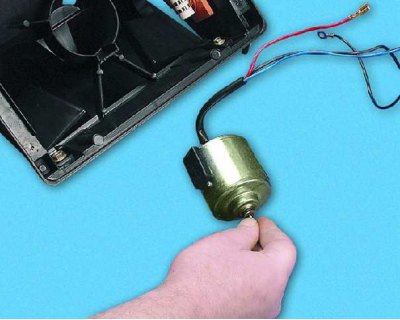
17....from the hole in the electric motor bracket in the heater casing.


18. Remove the electric motor from the heater housing.
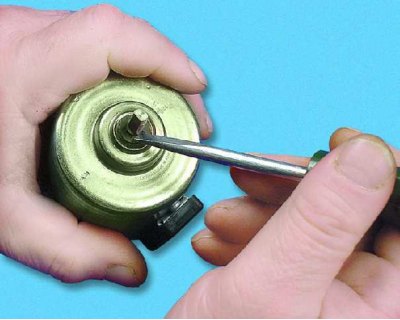
18. Remove the electric motor from the heater housing.


19. Using a screwdriver, pry the retaining ring off the motor shaft.
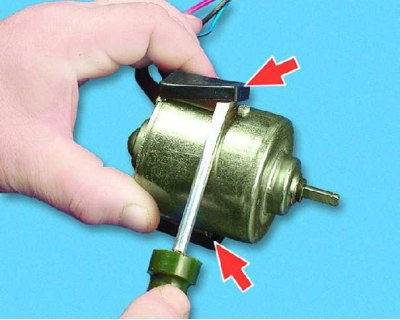
19. Using a screwdriver, pry the retaining ring off the motor shaft.


20. Remove the two rubber pads from the motor housing.
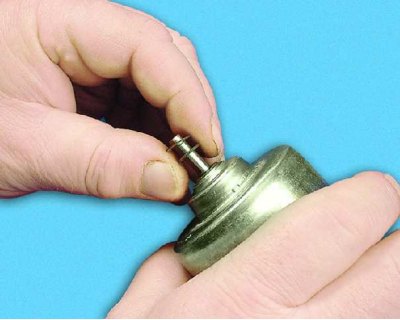
20. Remove the two rubber pads from the motor housing.


21. Remove the two washers from the motor shaft.
21. Remove the two washers from the motor shaft.


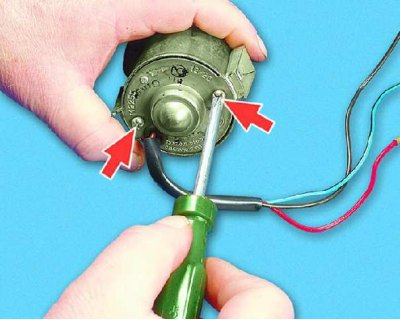
22. Remove the two screws securing the electric motor cover from the collector side.
22. Remove the two screws securing the electric motor cover from the collector side.


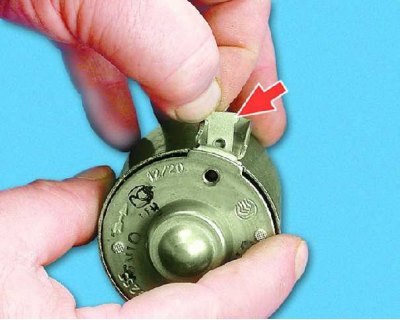
23. Remove the two embedded nuts from the grooves of the electric motor housing (one is shown).
23. Remove the two embedded nuts from the grooves of the electric motor housing (one is shown).


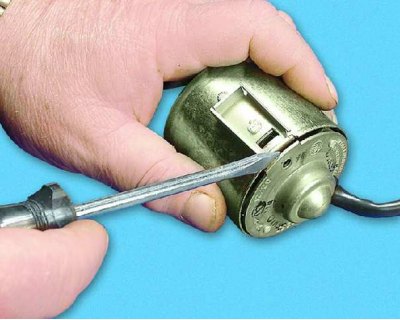
24. Pry off the motor cover with a screwdriver and...
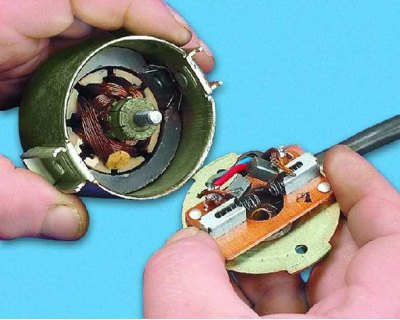
24. Pry off the motor cover with a screwdriver and...


25....remove it together with the brushes and brush holder.
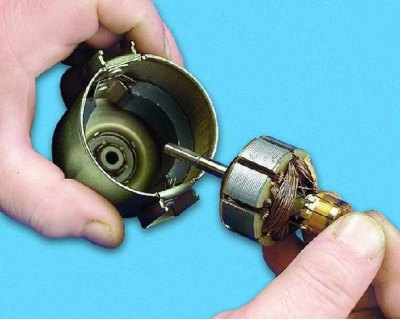
25....remove it together with the brushes and brush holder.


26. Remove the electric motor rotor from the housing.
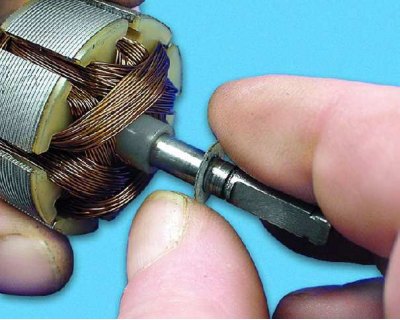
26. Remove the electric motor rotor from the housing.


27. Remove the washer from the rotor shaft.
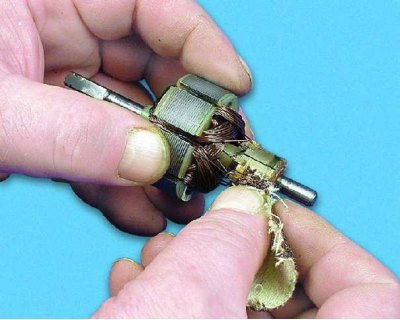
27. Remove the washer from the rotor shaft.


28. Clean the manifold with fine sandpaper and wipe with alcohol.
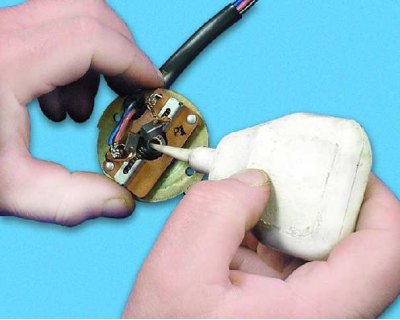
28. Clean the manifold with fine sandpaper and wipe with alcohol.


29. Lubricate the plain bearings of the electric motor rotor shaft with engine oil (in the electric motor housing and in the cover on the collector side).
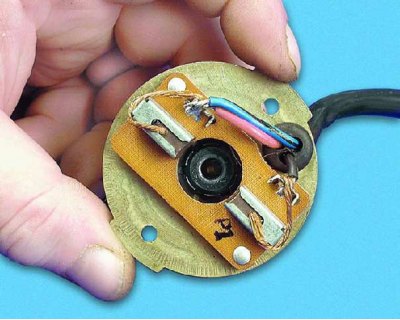
29. Lubricate the plain bearings of the electric motor rotor shaft with engine oil (in the electric…


30. Place the brush bars behind the brush holder (to facilitate rotor installation).
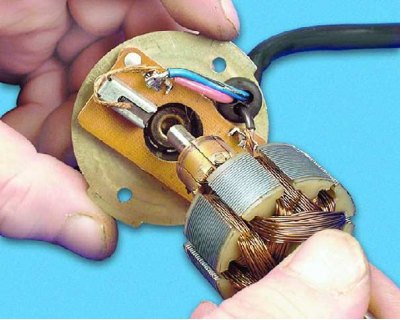
30. Place the brush bars behind the brush holder (to facilitate rotor installation).


31. Insert the motor rotor shaft into the cover bearing from the collector side.
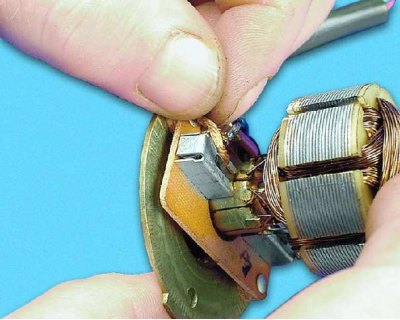
31. Insert the motor rotor shaft into the cover bearing from the collector side.


32. Disengage the brush bars from the brush holder. Then assemble and install the electric motor in the reverse order of disassembly.


This article is available at russian, bulgarian, belarusian, ukrainian, serbian, croatian, romanian, polish, slovak, hungarian
The text was reviewed by the specialist: Grigory Vologodtsev

Share with friends:

Previous articles
VAZ-11113: Interior
Next articles

Removal and installation the heater
Removal and installation the instrument panel
Replacing seat belts
Removal and installation the rear seat
Replacing the front seat runners
Removal and installation sun visors

More articles from other manuals on VAZ cars:
➠ Repair of heater electric motor VAZ-21011 (1974-1983)
➠ Repair of the heater fan electric motor VAZ-21051 (1979-2010)
➠ Repair of heater electric motor VAZ-21061 (1976-2006)
➠ Repair of heater electric motor VAZ-2121 (1977-1994)
➠ Preparing the car for maintenance and repair VAZ-2107 (1982-2012)
Link in different formats to this page


Visitor comments

No comments yet


How much will 43 + 14 ?


VAZ-1111 (1988-1996) 
  • General information
  • Vehicle description
  • Vehicle device
  • Vehicle operation
  • Maintenance
  • Applications
  • Power unit
  • Engine repair
  • Cooling system
  • Lubrication system
  • Supply system
  • Transmission
  • Clutch
  • Transmission
  • Chassis
  • Front suspension and wheels
  • Rear suspension
  • Steering
  • Brake system
  • Body
  • Exterior
  • Interior
  • Electrical equipment
  • Engine electrics
  • Equipment and devices


VAZ-11113 (1996-2003) 
  • General information
  • Introduction to the guide
  • User manual
  • Maintenance
  • Power unit
  • Engine repair
  • Cooling and lubrication system
  • Fuel system
  • Exhaust system
  • Transmission
  • Car gearbox
  • Clutch and drive shafts
  • Chassis
  • Front suspension
  • Rear suspension
  • Steering
  • Brake system
  • Body
  • Exterior
  • Interior
  • Doors and locks
  • Electrical equipment
  • Equipment and devices
  • Lighting and signaling
  • Engine electrics
  • Ignition system


VAZbook.ru © 2017 · Mobile version · Contact with administration · Sitemap: EN BG BY UA RS HR RO PL SK HU · Site search · News and articles VAZ-1111 · VAZ-11113 · VAZ-2101 · VAZ-21011 · VAZ-2104 · VAZ-2105 · VAZ-21051 · VAZ-2106 · VAZ-21061 · VAZ-2107 · VAZ-21099 · VAZ-2109 · VAZ-2108 · VAZ-2110 · VAZ-2112 · VAZ-2114 · VAZ-2115 · VAZ-2121 · VAZ-21213 · VAZ-21214 ·
The site stores technical data using cookies to improve the service.