

Car engine repair VAZ-1111 Oka
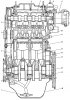
General information about engines
Engines of VAZ-1111 and 11113 models (pic. 2 and 3), used on cars - 4-stroke carburetor, 2-cylinder in-line, vertical cylinders and with a camshaft located on the cylinder head....
Engines of VAZ-1111 and 11113 models (pic. 2 and 3), used on cars - 4-stroke carburetor, 2-cylinder in-line, vertical cylinders and with a camshaft located on the cylinder head....

Engine suspension device
power unit (engine complete with gearbox and clutch) mounted on a welded tubular subframe ( see fig. 81 ) on three elastic rubber-metal supports 1, 5 and 7 (pic. 4). The front...
power unit (engine complete with gearbox and clutch) mounted on a welded tubular subframe ( see fig. 81 ) on three elastic rubber-metal supports 1, 5 and 7 (pic. 4). The front...

Crank mechanism device
The crank mechanism consists of a cylinder block, a piston with a connecting rod and a crankshaft with a flywheel. Cylinder block Cast iron, cast. Block cylinders are divided into...
The crank mechanism consists of a cylinder block, a piston with a connecting rod and a crankshaft with a flywheel. Cylinder block Cast iron, cast. Block cylinders are divided into...

Balancing mechanism device
To compensate for inertial forces from the parts of the crank mechanism, the engines have two balancing shafts 1 and 12 ( see fig. 3 ). Each of them is mounted in the cylinder...
To compensate for inertial forces from the parts of the crank mechanism, the engines have two balancing shafts 1 and 12 ( see fig. 3 ). Each of them is mounted in the cylinder...

The device of the gas distribution mechanism
Consists of camshaft 5 (pic. 6), valves 2 and guide bushings, springs with fasteners and cylindrical tappets 3 valves. The details of the mechanism are located on the cylinder...
Consists of camshaft 5 (pic. 6), valves 2 and guide bushings, springs with fasteners and cylindrical tappets 3 valves. The details of the mechanism are located on the cylinder...

Possible engine malfunctions
Possible engine malfunctions, their causes and remedies. Engine won't start Engine runs erratically or stalls at idle The engine runs unevenly and unstably at a high crankshaft...
Possible engine malfunctions, their causes and remedies. Engine won't start Engine runs erratically or stalls at idle The engine runs unevenly and unstably at a high crankshaft...
Removal and installation of the power unit
The power unit, which consists of the engine, clutch and gearbox, is removed from the engine compartment along with the subframe down. In this case, the front wheel drive shafts...
The power unit, which consists of the engine, clutch and gearbox, is removed from the engine compartment along with the subframe down. In this case, the front wheel drive shafts...

Removal and installation of a head of cylinders
On a car, the head is removed if the problem does not require removal of the power unit or if it is necessary to remove carbon deposits from the surface of the combustion chamber...
On a car, the head is removed if the problem does not require removal of the power unit or if it is necessary to remove carbon deposits from the surface of the combustion chamber...
Removal and installation of a camshaft
Remove the camshaft in the following order. Brake the car with the parking brake and set the gearshift lever to the neutral position. Disconnect the wire from the terminal «minus»...
Remove the camshaft in the following order. Brake the car with the parking brake and set the gearshift lever to the neutral position. Disconnect the wire from the terminal «minus»...
Removing and installing the camshaft drive belt
Before proceeding to replace the belt, brake the car with a parking brake, turn on IV gear and turn the front wheels to the right until they stop. Open the hood, remove the spare...
Before proceeding to replace the belt, brake the car with a parking brake, turn on IV gear and turn the front wheels to the right until they stop. Open the hood, remove the spare...

Removal and installation of an epiploon of a camshaft
Before proceeding with the replacement of the oil seal, brake the car with the parking brake and set the gear lever to the neutral position. Open the hood, remove the spare wheel...
Before proceeding with the replacement of the oil seal, brake the car with the parking brake and set the gear lever to the neutral position. Open the hood, remove the spare wheel...
Removal and installation of a forward epiploon of a cranked shaft
To replace the oil seal, install the car on a two-post lift, brake it with a parking brake and perform all the preparatory operations as for removing the camshaft oil seal....
To replace the oil seal, install the car on a two-post lift, brake it with a parking brake and perform all the preparatory operations as for removing the camshaft oil seal....

Removal and installation of a back epiploon of a cranked shaft
Before proceeding with the replacement of the oil seal, install the car on a lift and remove the gearbox (see sect. « Transmission »). Unscrew the bolts securing the clutch cover...
Before proceeding with the replacement of the oil seal, install the car on a lift and remove the gearbox (see sect. « Transmission »). Unscrew the bolts securing the clutch cover...

Removal and installation of the balance shaft gear
To replace the gear, install the car on a two-post lift and remove the gearbox, as described in sec. « Transmission ». Unscrew the bolts securing the clutch cover to the flywheel...
To replace the gear, install the car on a two-post lift and remove the gearbox, as described in sec. « Transmission ». Unscrew the bolts securing the clutch cover to the flywheel...
Removal and installation of connecting rod and piston group
To remove parts of this group, install the car on a lift and disconnect the wire from the terminal «minus» battery. Raise the car, remove the engine mudguards and drain the...
To remove parts of this group, install the car on a lift and disconnect the wire from the terminal «minus» battery. Raise the car, remove the engine mudguards and drain the...

Dismantling and assembly of the power unit
Disassembly Remove the muffler exhaust pipe with bracket. Loosen the starter bolt and nut 2 (pic. 29) to the clutch housing and remove the starter. Remove brackets 6 ( see fig. 4...
Disassembly Remove the muffler exhaust pipe with bracket. Loosen the starter bolt and nut 2 (pic. 29) to the clutch housing and remove the starter. Remove brackets 6 ( see fig. 4...

Engine disassembly
The washed and cleaned engine is installed on a stand for disassembly and oil is drained from the crankcase. Remove the fuel supply hose from the fuel pump to the carburetor and...
The washed and cleaned engine is installed on a stand for disassembly and oil is drained from the crankcase. Remove the fuel supply hose from the fuel pump to the carburetor and...

Engine Assembly
A clean cylinder block assembly with balancing shafts is installed on the stand and the missing studs are wrapped in it. Lubricate the bearing shells and thrust half rings of the...
A clean cylinder block assembly with balancing shafts is installed on the stand and the missing studs are wrapped in it. Lubricate the bearing shells and thrust half rings of the...

Dismantling and assembly of the block of cylinders
Disassembly of the cylinder block consists in removing the balance shafts. They are removed only if it is necessary to replace damaged bearings in the following order. Remove the...
Disassembly of the cylinder block consists in removing the balance shafts. They are removed only if it is necessary to replace damaged bearings in the following order. Remove the...

Disassembly and assembly of the connecting rod and piston group
When disassembling, remove the piston rings. The piston is placed in a support with a cylindrical recess and, using mandrel A.60308, centered in the hole of the piston pin, the...
When disassembling, remove the piston rings. The piston is placed in a support with a cylindrical recess and, using mandrel A.60308, centered in the hole of the piston pin, the...

Dismantling and assembly of a head of cylinders
If only one part needs to be replaced, the cylinder head may not be completely disassembled and only what is needed for replacement can be removed. The cylinder head is completely...
If only one part needs to be replaced, the cylinder head may not be completely disassembled and only what is needed for replacement can be removed. The cylinder head is completely...

Check and repair of the block of cylinders
When checking, the cylinder block is thoroughly washed and the oil channels are cleaned. After blowing and drying with compressed air, inspect the cylinder block. Cracks in any...
When checking, the cylinder block is thoroughly washed and the oil channels are cleaned. After blowing and drying with compressed air, inspect the cylinder block. Cracks in any...
Checking and repairing the connecting rod and piston group
The piston is cleaned of carbon deposits and all deposits are removed from the lubrication channels of the piston and connecting rod. Carefully examine the details. Cracks of any...
The piston is cleaned of carbon deposits and all deposits are removed from the lubrication channels of the piston and connecting rod. Carefully examine the details. Cracks of any...

Checking and repairing the crankshaft and flywheel
Crankshaft Inspect the crankshaft. Cracks anywhere on the crankshaft are not allowed. On surfaces mating with the working edges of the seals, scratches, scuffs and risks are not...
Crankshaft Inspect the crankshaft. Cracks anywhere on the crankshaft are not allowed. On surfaces mating with the working edges of the seals, scratches, scuffs and risks are not...

Check and repair of a head of cylinders
Thoroughly wash the cylinder head and clean the oil channels. Remove carbon deposits from the combustion chambers and from the surface of the exhaust channels with a metal brush....
Thoroughly wash the cylinder head and clean the oil channels. Remove carbon deposits from the combustion chambers and from the surface of the exhaust channels with a metal brush....
Checking and repairing the camshaft and its drive
On the bearing journals of the camshaft, scoring, nicks, scratches and aluminum enveloping from the bearings are not allowed. On the working surfaces of the cams and the...
On the bearing journals of the camshaft, scoring, nicks, scratches and aluminum enveloping from the bearings are not allowed. On the working surfaces of the cams and the...

Valve clearance adjustment
Gap A ( see fig. 6 ) between the camshaft lobes and shims on a cold engine must be (0,2±0,05) mm for intake valves and (0,35±0,05) mm - for graduation. The gap is adjusted by...
Gap A ( see fig. 6 ) between the camshaft lobes and shims on a cold engine must be (0,2±0,05) mm for intake valves and (0,35±0,05) mm - for graduation. The gap is adjusted by...
Camshaft drive belt tension adjustment
Toothed belt tension is an important adjustment factor that ensures long belt life, no slippage of the pulley teeth and quiet operation. Toothed belt tension is checked and...
Toothed belt tension is an important adjustment factor that ensures long belt life, no slippage of the pulley teeth and quiet operation. Toothed belt tension is checked and...

Alternator Drive Belt Tension Adjustment
Normal deflection A (pic. 66) the belt should be within 10-15 mm with a force of 100 N. To adjust the belt tension 4, loosen the nuts securing the generator to the tension bar 1...
Normal deflection A (pic. 66) the belt should be within 10-15 mm with a force of 100 N. To adjust the belt tension 4, loosen the nuts securing the generator to the tension bar 1...

Setting the ignition timing
Ignition advance angle up to c. m.t. at a crankshaft speed of 820-900 min -1 it should be (1±1) °for engines 1111 and (4±1) °for 11113. To check the ignition timing on the car,...
Ignition advance angle up to c. m.t. at a crankshaft speed of 820-900 min -1 it should be (1±1) °for engines 1111 and (4±1) °for 11113. To check the ignition timing on the car,...
Engine break-in after repair
The overhauled engine is bench tested (running-in) without load for the following cycle: at a speed of 820-900 min -1 - 2 minutes; 1000 min -1 - 3; 1500 min -1 - 4; 2000 min -1 -...
The overhauled engine is bench tested (running-in) without load for the following cycle: at a speed of 820-900 min -1 - 2 minutes; 1000 min -1 - 3; 1500 min -1 - 4; 2000 min -1 -...
This section is available on russian, bulgarian, belarusian, ukrainian, serbian, croatian, romanian, polish, slovak, hungarian
More articles from other manuals on VAZ cars:
➠ Power unit: Engine repair VAZ-21011 (1974-1983)
➠ Electrical equipment: Engine electrics VAZ-21051 (1979-2010)
➠ Power unit: Engine repair VAZ-21061 (1976-2006)
➠ Electrical equipment: Engine electrics VAZ-2107 (1982-2012)
➠ Power unit: Engine repair VAZ-2108 (1984-2003)
➠ Electrical equipment: Engine electrics VAZ-2110 (1995-2007)
➠ Electrical equipment: Engine electrics VAZ-2115 (1997-2012)
➠ Power unit: Engine repair VAZ-21213 (1994-2006)
➠ Power unit: Engine repair VAZ-21011 (1974-1983)
➠ Electrical equipment: Engine electrics VAZ-21051 (1979-2010)
➠ Power unit: Engine repair VAZ-21061 (1976-2006)
➠ Electrical equipment: Engine electrics VAZ-2107 (1982-2012)
➠ Power unit: Engine repair VAZ-2108 (1984-2003)
➠ Electrical equipment: Engine electrics VAZ-2110 (1995-2007)
➠ Electrical equipment: Engine electrics VAZ-2115 (1997-2012)
➠ Power unit: Engine repair VAZ-21213 (1994-2006)
Share with friends:
- General information
- Vehicle description
- Vehicle device
- Vehicle operation
- Maintenance
- Applications
- Power unit
- Engine repair
- Cooling system
- Lubrication system
- Supply system
- Transmission
- Clutch
- Transmission
- Chassis
- Front suspension and wheels
- Rear suspension
- Steering
- Brake system
- Body
- Exterior
- Interior
- Electrical equipment
- Engine electrics
- Equipment and devices
- General information
- Introduction to the guide
- User manual
- Maintenance
- Power unit
- Engine repair
- Cooling and lubrication system
- Fuel system
- Exhaust system
- Transmission
- Car gearbox
- Clutch and drive shafts
- Chassis
- Front suspension
- Rear suspension
- Steering
- Brake system
- Body
- Exterior
- Interior
- Doors and locks
- Electrical equipment
- Equipment and devices
- Lighting and signaling
- Engine electrics
- Ignition system
VAZbook.ru © 2017 · Mobile version · Contact with administration · Sitemap: EN BG BY UA RS HR RO PL SK HU · Site search · News and articles
VAZ-1111 · VAZ-11113 · VAZ-2101 · VAZ-21011 · VAZ-2104 · VAZ-2105 · VAZ-21051 · VAZ-2106 · VAZ-21061 · VAZ-2107 · VAZ-21099 · VAZ-2109 · VAZ-2108 · VAZ-2110 · VAZ-2112 · VAZ-2114 · VAZ-2115 · VAZ-2121 · VAZ-21213 · VAZ-21214 ·