English Русский
Български
Беларускі
Український
Српски
Hrvatski
Română
Polski
Slovenský
Magyar
| Articles | Contacts | Sitemap |   
Repair and maintenance Lada Repair and maintenance Mazda Repair and maintenance Mitsubishi Repair and maintenance Toyota Repair and maintenance Land Rover Repair and maintenance Hyundai Repair and maintenance Nissan
VAZbook.ru


Main     1111   2101   2105   2106   2107   2109   2110   2115   2121  
VAZ-1111 (1988-1996) VAZ-11113 (1996-2003)
  • Main
  • «Oka»
  • VAZ-11113
  • Chassis
  • Front suspension
  • Removal and installation a telescopic stand

Removal and installation a telescopic stand (VAZ-11113)

            0

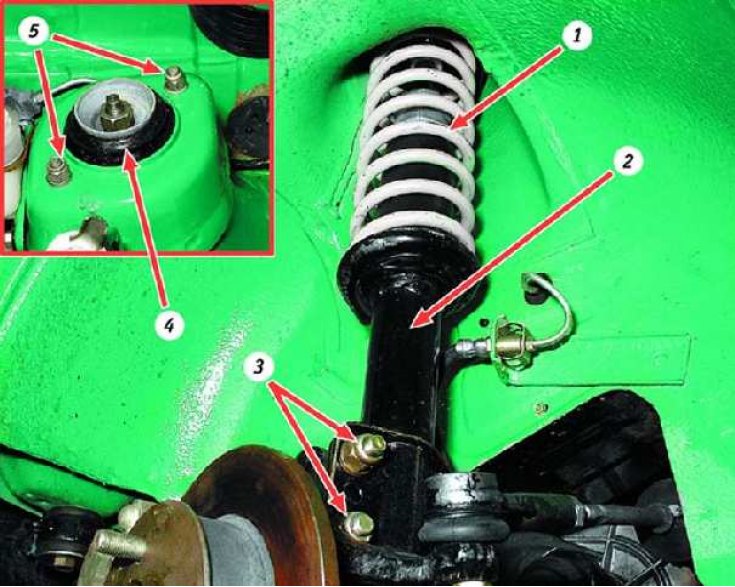
Telescopic stand: 1 – suspension spring; 2 – shock absorber strut; 3 – nuts for the lower mounting…

Telescopic stand: 1 – suspension spring; 2 – shock absorber strut; 3 – nuts for the lower mounting of the telescopic stand; 4 – upper support of the telescopic stand; 5 – nuts for the upper mounting of the telescopic stand


You will need:
  • wrenches "13", "19" (two), "8" or a special wrench to hold the shock absorber rod from turning
  • marker

marker


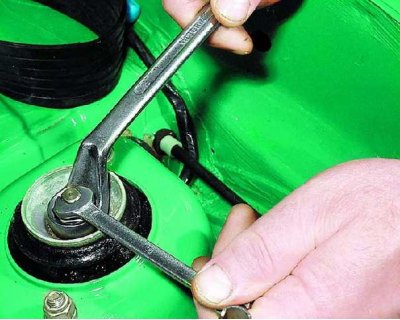
If you intend to disassemble the telescopic strut later, loosen the shock absorber rod nut, holding the rod from turning with a second wrench. Remove the corresponding wheel.

If you hear a knock or noise in the front suspension while driving, check the tightening of the nuts of the upper mount of the telescopic strut to the body. Knocks can also be caused by the destruction of the rubber buffer of the upper support of the strut or the buffer of the compression stroke, sediment or breakage of the suspension spring.


If the rubber buffer of the upper support of one of the struts is damaged or the elasticity of the suspension springs is not uniform, the car may pull to the side when driving in a straight line.

Check the condition of the shock absorber strut and replace it if the following faults are detected:
  • fluid leakage;
  • insufficient resistance on the rebound or compression stroke;
  • frequent suspension breakdowns.

frequent suspension breakdowns.


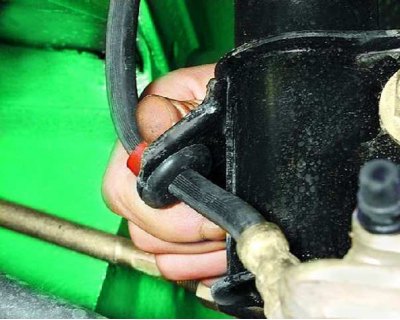
1. Remove the brake hose seal from the bracket on the strut.
1. Remove the brake hose seal from the bracket on the strut.


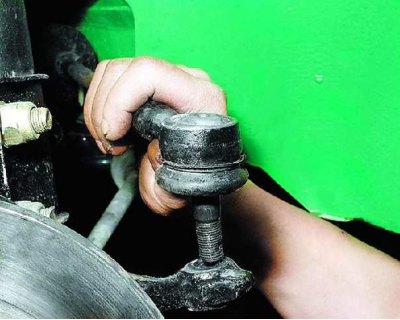
2. Press the ball joint pin out of the steering arm (see subsection 6.4.).
2. Press the ball joint pin out of the steering arm (see subsection 6.4.).


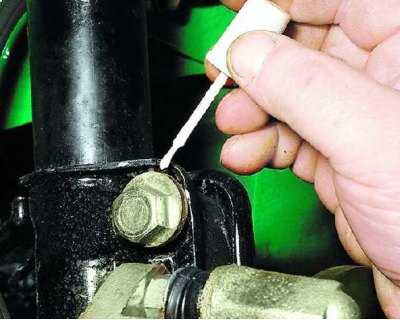
3. Mark the position of the adjusting bolt relative to the strut. This will help you maintain approximately the same camber when installing the strut.

3. Mark the position of the adjusting bolt relative to the strut. This will help you maintain…


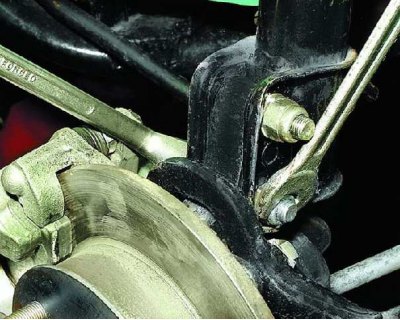
4. Loosen the nut of the lower bolt securing the strut to the steering knuckle.
4. Loosen the nut of the lower bolt securing the strut to the steering knuckle.


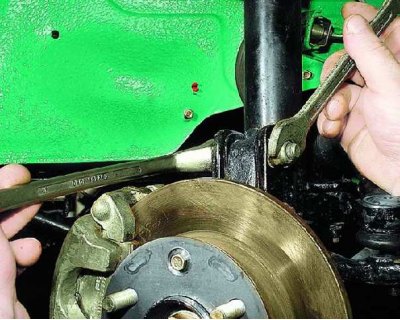
5. Loosen the nut of the adjusting (upper) bolt securing the rack.
5. Loosen the nut of the adjusting (upper) bolt securing the rack.


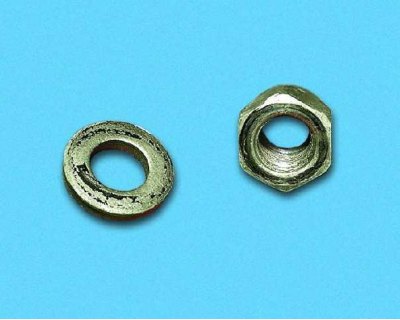
6. Please note: There is a washer under the nut of this bolt.
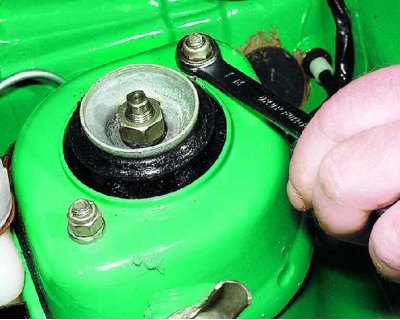
6. Please note: There is a washer under the nut of this bolt.


7. In the engine compartment, unscrew the two nuts of the upper strut mount.
7. In the engine compartment, unscrew the two nuts of the upper strut mount.


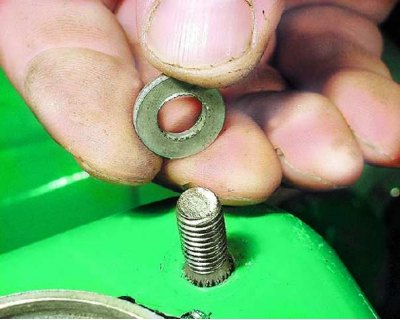
8. Remove the washers installed under the nuts.
8. Remove the washers installed under the nuts.


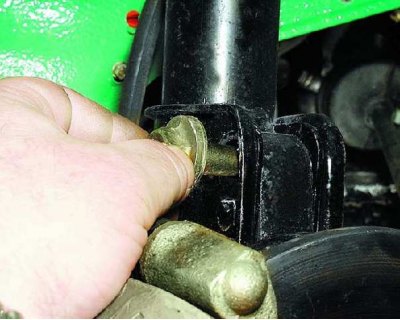
9. Remove both bolts securing the strut to the steering knuckle.
9. Remove both bolts securing the strut to the steering knuckle.


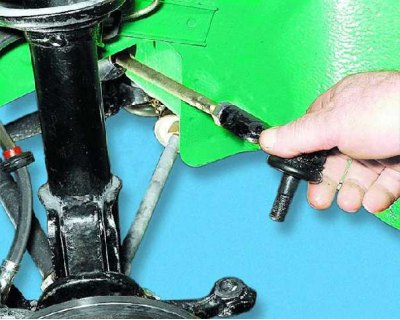
10. Move the steering rod to the side.
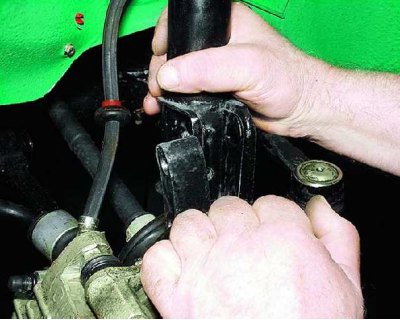
10. Move the steering rod to the side.


11. Disconnect the steering knuckle from the strut.
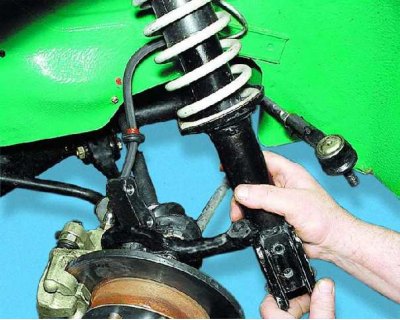
11. Disconnect the steering knuckle from the strut.


12. Remove the telescopic strut through the wheel well.
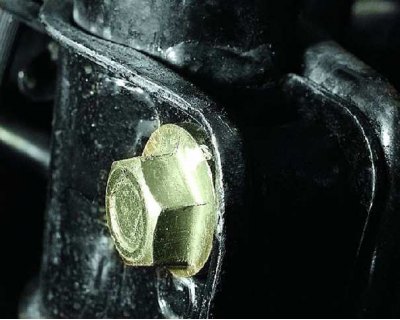
12. Remove the telescopic strut through the wheel well.


13. Install the telescopic strut in the reverse order of removal. When installing the old strut, turn the adjusting bolt in accordance with the previously made marks and...
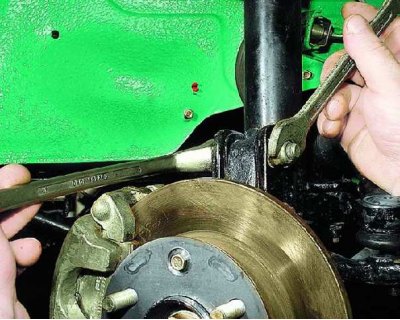
13. Install the telescopic strut in the reverse order of removal. When installing the old strut,…


14....holding it in this position from turning, tighten the mounting nut. After installing the rack, check and, if necessary, adjust the toe-in and camber of the wheels.


This article is available at russian, bulgarian, belarusian, ukrainian, serbian, croatian, romanian, polish, slovak, hungarian
The text was reviewed by the specialist: Grigory Vologodtsev

Share with friends:

Previous articles
VAZ-11113: Front suspension
Next articles

Repair of telescopic stand
Replacing the ball joint
Replacing the front suspension arm
Replacing the stretch
Replacement of anti-roll bar components

More articles from other manuals on VAZ cars:
➠ Testing the telescopic strut and shock absorber on the stand VAZ-2108 (1984-2003)
➠ Removal and installation a telescopic stand VAZ-2115 (1997-2012)
➠ Checking the shock absorber on the stand VAZ-2101 (1970-1983)
➠ Checking shock absorbers on a stand VAZ-2105 (1979-2010)
➠ Checking the clutch master cylinder on the stand VAZ-21213 (1994-2006)
Link in different formats to this page


Visitor comments

No comments yet


How much will 30 + 25 ?


VAZ-1111 (1988-1996) 
  • General information
  • Vehicle description
  • Vehicle device
  • Vehicle operation
  • Maintenance
  • Applications
  • Power unit
  • Engine repair
  • Cooling system
  • Lubrication system
  • Supply system
  • Transmission
  • Clutch
  • Transmission
  • Chassis
  • Front suspension and wheels
  • Rear suspension
  • Steering
  • Brake system
  • Body
  • Exterior
  • Interior
  • Electrical equipment
  • Engine electrics
  • Equipment and devices


VAZ-11113 (1996-2003) 
  • General information
  • Introduction to the guide
  • User manual
  • Maintenance
  • Power unit
  • Engine repair
  • Cooling and lubrication system
  • Fuel system
  • Exhaust system
  • Transmission
  • Car gearbox
  • Clutch and drive shafts
  • Chassis
  • Front suspension
  • Rear suspension
  • Steering
  • Brake system
  • Body
  • Exterior
  • Interior
  • Doors and locks
  • Electrical equipment
  • Equipment and devices
  • Lighting and signaling
  • Engine electrics
  • Ignition system


VAZbook.ru © 2017 · Mobile version · Contact with administration · Sitemap: EN BG BY UA RS HR RO PL SK HU · Site search · News and articles VAZ-1111 · VAZ-11113 · VAZ-2101 · VAZ-21011 · VAZ-2104 · VAZ-2105 · VAZ-21051 · VAZ-2106 · VAZ-21061 · VAZ-2107 · VAZ-21099 · VAZ-2109 · VAZ-2108 · VAZ-2110 · VAZ-2112 · VAZ-2114 · VAZ-2115 · VAZ-2121 · VAZ-21213 · VAZ-21214 ·
The site stores technical data using cookies to improve the service.