




Belt tension is characterized by the amount of deflection in the section between the pulleys of the coolant pump and the crankshaft or the pulleys of the pump and generator when applying a force of 10 kgf in the middle of the section. In the first case, the deflection should be 12-17 mm, and in the second - 10-15 mm.
Visually assess the condition of the belt. If there are any delaminations, tears or other mechanical damage, replace the belt (see below).
1. Prepare the vehicle for operations (see "Preparing a car for maintenance and repair").
2. To check the belt tension, use a large screwdriver or other suitable object to press on the belt branch in one of two places (shown by arrows) and check the deflection.
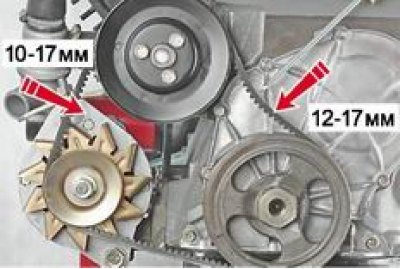
3. If the deflection does not correspond to the specified values, then loosen the nut securing the generator to the adjusting bar (see "Generator - removal and installation").
The information can be read on the website vazbook.ru
4. Using a mounting blade, press the generator away from the cylinder block, increasing the belt tension. If this requires excessive force, remove the engine mud shield (see "Mudguard - Removal and Installation"), key on 19 mm (by 13 mm for generator 9412.3701) loosen the nut securing the generator to the engine bracket (see "Generator - removal and installation"). Holding the generator, tighten the nut that secures the generator to the adjusting bar. Check the belt deflection, tighten or loosen its tension if necessary.
Caution! Excessive belt tension causes increased loads on the coolant pump and generator bearings, which will lead to their premature failure.
5. To replace the belt, loosen the nut securing the generator to the adjusting bar and use a mounting blade to move the generator to the cylinder block until it stops (see above).
6. For an injection engine, to remove the belt, remove the crankshaft position sensor (see "Crankshaft Position Sensor - Checking and Replacing").
7. Remove the belt from the pulleys and install a new one.
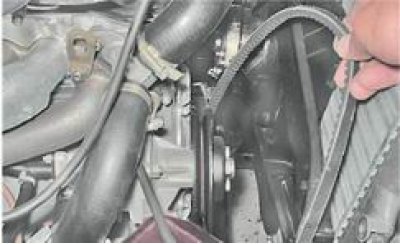
8. Tighten the belt (see above) and tighten the generator mounting nuts.
9. Installation of the remaining removed parts is carried out in the reverse order.