

Note. The door lock consists of an inner and outer part. In the event of a malfunction of the outer part, it can be replaced without removing the door trim. When replacing or repairing the inside of the lock, the door trim must be removed.
Removing
1. Remove the door trim.
2. Remove the plastic film from the front door.
3. Using a Phillips screwdriver, unscrew the three screws securing the inner door opening handle.
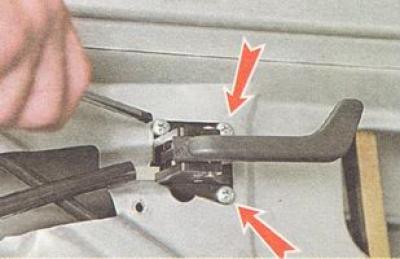
4. Disconnect the inner handle rod from the lock:
A) Prying with an awl, remove the latch from the pin of the lock lever.
b) We remove the washer and the rear end of the inner handle rod from the pin.
5. Remove the inner handle assembly with the rod.
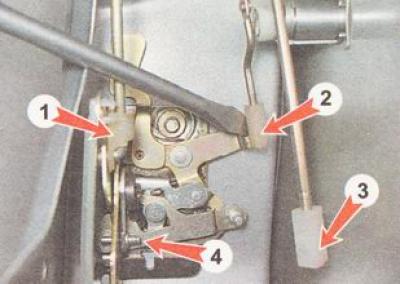
6. Using a slotted screwdriver, disconnect the plastic lugs of the outer handle of the lock (3) and thrust of the lock cylinder (2) from the lock levers. Locking button rod end (1) may not be disconnected.
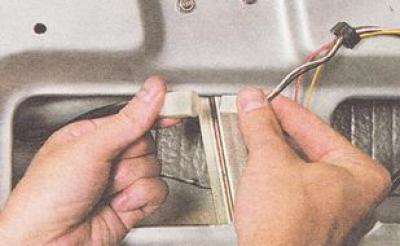
7. Disconnect the wire connectors of the central lock.
8. Unscrew the two lock screws and remove the outer part of the lock.
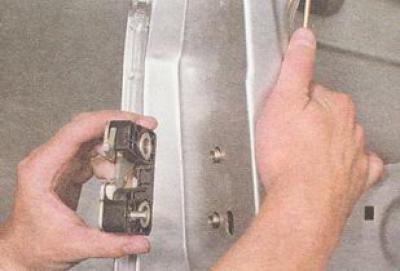
9. We remove the inner part of the lock assembly with the locking button rod and the central locking switch from the door.
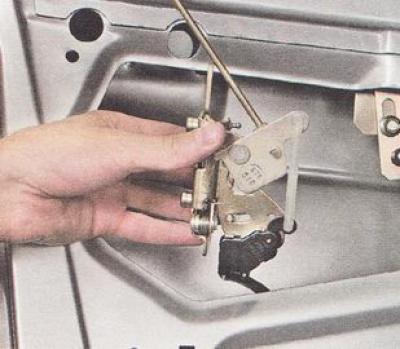
Note. In the front right door there is a motor-reducer for blocking the lock. Remove it in the same way as removing the rear door gear motor. On vehicles equipped with a remote controlled burglar alarm, the front door can also be equipped with a motor-reducer for blocking the lock.
10. Before removing the lock retainer, mark its position on the middle pillar of the body (marker or marker).
11. Remove the lock latch.
Note. Adjusting shims can be installed under the latch. When assembling, they must be installed in place.
Installation
We install the door lock and all previously removed parts on the car in reverse order.
Helpful advice. It is convenient to put plastic tips on the ball pins of the lock levers with sliding pliers.
We install the lock retainer according to the marks applied to the body pillar. If the door doesn't close properly (for example, with a metallic knock or having to slam the door hard to close), adjust the lock.
Adjustment
Note. The door lock is adjusted by changing the position of the latch on the rack. When closing the door, the protruding part of the latch body should not touch the door and the elements of the outer part of the lock.
The latch pin must enter the slot of the outer part of the lock, without touching the edges of the slot.
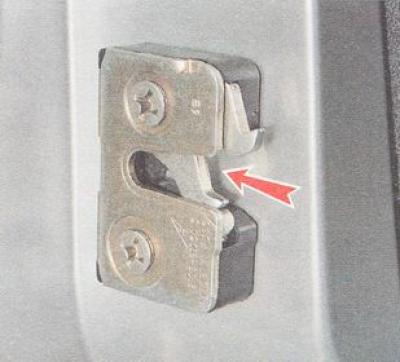
1. We loosen the tightening of the latch pin and two screws securing the latch (see point 9). By changing the position of the latch in the vertical plane, we achieve the optimal position of the latch pin in the slot of the lock.
2. The tightness of the door cover is adjustable by moving the latch in the horizontal plane.
3. If the latch touches the lock or the door, then accordingly increase or decrease the number of shims installed under the latch.
Helpful advice. Additional shims can be made by cutting them out of sheet metal (aluminum).
4. At the end of the adjustment, tighten the fastening screws and the front door lock retainer pin.