
Removing
Note: You can remove the door lock without removing the outer lock handle. It is only necessary to disconnect the handle rod from the lock (see below).
1. Remove the door trim (see "Upholstery of a back door - removal and installation").
2. We disconnect the pads of the wiring harness of the gear motor of the central locking drive.
3. Using a Phillips screwdriver, unscrew the two screws securing the gear motor.
4. Disconnect the gear motor from the lock rod and remove it from the door.
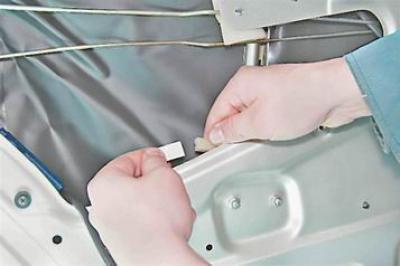
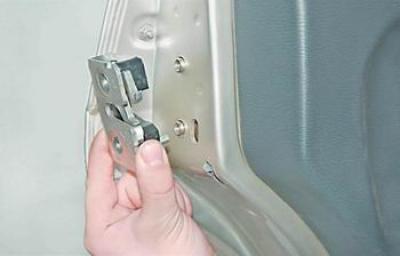
5. Disconnect the outer handle rod end from the lock lever (see "The external handle of a back door - removal and installation").
6. Using an impact screwdriver, unscrew the two screws securing the outer part of the lock.
7. Remove the outer part of the castle.
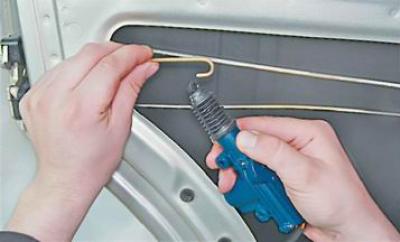
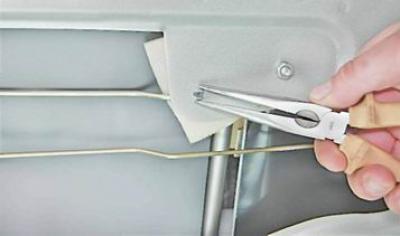
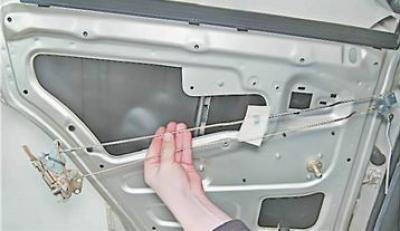
8. With pliers, squeezing the antennae of the plastic holder of the inner handle rod, we push it out of the hole in the door amplifier.
9. Using a Phillips screwdriver, unscrew the two screws securing the inner door handle.
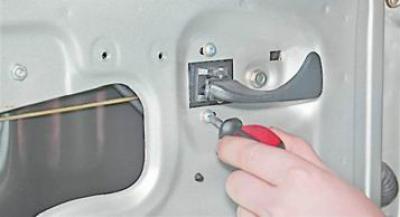
10. We remove the handle from the door and remove the rubber retainer from the traction tip with tweezers.

11. Remove the handle from the rod.
Tip: To remove the inner handle along with the rod, see "Rear door lock - removal, installation and adjustment".
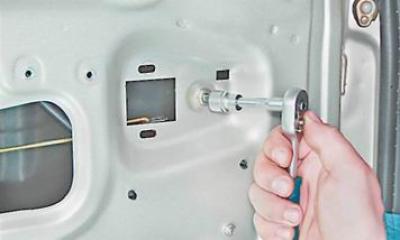
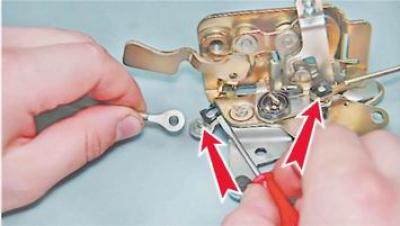
12. socket wrench by 13 mm unscrew the nut securing the lock switch rod.
13. We take out the lock with rods in the assembly from the door.
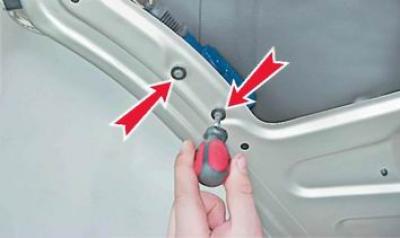
14. If necessary, prying with a screwdriver, remove the lock washers from the axles and disconnect the two rods.
15. In any available way, we mark the position of the lock latch on the body pillar.
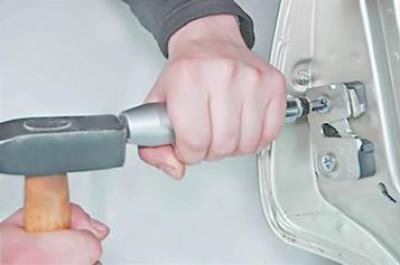
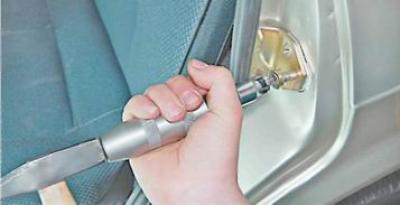
16. Using an impact screwdriver, unscrew the three screws securing the latch.
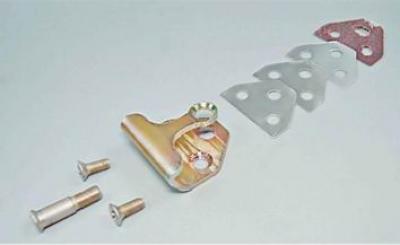
17. Remove the retainer and shims.
Installation
1. Lubricate the lock mechanism with grease.
2. Install the lock in reverse order.
3. We put the lock latch in place, combining the previously made marks, or moving the latch within the slots for the screws of its fastening, we achieve a clear fixation of the door in the closed position and its easy unlocking.