
English Русский
Български
Беларускі
Український
Српски
Hrvatski
Română
Polski
Slovenský
Magyar
| Articles | Contacts | Sitemap |   
Repair and maintenance Lada Repair and maintenance Mazda Repair and maintenance Mitsubishi Repair and maintenance Toyota Repair and maintenance Land Rover Repair and maintenance Hyundai Repair and maintenance Nissan
VAZbook.ru


Main     1111   2101   2105   2106   2107   2109   2110   2115   2121  
VAZ-2114 (2004-2013) VAZ-2115 (1997-2012)
  • Main
  • «Samara-2»
  • VAZ-2115
  • Chassis
  • Steering
  • Removal, installation and disassembly of the steering column

Removal, installation and disassembly of the steering column (VAZ-2115)

            0

You will need: a screwdriver, a 13 mm wrench, a 13 mm socket head, a ratchet, and a hammer.

1. Disconnect the wires from the "–" terminal of the battery.

2. Remove the steering wheel (see "Removal and installation the steering wheel").

3. Remove the steering column trim (see "Removal and installation steering column trims").

4. Remove the ignition switch (see "Removal and installation the ignition switch").

5. Remove the steering column switches (see "Checking and replacing steering column switches").

6. Unscrew the coupling bolt of the intermediate shaft coupling of the steering column.
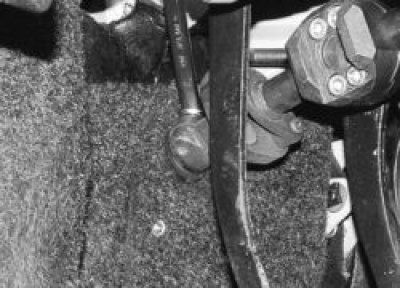
7. Remove the bolt securing the left front steering column to the body.
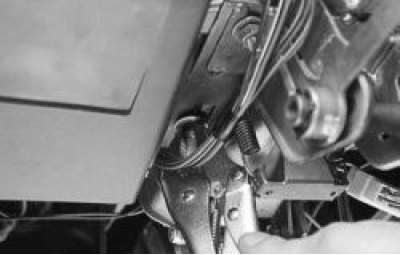

7. Remove the bolt securing the left front steering column to the body.

8. Similarly, unscrew the right front bolt securing the steering column to the body.


8. Similarly, unscrew the right front bolt securing the steering column to the body.


9. Unscrew the nut securing the left rear steering column to the body.
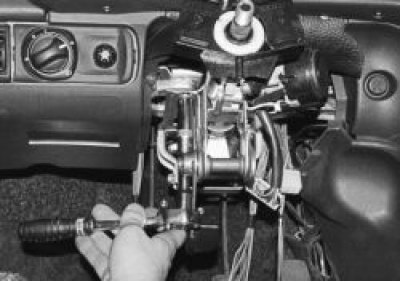
10. Similarly, unscrew the nut of the right rear mount of the steering column to the body.


10. Similarly, unscrew the nut of the right rear mount of the steering column to the body.

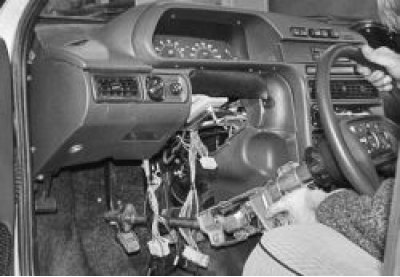
11. For ease of operation, install the steering wheel, tighten the nut securing the steering wheel to the shaft by hand…

12. …and remove the steering column from the splines of the steering gear drive pinion.
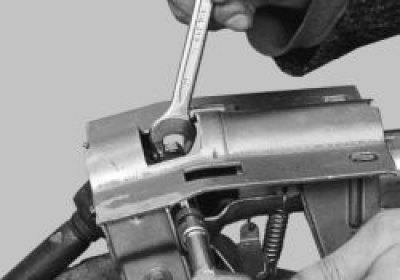
13. Unscrew the nut of the bolt of the terminal connection of the intermediate and steering shafts…


13. Unscrew the nut of the bolt of the terminal connection of the intermediate and steering shafts of the steering column..
14. …and remove the intermediate shaft from the steering shaft splines.
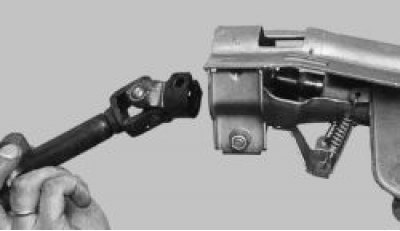

14. …and remove the intermediate shaft from the steering shaft splines.


15. Press the steering column shaft together with the bearing out of the bracket pipe.
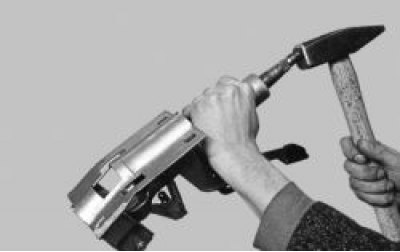

15. Press the steering column shaft together with the bearing out of the bracket pipe.

16. Replace steering column shafts if splines or threads are worn or damaged.


16. Replace steering column shafts if splines or threads are worn or damaged.

17. Remove the front one from the shaft (from the steering wheel side) bearing.

18. Using a punch and light hammer blows, press the rear bearing out of the steering bracket pipe.

19. Before installing the bearings, check that they rotate easily, without jamming. The plastic bearing bushings must not be damaged.
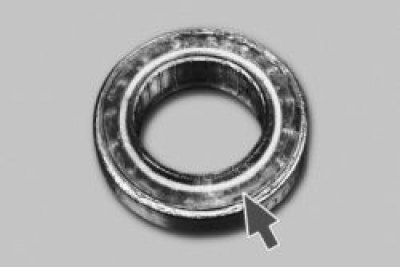
20. Press the rear bearing into the pipe flange until it stops, using a suitable mandrel, applying…


20. Press the rear bearing into the pipe flange until it stops, using a suitable mandrel, applying force only to the outer ring of the bearing. The bearing is mounted on a plastic sleeve, which has a wide flange on one side. When installing the bearing, it is the wide flange of the sleeve that must be facing outward.

21. Place the front bearing on the shaft so that the wide flange of the bearing sleeve faces the end of the shaft.

22. Insert the shaft into the tube - the rear end of the shaft should enter the rear bearing.

23. Press the front bearing into the pipe flange using a suitable mandrel, applying force only to the outer ring of the bearing.

24. If the steering column does not lock in the selected position…

25. …remove the retaining ring…
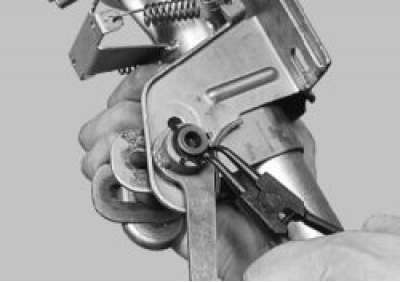
26. …then remove the lever from the splines of the adjusting sleeve and move it to the required…


26. …then remove the lever from the splines of the adjusting sleeve and move it to the required position.
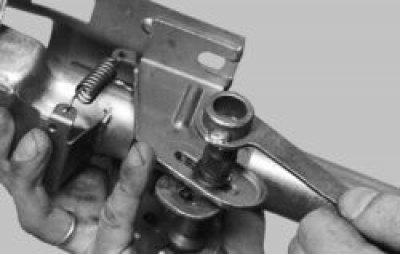
27. If the steering column does not move to the upper position when the steering column adjustment…


27. If the steering column does not move to the upper position when the steering column adjustment lever is turned down, check the return springs. Replace stretched or broken springs.
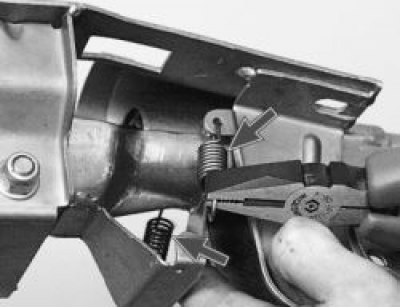
28. Install the steering column in the reverse order of removal.


28. Install the steering column in the reverse order of removal.


This article is available at russian, bulgarian, belarusian, ukrainian, serbian, croatian, romanian, polish, slovak, hungarian
The text was reviewed by the specialist: Grigory Vologodtsev

Share with friends:

Previous articles
VAZ-2115: Steering
Next articles

Removal and installation the steering wheel
Inspection and testing of steering
Possible steering malfunctions
Features of the steering design
Replacing the steering rod, outer end and protective boot of the ball joint
Removal and installation the steering gear
Checking the gap between the rack stop and the stop nut
Steering gear repair

More articles from other manuals on VAZ cars:
➠ Replacing the steering column switch VAZ-11113 (1996-2003)
➠ Steering column switches VAZ-2105 (1979-2010)
➠ Steering column switches VAZ-2106 (1976-2006)
➠ Steering column switches VAZ-2107 (1982-2012)
➠ Steering column switch VAZ-2108 (1984-2003)
Link in different formats to this page


Visitor comments

No comments yet


How much will 28 + 47 ?


VAZ-2114 (2004-2013) 
  • General information
  • Operation and maintenance
  • Power unit
  • Engine repair
  • Cooling system
  • Supply system
  • Control system
  • Exhaust system
  • Transmission
  • Clutch
  • Car gearbox
  • Front wheel drives
  • Chassis
  • Wheels and tires
  • Front suspension
  • Rear suspension
  • Steering
  • Brake system
  • Body
  • Exterior
  • Interior
  • Doors and glass
  • Tailgate
  • Ventilation and heating
  • Electrical equipment
  • Equipment and devices
  • Headlights and lighting
  • Engine electrics
  • Electrical circuits


VAZ-2115 (1997-2012) 
  • General information
  • Vehicle device
  • Operation manual
  • Vehicle malfunctions
  • Car care
  • Power unit
  • Engine repair
  • Cooling system
  • Supply system
  • Control system
  • Exhaust system
  • Transmission
  • Clutch
  • Car gearbox
  • Front wheel drives
  • Chassis
  • Front suspension
  • Rear suspension
  • Steering
  • Brake system
  • Body
  • Exterior
  • Interior
  • Doors, covers and windows
  • Electrical equipment
  • Equipment and devices
  • Headlights and lighting
  • Engine electrics
  • Anti-theft system


VAZbook.ru © 2017 · Mobile version · Contact with administration · Sitemap: EN BG BY UA RS HR RO PL SK HU · Site search · News and articles VAZ-1111 · VAZ-11113 · VAZ-2101 · VAZ-21011 · VAZ-2104 · VAZ-2105 · VAZ-21051 · VAZ-2106 · VAZ-21061 · VAZ-2107 · VAZ-21099 · VAZ-2109 · VAZ-2108 · VAZ-2110 · VAZ-2112 · VAZ-2114 · VAZ-2115 · VAZ-2121 · VAZ-21213 · VAZ-21214 ·
The site stores technical data using cookies to improve the service.