




Instrument panel and its accessories
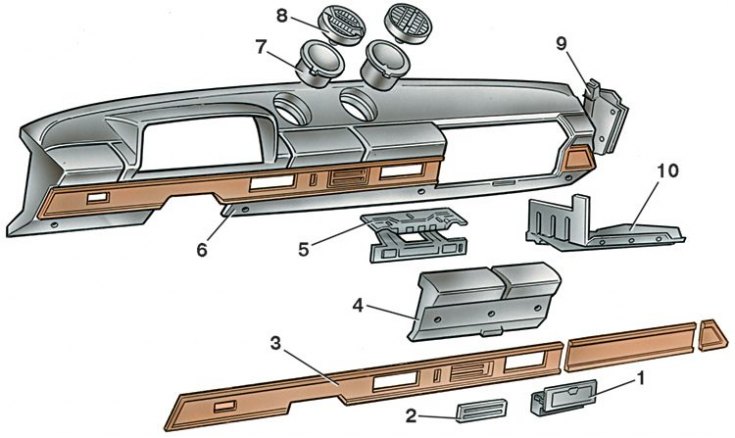
1 – ashtray; 2 – heater control lever trim frame; 3 – panel cladding; 4 – glove compartment lid; 5 – glove box loop; 6 – instrument panel; 7 – deflector pipe; 8 – deflector; 9 – side of the glove compartment; 10 – glove box body
The panel is attached to the body at eight points: from above with nuts; from below with screws.
Removal the instrument panel
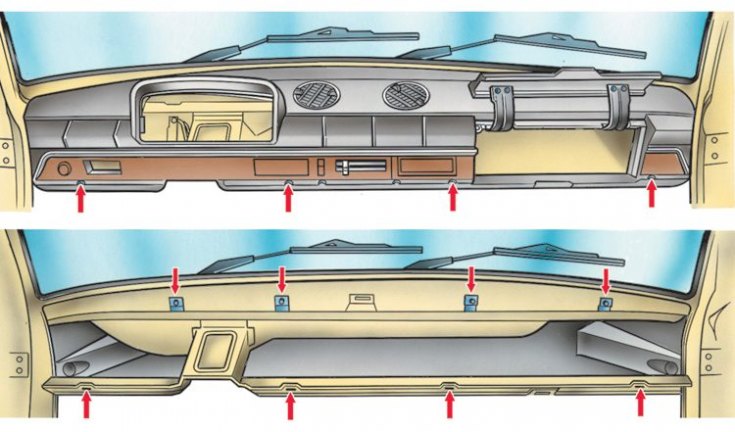
The arrows show the attachment points to the front cross members.
1. Disconnect the ground wire from the battery.
2. Loosen the mounting screws and remove the steering shaft trim cover and windshield pillar trims.
3. Remove the instrument cluster (see subsection 11.6.1), a three-key switch and a cabin heater switch.
4. When disconnecting the wires from the glove box light, unscrew the screws securing the glove box side panel to the instrument panel.
5. Remove the four screws securing the lower instrument panel to the front crossmember. Through the openings in the glove compartment and instrument cluster, remove the four nuts securing the upper panel to the front.
6. Remove the handles from the control levers, for which, at the junction of the handle with the lever, bend back the lower part of the upper handle with a flat thin tool, and the upper part of the lower handle with a flat thin tool.
7. Remove the instrument panel.
8. The installation of the instrument panel is carried out in reverse order.
Information copied from the portal VAZBOOK.ru