
Heater control drive
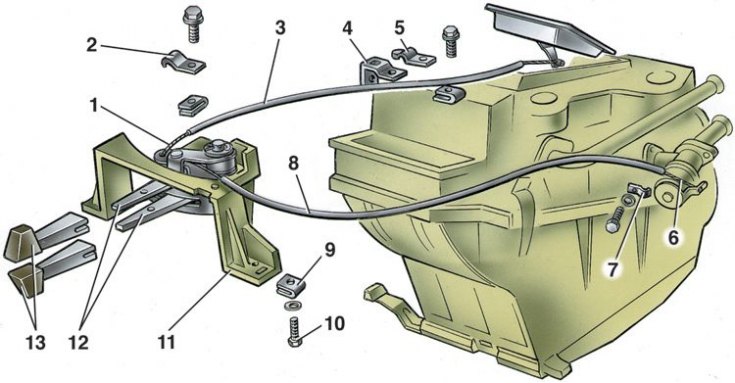
1 - control rod of the air intake cover; 2, 5, 7 - clamping brackets; 3, 8 - rod shells; 4 - bracket for fastening the thrust shell; 6 - control rod of the heater tap; 9 - spring nut, right, for fastening the bracket of control levers; 10 – bracket fastening screw; 11 – an arm of control levers; 12 - control levers; 13 - lever handles
Removing
1. Move the heater control lever to the right to the full and drain the liquid from the engine cooling system.
2. Disconnect the wire «weight» from the battery.
3. Loosen the clamps and disconnect the rubber hoses for supplying and discharging fluid from the heater pipes, and then remove the rubber pipe seal.
4. Loosen the bracket bolt 7 (see fig. Heater control drive), fixing the flexible rod 6 on the crane, and remove the rod from the crane.
5. Take away and remove four spring clips and, having disconnected wires, remove a casing of the fan from a casing of a radiator of a heater.
6. Remove the instrument cluster and through the opening for it in the instrument panel, loosen the bracket screw 2, which secures the flexible rod 1 for controlling the air intake hatch cover, and remove the rod from the lever.
7. Loosen the nuts securing the radiator shroud and remove it.
When unscrewing one of the nuts securing the radiator casing, the wire is disconnected «masses» fan motor, which is located on the left side of the radiator casing.
Installation
Install the heater in the reverse order. After installing the heater and connecting all hoses to the engine, fill the engine cooling system with liquid.