
English Русский
Български
Беларускі
Український
Српски
Hrvatski
Română
Polski
Slovenský
Magyar
| Articles | Contacts | Sitemap |   
Repair and maintenance Lada Repair and maintenance Mazda Repair and maintenance Mitsubishi Repair and maintenance Toyota Repair and maintenance Land Rover Repair and maintenance Hyundai Repair and maintenance Nissan
VAZbook.ru


Main     1111   2101   2105   2106   2107   2109   2110   2115   2121  
VAZ-2104 (1984-2012) VAZ-2105 (1979-2010) VAZ-21051 (1979-2010)
  • Main
  • «Zhiguli»
  • VAZ-2104
  • Power unit
  • Cooling system
  • Coolant — Checking Level and Replacing

Coolant — Checking Level and Replacing (VAZ-2104)

            0

Contents: Checking the level ↓ Replacing the coolant ↓ Sequence of execution ↓
The expansion tank of the cooling system is installed in the engine compartment on the left side on the mudguard and is secured to the bracket with a rubber clamp.

Recommendation. When removing and installing cooling system hoses, it is recommended to replace the standard band clamps with worm clamps marked 25-40. These clamps are more convenient to install and seal the connections more reliably.


Checking the level


The fluid level in the expansion tank should be 3-4 mm above the "MIN" mark on the translucent body of the tank.

1. For ease of monitoring the fluid level, unfasten the rubber belt, holding the tank with your hand.
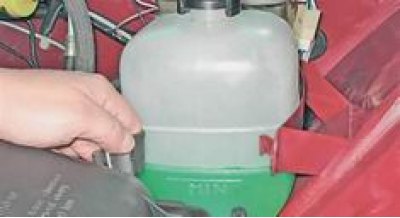
1. For ease of monitoring the fluid level, unfasten the rubber belt, holding the tank with your…


Attention! The expansion tank cap should only be unscrewed on a cold engine, since excess pressure is created inside the tank on a warm engine.


2. If necessary, open the tank cap and add coolant (see "Operating fluids") to the required level.
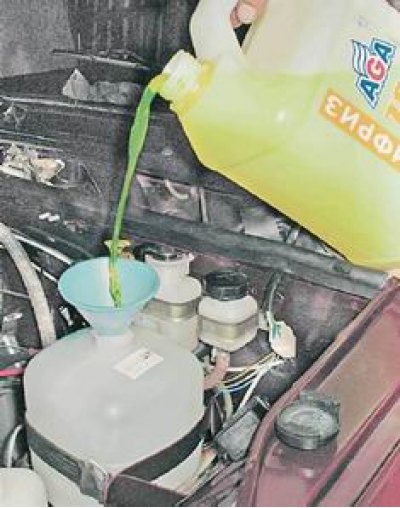
2. If necessary, open the tank cap and add coolant (see «Operating fluids») to the required level.


Warning! Coolant is poisonous, be careful. If it gets on the paintwork, the liquid may cause its color change, so remove the liquid immediately with a rag.


Do not use water as a coolant, it does not contain corrosion inhibitors, does not lubricate the pump seals well and freezes at sub-zero temperatures.

Replacing the coolant


We replace the coolant in accordance with the maintenance schedule (see "Periodic maintenance"), as well as in case of a change in its color (this is a sign of aging of the fluid). Replace the fluid only when the engine is cold!

[The article is copied from the website: www.vazbook.ru]

Sequence of execution


1. Place the vehicle on an inspection pit or overpass (see "Preparing a car for maintenance and repair").

2. Move the interior heater control lever to the extreme right position (open the heater valve completely).

3. Unscrew and remove the radiator and expansion tank caps.
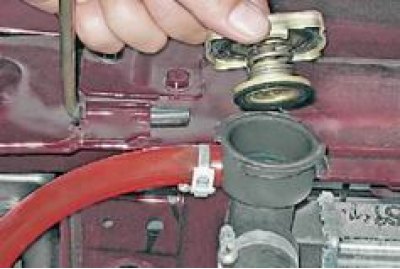
3. Unscrew and remove the radiator and expansion tank caps.


4. Remove the engine mudguard (see "Mudguard - Removal and Installation").

5. Place the container (not less than 10 l) under the drain plug in the cylinder block.

6. With a socket wrench by 13 mm using an extension, unscrew the drain plug.
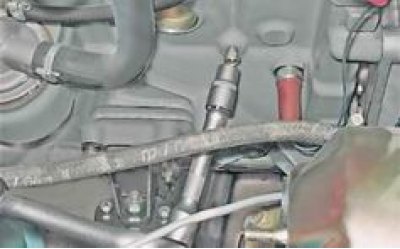
6. With a socket wrench by 13 mm using an extension, unscrew the drain plug.


7. Drain the coolant from the cylinder block.
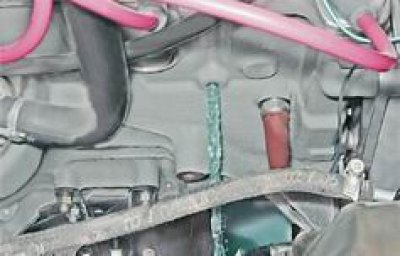

7. Drain the coolant from the cylinder block.


8. Place the same container under the radiator drain hole and unscrew the plug.
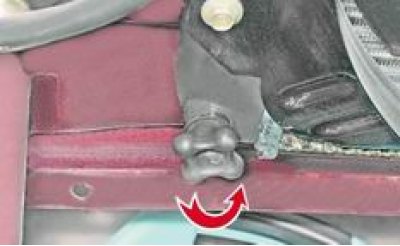
8. Place the same container under the radiator drain hole and unscrew the plug.


9. Drain the coolant from the radiator.
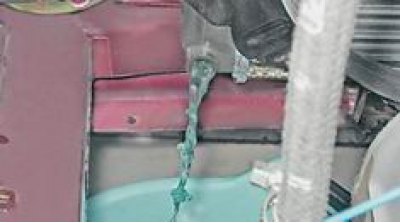
9. Drain the coolant from the radiator.


10. After unfastening the expansion tank fastening belt and lifting it, drain the liquid from the tank through the radiator.

11. Install the tank in place and secure it with a belt.

12. Tighten the drain plugs on the radiator and cylinder block.

Note: To avoid air locks, it is recommended to remove the rubber hose from the intake manifold heating unit pipe (throttle bodies on injection engines).


When filling the system, at the moment the liquid comes out of the hose, we put it on the branch pipe.
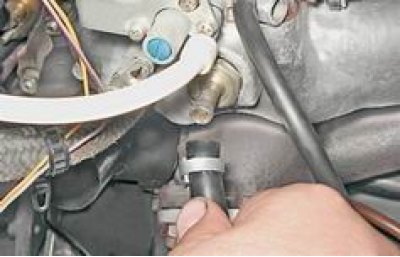
When filling the system, at the moment the liquid comes out of the hose, we put it on the branch…


12. Fill the engine cooling system through the radiator neck until the fluid level reaches the lower edge of the neck.
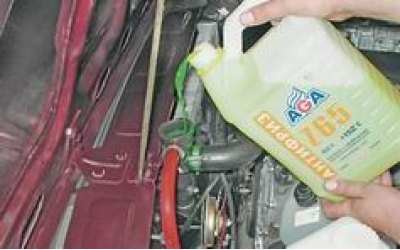
12. Fill the engine cooling system through the radiator neck until the fluid level reaches the…


13. In the process of filling the system with liquid (to reduce the likelihood of air locks forming) we squeeze the radiator hoses with our hands. We close the radiator cap.

14. Fill the expansion tank with coolant to a level 3-4 mm above the "MIN" mark on the tank wall and close the plug.

15. Start the engine and let it idle for 3-5 minutes to remove air locks, then stop the engine and add coolant to the radiator and reservoir to the required level.


This article is available at russian, bulgarian, belarusian, ukrainian, serbian, croatian, romanian, polish, slovak, hungarian
The text was reviewed by the specialist: Grigory Vologodtsev

Share with friends:

Previous articles
VAZ-2104: Cooling system
Next articles

Description of the design of the cooling system
Thermostat — replacement
Electric Fan Switch Sensor — Replacement
Coolant Temperature Gauge Sensor — Replacement
Expansion tank — replacement
Radiator Electric Fan — Removal and Installation

More articles from other manuals on VAZ cars:
➠ Coolant — Checking Level and Replacing VAZ-2106 (1976-2006)
➠ Coolant — Checking Level and Replacing VAZ-2107 (1982-2012)
➠ Low Coolant Level Sensor in Expansion Tank — Checking and… VAZ-2114 (2004-2013)
➠ Checking the coolant level VAZ-1111 (1988-1996)
➠ Checking the level and adding coolant VAZ-21099 (1990-2004)
Link in different formats to this page


Visitor comments

No comments yet


How much will 43 + 42 ?


VAZ-2104 (1984-2012) 
  • General information
  • Operation and maintenance
  • Power unit
  • Engine repair
  • Fuel system (carburetor)
  • Fuel system (injector)
  • Control system
  • Cooling system
  • Exhaust system
  • Transmission
  • Clutch
  • Car gearbox
  • Cardan gear
  • Rear axle
  • Chassis
  • Front suspension
  • Rear suspension
  • Wheels and tires
  • Steering
  • Brake system
  • Body
  • Exterior
  • Interior
  • Doors and glass
  • Ventilation and heating
  • Electrical equipment
  • Equipment and devices
  • Headlights and lighting
  • Engine electrics
  • Electrical circuits


VAZ-2105 (1979-2010) 
  • General information
  • Vehicle description
  • Vehicle device
  • Vehicle operation
  • Maintenance
  • Power unit
  • Engine repair
  • Cooling and lubrication system
  • Supply system
  • Transmission
  • Clutch
  • Car gearbox
  • Cardan gear
  • Rear axle
  • Chassis
  • Suspension and shock absorbers
  • Steering
  • Brake system
  • Body
  • Body elements
  • Electrical equipment
  • Engine electrics
  • Equipment and devices


VAZ-21051 (1979-2010) 
  • General information
  • Introduction to guide
  • User manual
  • Troubleshooting
  • Power unit
  • Engine repair
  • Engine repair VAZ-2103
  • Cooling system
  • Lubrication system
  • Power and exhaust system
  • Fuel injection
  • Transmission
  • Clutch
  • Car gearbox
  • Cardan gear
  • Rear axle
  • Chassis
  • Suspension and shock absorbers
  • Steering
  • Brake system
  • Body
  • Exterior
  • Interior
  • Doors and windows
  • Electrical equipment
  • Equipment and devices
  • Engine electrics
  • Ignition system
  • Electrical circuits


VAZbook.ru © 2017 · Mobile version · Contact with administration · Sitemap: EN BG BY UA RS HR RO PL SK HU · Site search · News and articles VAZ-1111 · VAZ-11113 · VAZ-2101 · VAZ-21011 · VAZ-2104 · VAZ-2105 · VAZ-21051 · VAZ-2106 · VAZ-21061 · VAZ-2107 · VAZ-21099 · VAZ-2109 · VAZ-2108 · VAZ-2110 · VAZ-2112 · VAZ-2114 · VAZ-2115 · VAZ-2121 · VAZ-21213 · VAZ-21214 ·
The site stores technical data using cookies to improve the service.