




Contents: Removal ↓ Installation ↓
To complete the job you will need a two-jaw puller and a torque wrench.
The seal is replaced with a new one if oil leaks are detected from under the pinion shaft. This is visually determined by the presence of oil drops on the outer surface of the gearbox. It should be borne in mind that if the gearbox housing is covered only with a thin film of oil without the formation of drops (so-called oil sweating), then this is not a reason to replace the seal.
Attention! Unqualified actions when replacing the seal may lead to the need to disassemble and repair the rear axle gearbox, which can only be done in a specialized workshop.
Removal
1. Place the vehicle on an inspection pit or overpass (see "Preparing a car for maintenance and repair").
(The article is copied from the website: «VAZBOOK»)
2. Drain the oil from the rear axle (see "Rear Axle - Checking Oil Level and Changing Oil").
3. Disconnect the cardan shaft from the drive gear flange (see "Cardan transmission - removal and installation").
4. Turn on the parking brake.
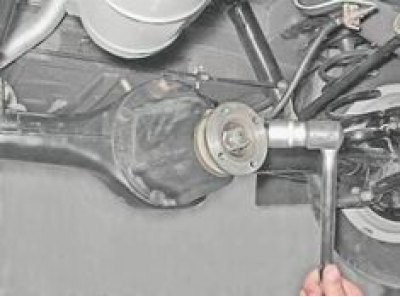
5. With a socket wrench on 24 mm we unscrew the tailpiece flange fastening nut.
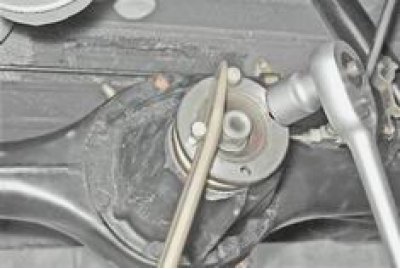
6. You can also prevent the flange from turning without using the parking brake. To do this, insert bolts into the two holes of the drive gear flange and, holding the flange from turning with a suitable tool, (with a mounting blade), unscrew the flange mounting nut.
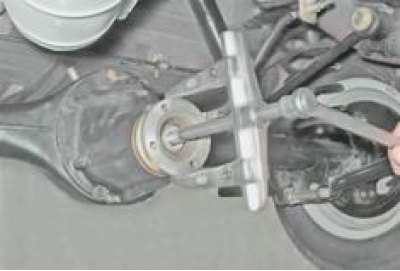
7. Using a two-jaw puller, press the tailstock flange off the splines of the drive gear. Sometimes the flange can be removed manually without using a puller.
8. Remove the washer and flange with the mud deflector from the tailstock.
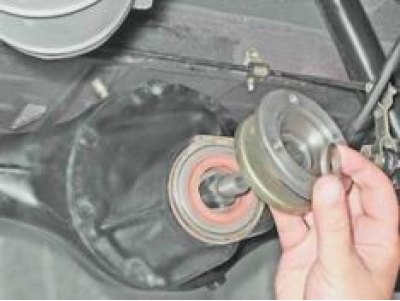
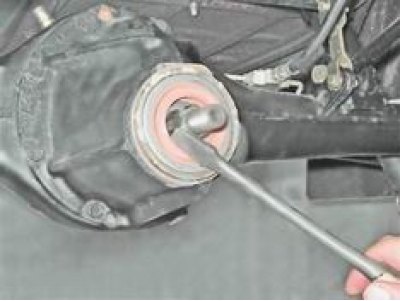
9. Pry up the seal with a screwdriver and remove it from the gearbox housing.
Installation
Attention! Before installing the seal, check the condition of the cylindrical surface of the flange that contacts the seal. It often has traces of corrosion and wear that should be removed by polishing. If there is a deep groove on the surface, press the seal so that it is offset, i.e. protrudes relative to the end of the gearbox neck.
1. Apply plastic grease to the seating surface and working edge of the new seal.
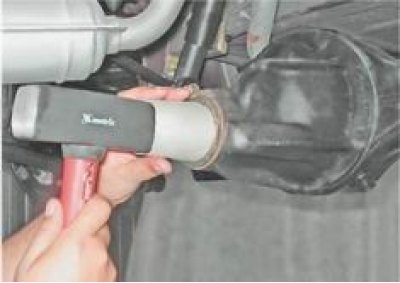
2. With light hammer blows (without allowing any distortions) we press the seal into the steel collar of the seal or through a bushing of a suitable diameter.
3. Install the parts previously removed from the shank. It is recommended to replace the self-locking nut securing the shank flange with a new one.
4. We hang up the rear part of the car (see "Preparing a car for maintenance and repair").
5. Disengage the axle shafts from engagement with the differential gears (see below, "Half shaft - removal and installation, replacement of seal").
6. Holding the tailstock flange by the bolts screwed into the flange holes, tighten the tailstock nut with a torque wrench to 120 N·m, then rotate the flange by hand. The resistance to rotation should be light and uniform, the flange should rotate without jamming or clicking, otherwise the gearbox is subject to repair in a specialized workshop. At the same time, check for the absence of even the slightest axial play in the tailstock bearings. If there is play, increase the tightening torque of the nut by 20-30 N·m and again check the smoothness of rotation and the absence of play. You should not increase the tightening torque above 225 N·m, you can "crush" the spacer sleeve. If the play cannot be eliminated, the gearbox is also subject to repair.
If, when tightening the nut, the tightening torque does not increase and remains less than the recommended minimum value (120 Nm), this means that the spacer sleeve has "sagged" and must be replaced by disassembling the gearbox in a workshop.