




Roof replacement
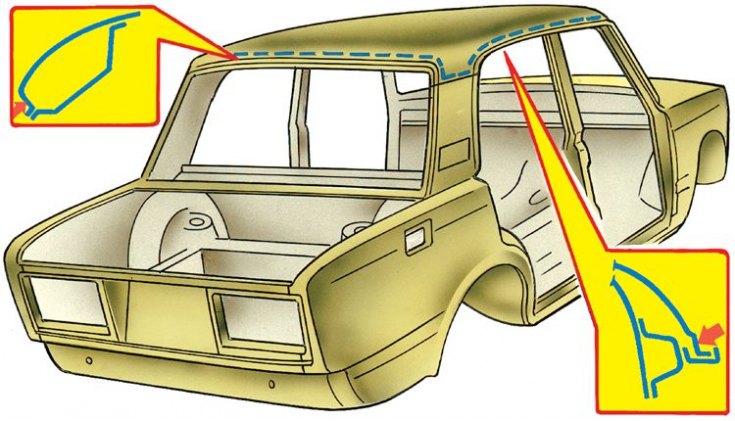
Arrows show the cutting locations. Dotted lines indicate the cutting lines of the roof panel
Roof welding locations
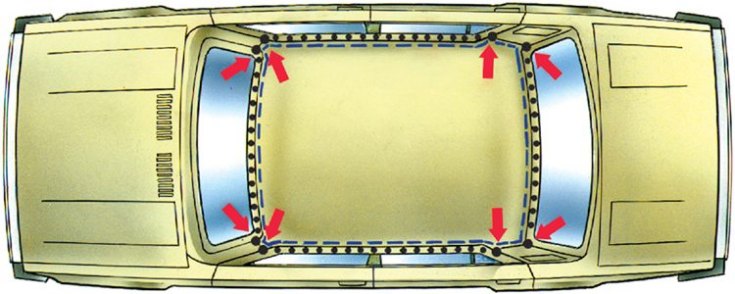
The dots indicate contact welding seams. The arrows indicate gas welding locations.
In most emergency cases with roof damage, it is necessary to replace it.
1. Remove the windshield, rear window, roof lining and its accessories.
2. Place the new panel on the roof of the body and determine the places for cutting the side panels and front door pillars.
3. Stepping back from the edge of the roof panel by 8 mm, make cuts along the bends of the joints with the windshield frame panels, with the rear window frame cross member, gutters and side roof panels (see fig. Roof replacement).
(The original is available on the website: «www.VazBook.ru»)
4. For the side roof panels, cut the roof panel 10–15 mm above the marking.
5. Disconnect the roof panel, remove the remaining panel strips and clean the seating areas of the body and the new panel.
6. Straighten the body elements at the joints with the panel and adjust the new roof panel into place.
7. At the points shown by the arrows, gas weld the roof panel to the windshield panel and the side roof panel (see fig. Roof welding locations).
8. Check the fit of the panel and weld it around the perimeter with contact welding at 40–50 mm intervals. Weld it to the side roof panels with gas welding.
9. In the absence of a contact welding machine, gas welding or electric welding in a carbon dioxide environment is allowed.