
Front fender replacement
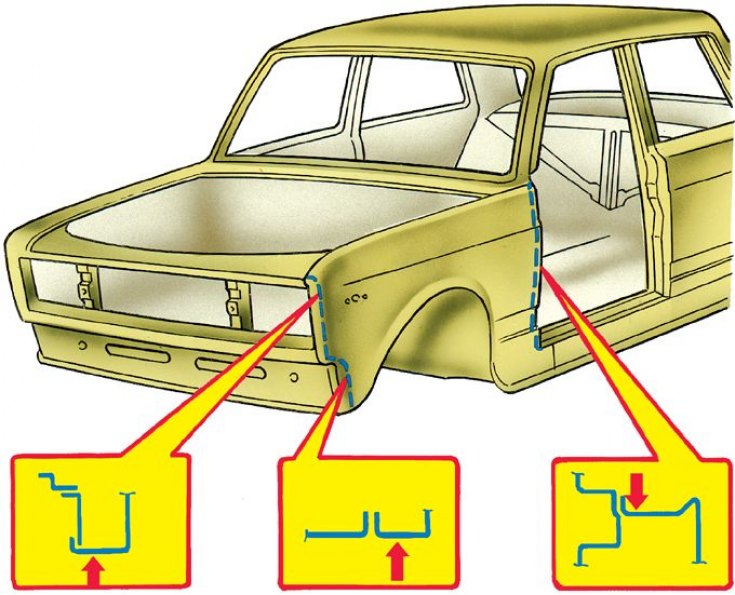
The arrows on the fragments indicate the places where the wing was cut. The dotted lines indicate cutting lines.
Front fender welds
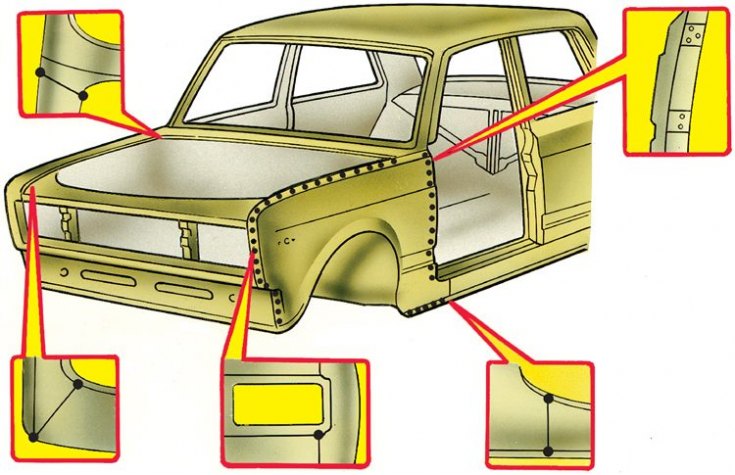
In the main view, the dots indicate the resistance welding seams. The fragments show gas welding points
1. For minor wing damage (small dents, scratches, etc.) carry out, without removing the wing, straightening and painting work.
2. After straightening, check the condition of the internal anti-corrosion coating, restore it if necessary.
3. In case of significant deformation of the wing, if there are gaps, replace the wing.
4. Remove bumper (see subsection 10.3), hood, antenna, front door; remove the lights from the wing.
5. Use a 6-7 mm drill to drill out the contact welding points of the gutter with body elements and disconnect the gutter with a thin flat chisel with a bent end.
6. With a thin sharpened chisel, cut or cut off the wing joints with a grinder (the arrows indicate the places for cutting the wing, the dotted line shows the cutting lines):
- with the front panel from the headlight down, retreating 2–3 mm from the connection line;
- with the front pillar of the sidewall, stepping back 5 mm from the bend line (see fig. Front fender replacement).
7. Detach the wing, use a chisel to remove the remaining wing strips. Align the deformed edges and clean the seats of the body and the new wing.
8. Remove dirt and rust from the cavity closed by the wing, apply zinc-chromate primer GF-073.
9. Replace the hood and door. Fit the new wing to the landing site and secure with clamps.
10. Weld the fender by gas welding at the indicated points. For gas welding, use a brass rod L-62 or L-68 (see fig. Front fender welds).
10. After checking the landing of the wing, weld it by resistance welding with a step of 40–50 mm or by electric welding in a carbon dioxide environment with a wire Sv-08G1S or Sv-08G2S with a diameter of 0.8 mm with an intermittent seam 10 mm long every 30–40 mm. The strength of the electric current is 50–90 A.