




Replacing the rear wing
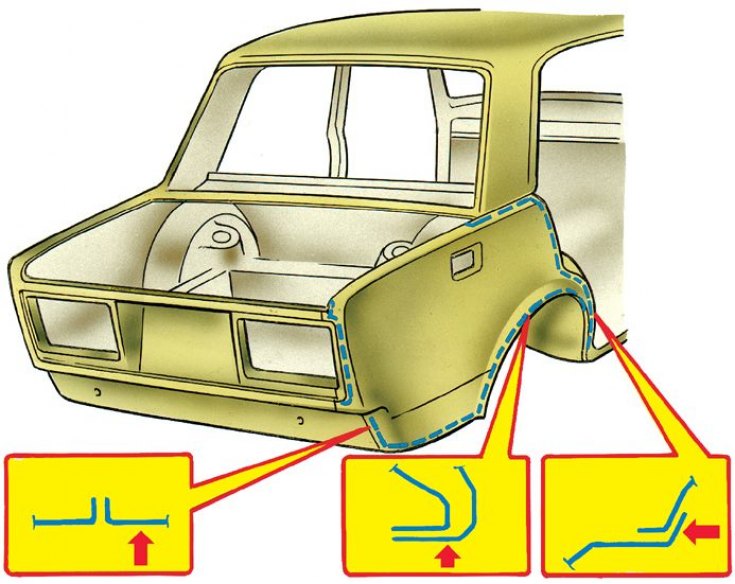
Arrows on the fragments indicate the places where the wing was cut. The dotted lines indicate the cutting lines
Rear wing weld points
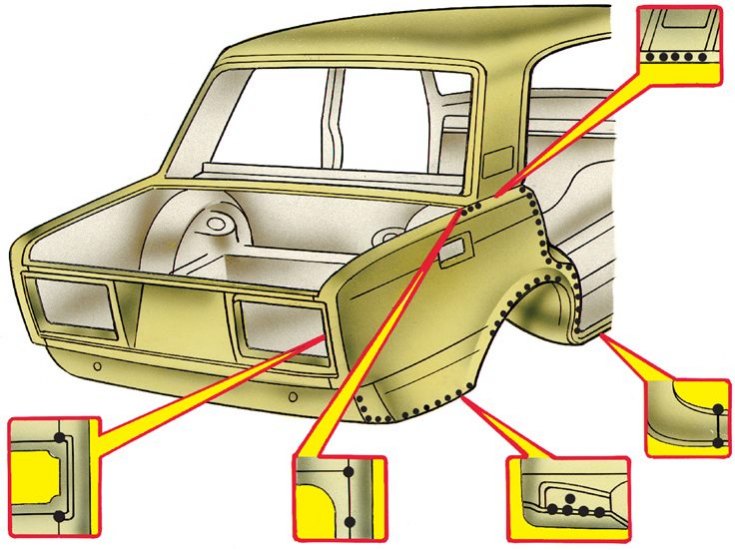
The main view shows contact welding seams as dots. The fragments show gas welding locations
1. When replacing the wing, remove the taillight and bumper. Free the trunk, remove the rubber seal of the trunk lid and the fuel tank (if the right wing changes) and disconnect the electrical wiring.
2. Cut with a thin, sharp chisel or cut with a grinder along the wing of the joint:
- with the rear wheel arch along the bend, retreating from the edge of the wing by 12–15 mm;
- with spare wheel floor (or fuel tank) along the bend, stepping back from the edge of the wing by 12–15 mm;
- with the rear panel, 2 mm from the connection line;
- with the rear window crossbar panel, 2–3 mm from the bend edge;
- with the rear part of the sidewall along the bend, stepping back from the edge of the wing by 15–20 mm (see fig. Replacing the rear wing).
3. Cut off the corner where the wing connects to the rear panel, stepping back 15 mm from the edge of the corner.
The text is published on the portal: vazbook
4. Using a 6-7 mm drill, drill out the contact welding spots where the wing meets the side roof panel and detach the wing. Remove the remaining wing strips, straighten the deformed edges and clean the body and new wing seating areas.
5. Fit the new wing to the landing site, grab it with clamps and weld it with gas welding rods L-62 or L-68 in the places indicated on the fragments (see fig. Welding points of the rear wing).
6. Check the fit of the wing and weld it using contact welding at 40–50 mm intervals.
7. In the absence of a contact welding machine, gas welding by melting the edges with an intermittent seam 20 mm long every 30 mm using an L-68 rod is allowed. In the doorway, electric welding with a semiautomatic device in a carbon dioxide environment is allowed.